Ingredients
Method
Step 1: Prepare Your Workspace and Preheat
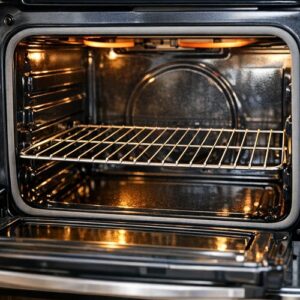
- Start by positioning your oven rack to the middle position and preheating your oven to 400°F. This temperature is crucial—it's hot enough to render chicken fat and crisp skin, but not so aggressive that the exterior burns before the interior cooks through. While the oven preheats, line a standard baking sheet with aluminum foil, shiny side facing up. The shiny side reflects heat more efficiently, promoting even browning across the bottom of your chicken thighs. This prep work takes just five minutes but ensures you're never scrambling once the raw chicken hits the pan. Pat this preparation into your routine before you even remove the chicken from the refrigerator.
Step 2: Season the Chicken and Initial Roast
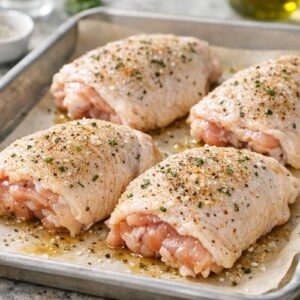
- Remove your chicken thighs from the refrigerator and pat them completely dry with paper towels. Moisture is the enemy of crispy skin—any dampness will create steam instead of browning. Place the thighs skin-side up on your prepared baking sheet, arranging them so they're not touching. Season generously on both sides with freshly ground black pepper (salt comes later through the ranch mix). Transfer to your preheated 400°F oven and roast for exactly 25 minutes. During this initial phase, the skin will begin rendering its fat and the surface will start developing color. You're looking for the skin to lose its raw appearance and show the first signs of golden browning—it won't be fully crispy yet, and that's exactly right.
Step 3: Create Your Ranch Herb Coating
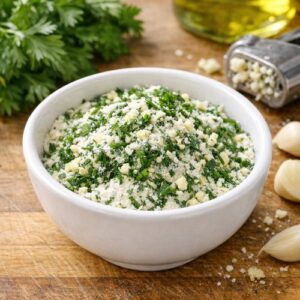
- While the chicken roasts during those first 25 minutes, prepare your herb mixture. In a small bowl, combine the dry ranch dressing mix with your minced fresh garlic. Slowly drizzle in the olive oil while stirring, creating a paste that's spreadable but still textured. The mixture should resemble something between wet sand and a thick paste. Taste a tiny amount (just touch it to your tongue)—it should taste intensely herbal and garlicky, almost aggressively seasoned. That intensity is correct; it will distribute across the chicken as it roasts. If your mixture seems very thick, add the lemon juice one teaspoon at a time until it reaches a spreadable consistency. The lemon juice not only thins the paste but also adds brightness that cuts through the richness of the chicken fat.
Step 4: Apply the Herb Mixture and Continue Roasting
- Remove the chicken from the oven when that initial 25-minute mark hits. The skin should be partially set and showing color, but still have room to crisp further. Using a spoon or small brush, generously apply your ranch herb mixture directly onto the skin of each thigh, making sure to coat thoroughly but not excessively. You want an even layer that will toast and darken as the chicken finishes cooking. Return the baking sheet to the oven immediately and roast for another 10-15 minutes. The exact timing depends on your specific oven and the size of your thighs. The herb coating will deepen in color and smell absolutely intoxicating—you'll notice aromas of toasted garlic and dried herbs filling your kitchen.

Step 5: Check for Doneness Using Proper Temperature
- After that second roasting phase, your chicken should look golden-brown with an herb-tinged exterior. But appearance alone doesn't guarantee safety or perfect doneness. Grab an instant-read food thermometer and insert it into the thickest part of the largest thigh, angling toward the thigh meat and deliberately avoiding the bone (which conducts heat differently than meat). You're looking for 165°F internal temperature, the USDA-recommended safe temperature for poultry. When the thickest thighs hit 165°F, all the others are definitely done. If you're still below 165°F, return the chicken to the oven for 2-3 minute increments, checking again with your thermometer. Thighs are forgiving; even if they hit 175°F, the higher fat content keeps them juicy and doesn't dry them out like breast meat would.

Step 6: Optional Broiler Finish for Maximum Crispness
- If you want to push the crispiness factor even further—and I often do—carefully move your baking sheet to the broiler for a final 2-5 minute finish. Position the sheet in the upper third of your oven and watch it constantly. The broiler's intense direct heat will deepen the herb coating's color and add extra crispness to the skin's surface. This is optional but transformative. Just stay in the kitchen during this phase—broilers work fast, and you want to pull the chicken the moment the exterior reaches deep golden-brown, not charred. The line between gorgeously caramelized and burnt moves quickly under the broiler, so vigilance is your best friend here.

Step 7: Rest and Serve
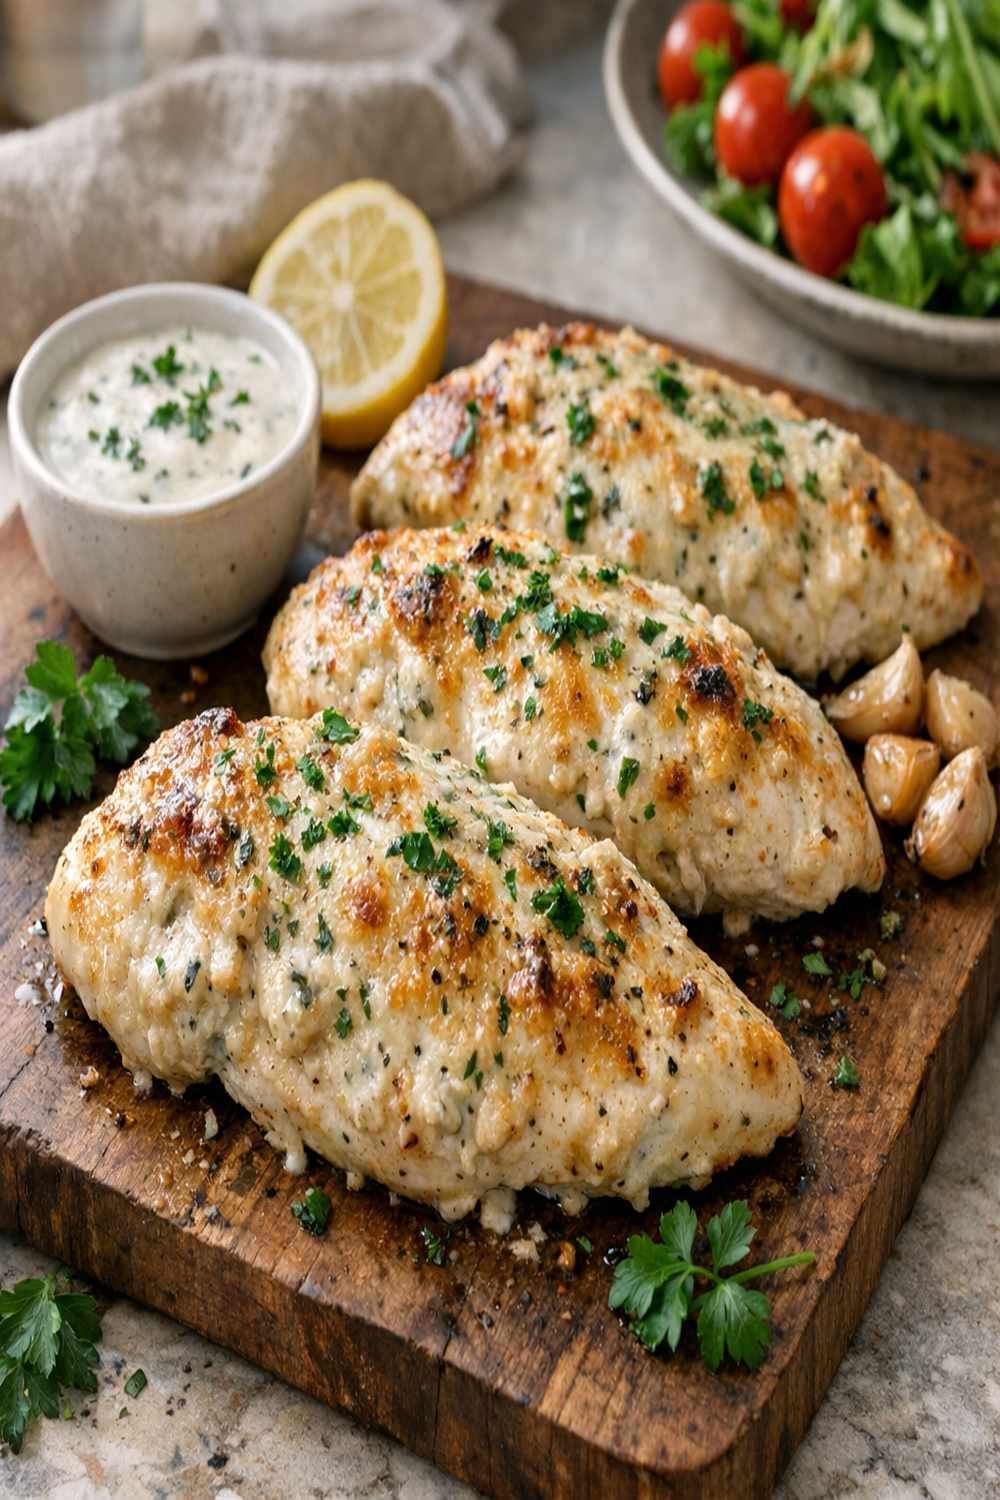
- Remove the baking sheet from the oven and let the chicken rest for 5 minutes before plating. This brief resting period allows the muscle fibers to relax and reabsorb internal juices, ensuring every bite stays moist and tender. During these five minutes, the residual heat continues cooking the interior slightly while the exterior sets and the herbs finish toasting. Arrange the thighs on a serving platter, drizzling any pan juices (which will be herb-infused and delicious) over top. The skin should be genuinely crispy, the meat inside should be juicy and tender, and the aroma should make everyone at your table immediately hungry.

Nutrition
Notes
- Maximize Skin Crispness - If preventing steam is your top priority, place a wire rack directly on your baking sheet before laying down the foil. Set your chicken thighs on the rack instead of directly on the foil. This allows heat to circulate underneath, promoting even browning and crisping on the bottom of the thighs, not just the top.
- Create Umami Depth - Add ½ teaspoon of soy sauce or tamari to your herb mixture for unexpected savory depth. The small amount doesn't make the chicken taste Asian; instead, it amplifies the natural savory notes already present in the meat and herbs.
- Customize the Herb Mix - Don't feel locked into the packet. If you prefer less sodium, blend the dry ranch packet with additional fresh herbs like minced fresh dill or parsley. You can also swap in a different seasoning blend entirely—Italian seasoning plus garlic works beautifully, as does Cajun seasoning for a regional variation.
- Use a Sheet Pan for Vegetable Companions - Toss hardy vegetables like Brussels sprouts, baby potatoes, or root vegetable chunks with a small amount of olive oil and roast them on the same sheet as your chicken. Space them around the thighs so they don't interfere with crisping. They'll roast in the same 40-45 minutes, creating a one-pan meal.
- Save the Pan Drippings - Those herb-infused drippings in your baking sheet are liquid gold. Deglaze the hot pan with a splash of chicken stock and a squeeze of lemon, then use this as a pan sauce for your chicken or vegetables. It adds restaurant-quality finishing touches.
- Temperature Matters for Chicken Storage - Always refrigerate leftover cooked chicken within 2 hours of cooking. Cold chicken should be stored at 40°F or below and consumed within 3-4 days. When in doubt, freeze it—properly stored chicken lasts 2-3 months in the freezer.