Ingredients
Method
Step 1: Create Your Aromatic Spice Foundation
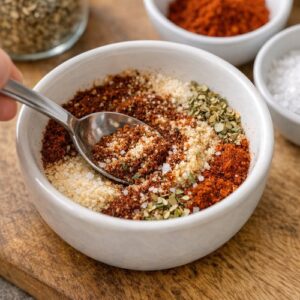
- In a small bowl, combine your chili powder, garlic powder, onion powder, dried oregano, kosher salt, and cayenne pepper (if using). Give it a quick stir to distribute everything evenly. This step takes less than one minute, but it's crucial: mixing your spices beforehand ensures they coat the chicken uniformly, rather than settling unevenly if you tried to sprinkle them directly. Here's a pro tip from my kitchen: warm your spices slightly by rubbing the bowl between your hands for a few seconds. This "wakes up" the dried spices and releases their essential oils, deepening their flavor impact. You'll notice a more aromatic, complex taste in the final dish.
Step 2: Prepare and Season Your Chicken
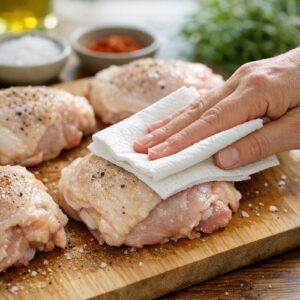
- Pat your chicken thighs completely dry using paper towels. This is non-negotiable for a proper sear. Moisture is the enemy of browning—any surface water will turn to steam, steaming the chicken instead of searing it. Once dry, drizzle with your tablespoon of olive oil, then sprinkle the spice mixture evenly over both sides, using your fingers to gently press the spices into the meat. The chicken should look generously coated but not clumpy. Some cooks worry about "too much spice," but remember: these are dried spices, and they distribute across the surface. The actual amount touching your palate is much less concentrated than it appears. Trust the process.
Step 3: Sear for the Initial Crust
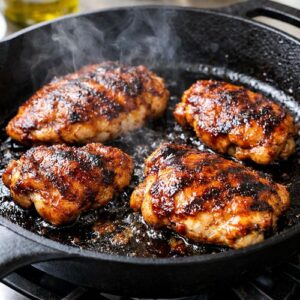
- Heat your skillet (ideally cast iron, but any heavy-bottomed skillet works) over medium-high heat for 2 minutes. You want it genuinely hot—if you hold your hand 4 inches above it, you should feel significant heat. Lightly coat with cooking spray or a thin brush of oil (the chicken's oil will handle most of the cooking, but a touch more prevents sticking on older skillets). Place your seasoned chicken thighs in the skillet without moving them. This is crucial. Your instinct might be to fidget, flip, or shift them around, but resist that urge. For the first 5 minutes, let them sit undisturbed. You'll hear sizzling—that's the Maillard reaction happening, creating hundreds of new flavor compounds. Resist the temptation to peek constantly; each time you lift the cover, heat escapes. Cover the skillet with a lid or even a baking sheet if you don't have a proper lid. The trapped steam helps cook the chicken through while the bottom develops that gorgeous golden-brown crust.
Step 4: Flip and Cook the Second Side
- After exactly 5 minutes, remove the cover and flip your chicken thighs using tongs. You should see a beautiful mahogany-brown crust on the bottom—this is what we were working for. Don't scrape aggressively if they seem to stick; a gentle tug will release them once the crust has fully set. Replace the cover and cook the second side for another 5 minutes. At this point, your chicken is mostly cooked through, though we're not checking for doneness yet. The dark meat of thighs is forgiving and takes a bit longer to overcook than breast meat, which is another reason I love this cut.
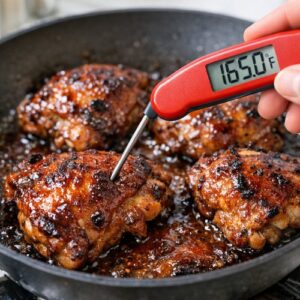
Step 5: Check for Doneness
- Remove the cover and insert an instant-read thermometer into the thickest part of the thigh, avoiding bone. You're looking for 165°F (74°C) at minimum, though thigh meat stays wonderfully juicy even at 170°F. The juices should run clear with no pink at all when you pierce the thickest part. If your chicken hasn't reached 165°F yet, replace the cover and cook for another 2-3 minutes. Every stove is different, and factors like skillet thickness and burner power affect cooking time. Always trust the thermometer over timing.
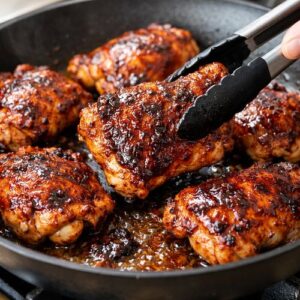
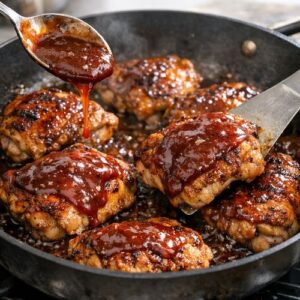
Step 6: Sauce and Finish
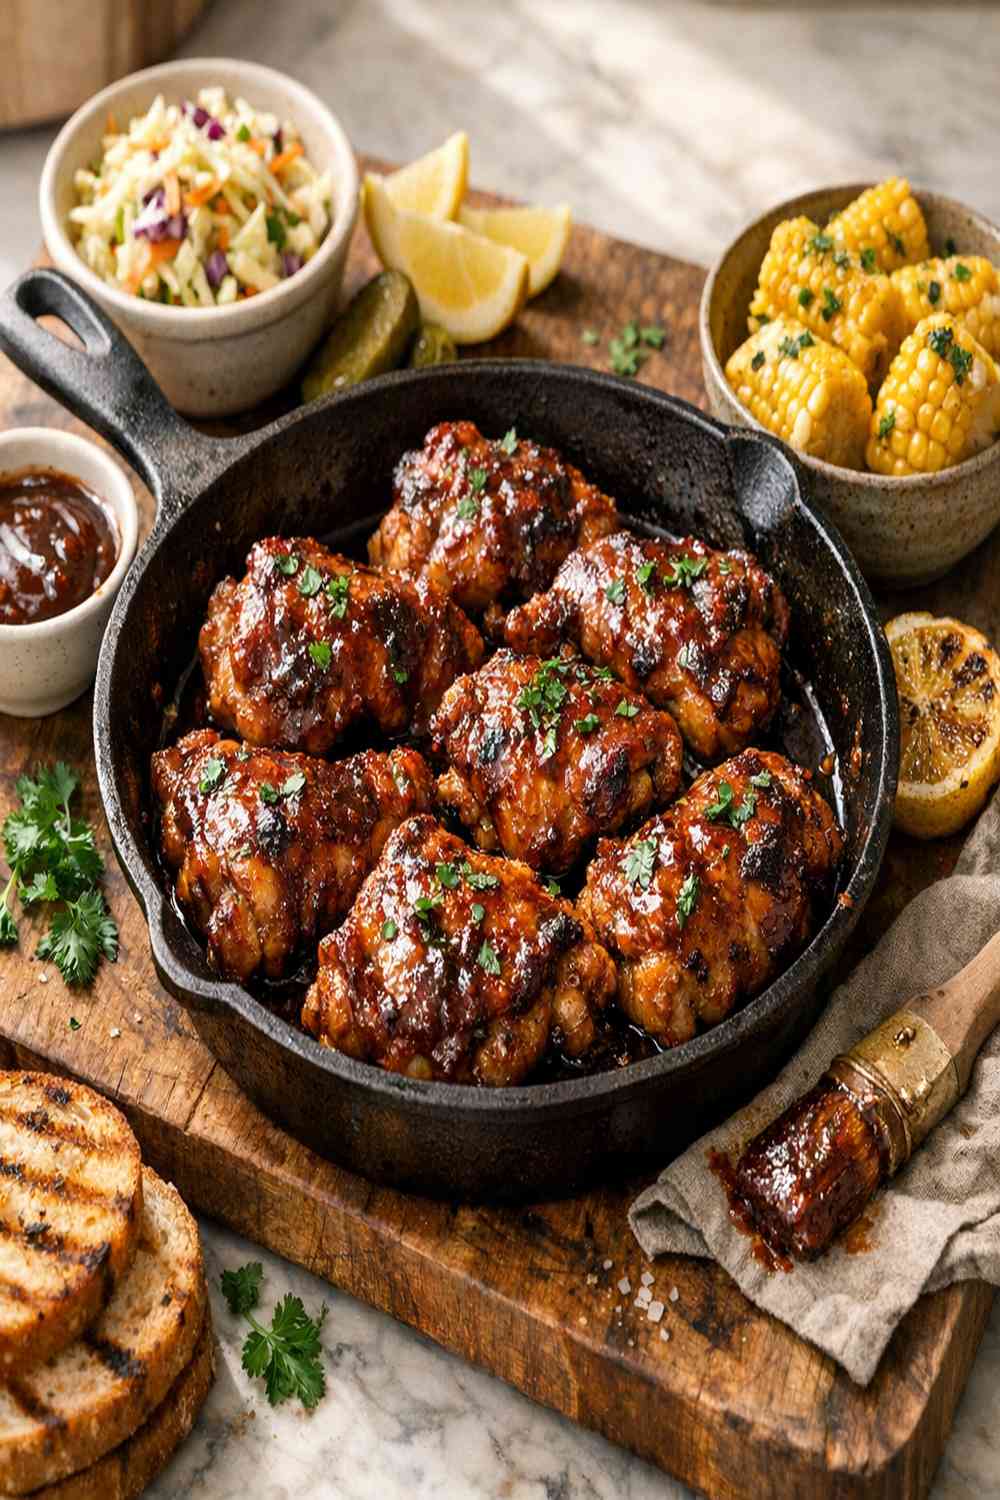
- Once your chicken reaches 165°F, pour half your barbecue sauce over the top of each thigh, coating generously. Flip the chicken over and pour the remaining sauce on the other side. If you're using honey or maple syrup, drizzle it now—it will help the sauce caramelize and create a glossy finish. Leave the skillet uncovered and cook for 2-3 minutes more, using a spoon or basting brush to continuously coat the chicken with the sauce. You'll see the sauce bubble slightly at the edges and cling to the meat. This final step creates the signature glossy, caramelized finish that makes this dish so visually appealing and delicious. The chicken should look glossy and deeply browned, almost glistening on the plate. This is your signal that the sauce has properly adhered and started to caramelize.
Notes
- Cast iron is your friend - Cast iron skillets retain heat more evenly than stainless steel, creating a more consistent sear. They also improve with use and distribute heat beautifully
- Don't skip patting the chicken dry - This single step makes the difference between steamed and seared chicken. Use paper towels and be generous with your patting
- Invest in an instant-read thermometer - I've said it before, but I cannot overstate this: guessing is how chicken becomes dry. A $20 Bluetooth thermometer removes all guesswork
- Room temperature matters - Remove your chicken from the fridge 10 minutes before cooking. Cold chicken takes longer to reach temperature, and uneven cooking results
- Sauce choice is personal - Use whatever barbecue sauce speaks to you. Smoky? Spicy? Vinegar-based? Your preference here is the right preference
- The pan should be smoking slightly - When you first place chicken in the skillet, you should hear an immediate sizzle. If it just quietly settles, your pan wasn't hot enough