Ingredients
Method
Step 1: Create Your Spice Blend and Coat the Chicken
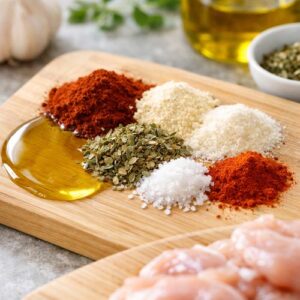
- In a shallow bowl or on a small cutting board, combine your olive oil, chili powder, onion powder, garlic powder, dried oregano, salt, and cayenne pepper if using. Stir these together thoroughly—you want the spices evenly distributed throughout the oil, creating a paste-like consistency. This step takes just two minutes but makes an enormous difference in flavor distribution. Pat your chicken thighs dry with paper towels (this helps the spice blend stick better and encourages browning). Place them in the bowl and use your hands or tongs to coat both sides thoroughly with the spice mixture. Make sure every surface makes contact with the seasoned oil. This direct contact allows the warm spices to begin releasing their essential oils and perfuming the chicken before heat even enters the equation.
Step 2: Heat Your Skillet and Brown the Chicken
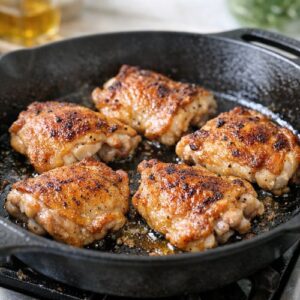
- Place a medium skillet (cast iron works wonderfully here because it distributes heat so evenly, but any heavy-bottomed skillet works beautifully) over medium-high heat. Let it preheat for about one minute—you want it genuinely hot, not just warm. A quick way to check: hold your hand about 4 inches above the pan; if you need to pull it away after 3-4 seconds, you're at the right temperature. Carefully place your seasoned chicken thighs into the hot pan. You should hear an immediate sizzle—this is the Maillard reaction beginning, where the proteins and sugars in the chicken interact with heat to create complex brown flavors. Don't move the chicken for the first couple of minutes; you want that initial browning to develop undisturbed. After about 2-3 minutes, check the underside. It should be golden brown and slightly caramelized. If it looks pale, give it another minute. Once you've achieved that beautiful browning, flip the chicken over and brown the opposite side for another 2-3 minutes. This foundational browning creates the flavor backbone for everything that follows.
Step 3: Steam the Chicken Under Cover
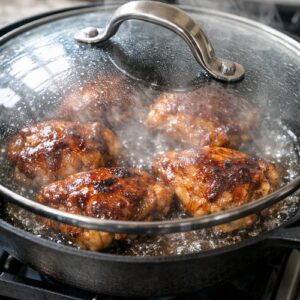
- Once both sides are golden, add the water to the bottom of the skillet (not directly on the chicken—along the sides is perfect). Immediately cover the skillet with a lid or even a baking sheet if you don't have a lid. This traps steam and creates a humid cooking environment that gently brings the chicken to doneness without additional browning. Reduce your heat to medium and let the covered chicken cook for 5 minutes undisturbed. During this time, steam is doing the heavy lifting, cooking the chicken through while keeping it incredibly moist. You'll hear gentle sizzling and see steam escaping when you peek—this is exactly what should happen. After 5 minutes, carefully remove the lid (watch out for the escaping steam!), flip the chicken over, and replace the cover. Cook for another 5 minutes. This second covered phase ensures even cooking throughout the thigh, which is thicker than chicken breast and needs this extra time to reach perfect doneness.
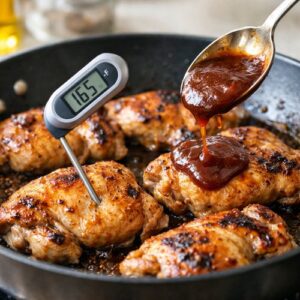
Step 4: Check for Doneness and Add the Barbecue Sauce
- Remove the lid and check your chicken's internal temperature using an instant-read thermometer. You're looking for 165°F (74°C) at the thickest part. This is the USDA-recommended safe internal temperature for poultry. Alternatively, pierce the thickest part with a fork or knife tip—the juices should run completely clear with no pink. If you see any pink in the juices, cover and cook for another 2-3 minutes, then check again. Once your chicken is fully cooked, pour half of your barbecue sauce evenly over the two thighs. Use a spoon or basting brush to distribute it so every surface gets coated. The warm chicken will immediately begin reducing and thickening the sauce.
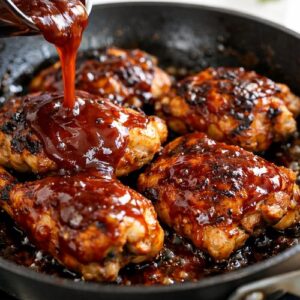
Step 5: Build Your Final Glaze
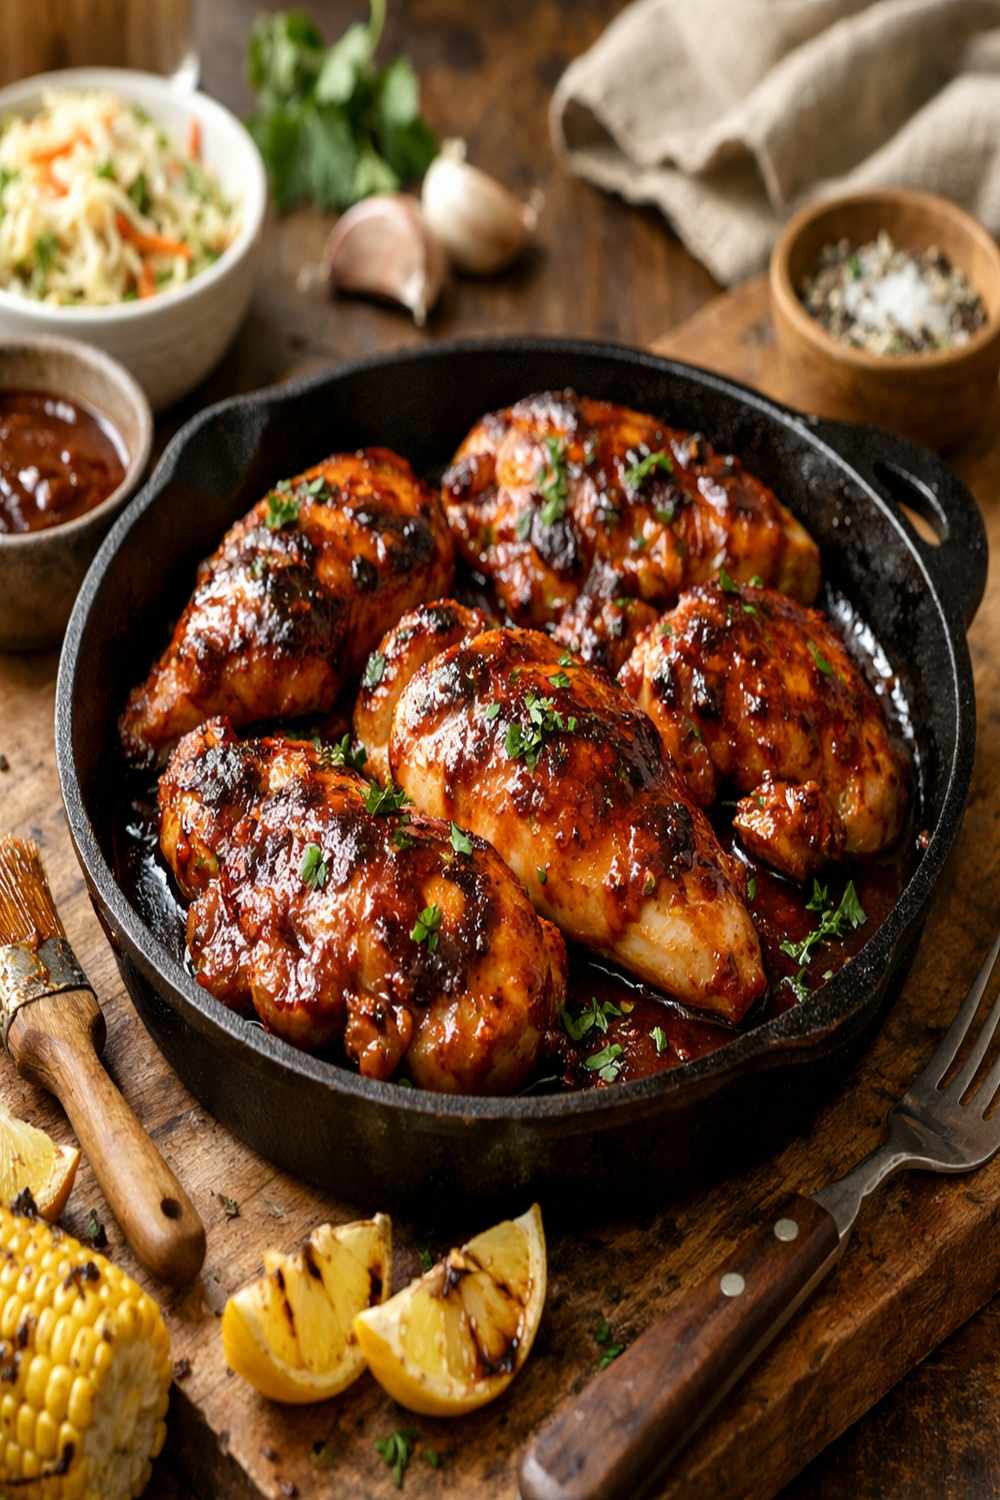
- Flip the chicken over and pour the remaining barbecue sauce over the other side. Now here's where the magic happens: with the lid off and the heat still at medium, let the chicken cook uncovered for 2-3 minutes. Use a basting brush or spoon to continuously coat the chicken with the sauce, essentially painting layer upon layer of barbecue coating onto the surface. Watch closely during these final minutes. The sauce will bubble gently around the edges and begin darkening slightly. This reduction concentrates the barbecue flavor and creates that gorgeous, sticky glaze that makes barbecue chicken so irresistible. The chicken should look glossy and caramelized, almost lacquered. After 2-3 minutes, when the sauce has thickened considerably and clings beautifully to the chicken, you're finished. The entire cooking process from raw to plated takes approximately 20-25 minutes, making this one of the fastest ways to create genuine barbecue flavor.
Notes
- Room temperature chicken cooks more evenly - Remove your chicken from the refrigerator 15-20 minutes before cooking. Cold chicken straight from the fridge will have a higher temperature differential between outside and inside, making it harder to cook through without overcooking the exterior. Room temperature chicken cooks predictably and evenly.
- Pat dry equals better browning - Moisture on the chicken surface steams rather than browns. Spend 30 seconds patting your thighs completely dry with paper towels. This small step dramatically improves your initial browning and sets up everything that follows.
- Don't crowd your skillet - If making this recipe for more than two people, resist the urge to squeeze extra chicken in. A crowded pan drops the temperature and creates steam instead of browning. Cook in batches if needed; it only adds 10-15 minutes total.
- Cast iron is your secret weapon - If you own a cast iron skillet, use it for this recipe. Its thermal mass maintains even heat distribution better than stainless steel, resulting in more uniform browning and more predictable cooking.
- Choose your barbecue sauce strategically - Thin, vinegar-based sauces need slightly longer cooking to reduce properly. Thick, molasses-heavy sauces caramelize quickly. Thinner sauces work slightly better for this method, but either type is perfectly fine—just adjust your final uncovered cooking time accordingly.
- The thermometer never lies - If you're nervous about doneness, invest in a quick-read instant thermometer (they're inexpensive and genuinely invaluable). Guessing leads to either undercooked chicken or dry, overcooked meat. Thermometers eliminate both problems.