Ingredients
Method
Step 1: Start Your Water and Prep Station
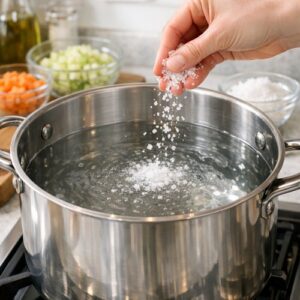
- Fill a large pot (at least 6-quart capacity) three-quarters full with cold water and add a generous pinch of sea salt—about one tablespoon. Place it on your highest heat setting. While water heats, set up your prep station with all vegetables washed, dried, and ready to cut. This waiting period is perfect for gathering your bowls, measuring spoons, and storage containers. When everything is within arm's reach, your actual cooking moves at twice the speed. Pro tip from my professional kitchen experience: mise en place—having everything prepared and measured before you begin—is the difference between relaxed cooking and stressed cooking. Take five extra minutes now and save yourself fifteen minutes of scrambling later.
Step 2: Cook Your Pasta to Perfect Tenderness
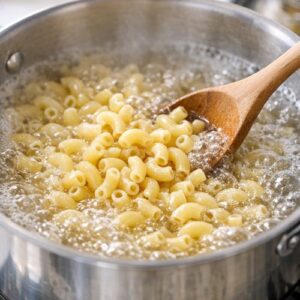
- Once your water reaches a rolling boil, add your pound of elbow pasta and stir immediately to prevent sticking. Set a timer for one minute less than the package suggests—we want al dente texture that won't turn mushy after absorbing dressing over several days. At about 8 minutes total (depending on brand), taste a piece. It should have just a slight firmness in the center, not chalky, but not completely soft either. Drain immediately into a colander, then rinse under cold running water for about 30 seconds while gently stirring with your fingers. This stops the cooking process and removes excess starch. Drizzle with one teaspoon of olive oil and toss gently—this prevents clumping as it cools.
Step 3: Prepare Your Vegetables With Precision
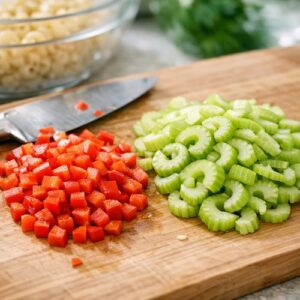
- While pasta cools slightly, dice your red bell pepper into ¼-inch pieces (uniform size means even texture distribution). Slice your celery into thin half-moons—the thinner you slice, the more evenly it softens with the dressing. Dice your red onion finely; the smaller pieces distribute their sharp flavor throughout rather than creating onion-forward bites. Cut your sweet gherkins into small dice as well—these add crucial texture contrast. The texture consistency matters in meal prep salads more than many home cooks realize. If your vegetable pieces are drastically different sizes, some soften completely by day four while others remain crunchy. Aim for uniform ¼-inch to ⅜-inch pieces across all vegetables.
Step 4: Boil and Cool Your Eggs Efficiently
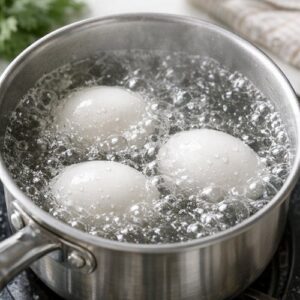
- If you haven't already prepared hard-boiled eggs, place three large eggs in a small saucepan, cover with cold water, and bring to a boil. Once boiling, remove from heat, cover, and let sit for 12 minutes exactly. Transfer to an ice bath immediately to stop cooking. This prevents that grey-green ring and ensures a creamy, pale yellow yolk. Once cooled (about 10 minutes), peel gently under cool running water—the water helps separate the membrane from the white. Dice into ¼-inch pieces.
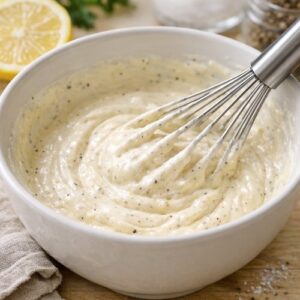
Step 5: Build Your Dressing in a Separate Bowl
- In a medium bowl, whisk together your mayonnaise, sour cream, Dijon mustard, and fresh lemon juice. This combination is your emulsified base. Add your granulated sugar, salt, black pepper, and garlic powder, whisking until the sugar completely dissolves. This takes about 30 seconds of actual whisking—you should see no grains remaining. Stir in your sweet pickle juice and the optional crushed red pepper if using. Taste this dressing now—before it meets the pasta. It should taste bright, tangy, slightly sweet, and rich. If it seems one-dimensional, you probably need more acid (lemon juice) or salt. Season now rather than after everything is mixed. This is the moment when understanding flavor balance, not just following instructions, makes all the difference. My multicultural upbringing taught me that the best dishes hit multiple flavor notes at once—acid, salt, fat, sweetness, subtle heat. Your dressing should make you pause and think, "Yes, that's exactly right."
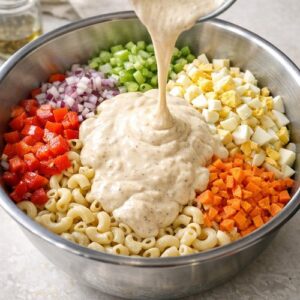
Step 6: Combine Everything in Your Final Assembly Bowl
- In your largest mixing bowl, combine your cooled pasta with all prepared vegetables and diced eggs. Pour your prepared dressing over everything and fold gently but thoroughly using a large rubber spatula—this isn't a job for your hands, which can crush delicate pasta. Fold for about one minute, making sure every piece of pasta gets coated. The pasta will seem slightly underdressed at this moment. Don't panic. As this sits, the pasta continues absorbing moisture from the vegetables and dressing, reaching perfect creaminess by tomorrow. If you taste it now and it seems underseasoned, hold off on adjusting—taste again after it's been refrigerated overnight before adding more salt.
Step 7: Portion Into Your Storage System
- Divide your finished mac salad evenly into your storage containers. I use 32-ounce glass containers with fitted lids—one container per day, plus one extra for flexibility. Fill each container only three-quarters full so the lid closes securely without pressure. Overstuffed containers create a sloppy mess when you open them. Press a piece of parchment paper directly onto the surface of each portion before sealing the lid. This extra step prevents condensation from dripping back onto your salad during storage, which can make it watery by day four or five.