
Ingredients
Method
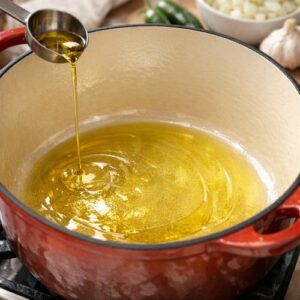
Step 1: Build Your Aromatic Foundation
- Heat your olive oil in a large Dutch oven or heavy-bottomed soup pot over medium heat for approximately one minute until it shimmers and smells subtly fruity. This isn't a racing moment—we're gently warming the oil to distribute heat evenly across your cooking vessel. Add your diced onion and chopped poblano pepper, stirring occasionally with a wooden spoon. You're looking for the onion to transition from opaque to translucent with slightly softened edges, approximately 5-6 minutes. This is your window of doneness—the vegetables should be tender but not browned. You'll notice the kitchen beginning to smell herbaceous and warm, which signals properly cooked aromatics. This foundational step is non-negotiable in my kitchen. Rushing through it means missing out on the caramelization that develops natural sweetness and complexity. Professional cooks call this the "flavor foundation," and for good reason.
Step 2: Create Your Creamy Base
- Pour your enchilada sauce directly into the pot with the softened vegetables. Stir everything together gently, ensuring the sauce coats all the vegetables. Now comes the critical moment: add your room-temperature cream cheese cubes. Using a wooden spoon, break apart the cream cheese into smaller pieces as it begins to melt—don't just let it sit there. This active stirring, done over 3-4 minutes, ensures smooth integration without lumps. You're essentially creating an emulsion here, blending the fat from the cream cheese with the liquid from the sauce. The cream cheese should be completely melted and the mixture should look unified and silky, with no visible white chunks remaining. If you're seeing resistance, reduce heat to medium-low. The color should deepen slightly—this is the enchilada sauce doing its job, infusing the cream cheese with authentic flavor.
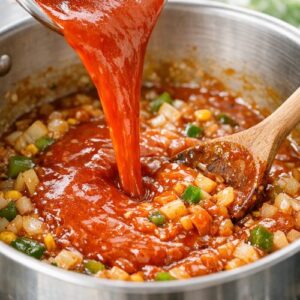
Step 3: Add Your Vegetables and Beans
- Now add your canned diced tomatoes (including their juice for extra flavor and body), your rinsed black beans, and your frozen corn kernels. Stir everything together thoroughly, ensuring each vegetable and bean is coated in that gorgeous creamy enchilada base. The frozen corn will begin thawing immediately from the residual heat—this is perfectly fine and actually keeps the corn from becoming mushy. At this point, let the mixture heat through for approximately 2-3 minutes with occasional stirring. You'll notice steam rising gently and the bottom of the pot occasionally releasing little wisps of aroma. This gentle heating allows flavors to begin melding without shocking the cream cheese base. The reason I use perfect black beans (whether homemade or canned) is because they provide substantial protein and earthiness that balances the richness of the cheese. Their mild flavor doesn't compete with the enchilada sauce—instead, they amplify it.

Step 4: Add Protein and Final Liquid
- Add your shredded chicken breast and low-sodium chicken broth to the pot, stirring gently to combine. Here's where your culinary judgment enters the picture: the consistency of your finished soup depends on personal preference. Some prefer it thick and hearty, like a stew; others like it more brothier and sippable. With the amounts listed, you'll land somewhere in the middle—beautifully balanced between substance and fluidity. If your mixture seems too thick, add chicken broth in ¼-cup increments until you reach your desired consistency. Cook for 10-12 minutes over medium heat, stirring occasionally, never allowing the soup to reach a rolling boil. Here's my professional tip: maintain what I call a "lazy simmer"—tiny bubbles forming at the edges and occasional wisps of steam, but nothing vigorous. This temperature range keeps the cream cheese emulsion stable and prevents it from separating or becoming grainy. Too much heat and you'll taste that curdling sensation; too little and flavors won't fully develop.

Step 5: Final Seasoning and Temperature Check
- Taste your soup carefully. Because enchilada sauce already contains salt, and we're using low-sodium broth, most people find the seasoning exactly right. However, if you want additional depth, this is where ½ teaspoon of ground cumin creates magic. Stir it in and let it bloom in the heat for about one minute—you'll actually smell the cumin's essential oils activating. At this point, your soup should be steaming gently and registering around 180-190°F if you have a thermometer handy. It shouldn't be bubbling aggressively. If everything looks beautiful and smells incredible, we're ready for the final step.

Step 6: Serve with Toppings
- Remove your pot from heat. Immediately ladle the soup into serving bowls. While the soup is still steaming, top each bowl with a generous handful of shredded mozzarella cheese and a sprinkle of sliced green onion tops (I reserve just the lightest green portions for the prettiest presentation). The residual heat from the soup will slightly soften the mozzarella, creating those beautiful melted streaks throughout. This final touch adds both visual appeal and an additional layer of cheesy richness that makes people go back for seconds. Let each serving rest for about one minute before eating—this allows the cheese to settle slightly and prevents burning your mouth on superheated soup. Serve immediately while flavors are at peak vibrancy.

Nutrition
Notes
- Temperature is your best friend - Investing in an inexpensive instant-read thermometer takes the guesswork out of cooking. You're aiming for 180-190°F as your target, never higher once cream cheese enters the picture.
- Customize your heat level - Prefer more spice? Add a pinch of cayenne or diced jalapeños with the aromatics. Like it milder? Use mild enchilada sauce. Your kitchen, your rules.
- Make it vegetarian effortlessly - Simply omit the chicken and add an extra cup of beans or diced zucchini. The soup remains equally satisfying and packed with protein from the legumes.
- Create a stunning visual presentation - After adding cheese and green onions, drizzle with a tiny bit of crema or sour cream and sprinkle with fresh cilantro. This elevates a weeknight dinner to special-occasion status instantly.
- Double the recipe confidently - This soup scales beautifully. Double everything, use a larger pot, and increase the cooking time by just 2-3 minutes. Perfect for meal prep or feeding a gathering.