Ingredients
Method
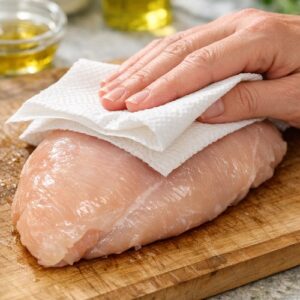
Step 1: Prepare and Season Your Chicken for Maximum Flavor Absorption
- Place your chicken breast on a cutting board and pat it completely dry with paper towels. Moisture is the enemy of browning—wet proteins steam instead of sear. Now here's the professional secret: hold your knife parallel to the cutting board and slice horizontally through the thickest part of the breast, creating two thinner, more uniform pieces. This technique is called butterflying, and it's crucial because it ensures even cooking and allows the chicken to absorb more pan flavors. Season the top side of both pieces generously with salt and pepper. Don't be timid. You're seasoning protein that will cook for several minutes; some seasoning will sink in, some will flavor the pan itself.
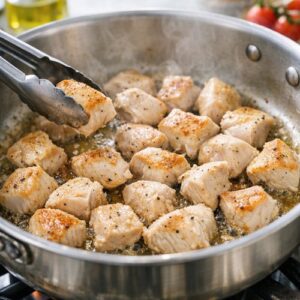
Step 2: Sear the Chicken and Build Your Flavor Foundation
- Preheat a large skillet with high sides over medium heat for about 30-45 seconds. This brief preheat ensures the pan is evenly heated. Add 1-2 tablespoons of neutral cooking oil and swirl to coat the entire bottom. When the oil moves freely and shimmers slightly, you're ready to sear. This moment is crucial—too cool and you'll steam; too hot and you'll burn before the inside cooks. Place the seasoned chicken pieces into the pan, seasoned-side down. Immediately season the top side with another sprinkle of salt and pepper. Increase heat to medium-high. Here's what's happening: the proteins are making contact with extreme heat, and the amino acids and sugars are undergoing the Maillard reaction—that magnificent chemical process that creates the brown crust and concentrated flavor. Cook without moving the chicken for 3-5 minutes. You want a golden-brown crust, not pale and steamed. Check the internal temperature with an instant-read thermometer (160°F minimum for food safety). Once cooked through, transfer the chicken to a clean plate or cutting board to rest. This resting period allows proteins to relax and reabsorb juices.
Step 3: Create the Sauce Base From Pan Drippings
- Do not clean your pan. Those browned bits—the fond—are liquid gold. This is where the restaurant magic lives. Reduce heat to low and add the remaining tablespoon of cooking oil. Now add your minced shallot and cook, stirring frequently, for about 2-3 minutes until completely softened and beginning to turn translucent. Add the tomato paste concentrate, minced garlic, and crushed red pepper flakes. Cook for exactly 1 minute, stirring constantly. You'll notice the mixture starting to darken and caramelize slightly on the pan bottom. This is perfect. You want that slight sticking—it's flavor concentration. Just don't let it burn into black char. This is the moment many home cooks skip, and it's why their sauces taste one-dimensional. You're creating a deeply flavored base through the Maillard reaction happening with your aromatics.
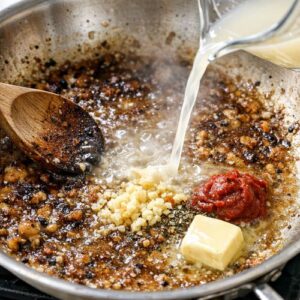
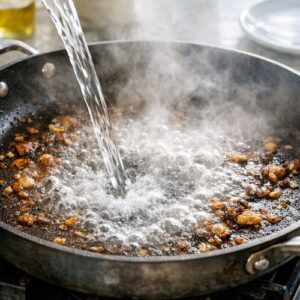
Step 4: Deglaze and Build Sauce Structure
- Add a splash of water—just enough to cover the pan bottom. It will immediately sizzle dramatically on contact with the hot pan. This is deglazing, and it's how we capture all those browned bits and transform them into sauce. Increase heat to high and use a wooden spoon with a sturdy edge to scrape the bottom of the pan as the liquid comes to a boil. Scrape aggressively. Every bit of brown matters. You'll see the fond slowly dissolve into the liquid, giving it color and depth. This takes about 2 minutes and is absolutely non-negotiable for flavor.
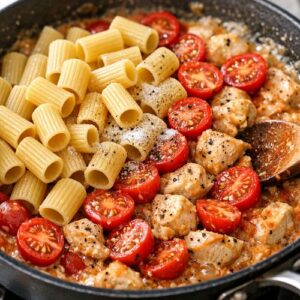
Step 5: Cook Pasta Directly in the Sauce—The Restaurant Secret
- Add the uncooked rigatoni, halved cherry tomatoes, the measured salt, and black pepper to the pan. Give everything a quick stir to combine. Now add just enough water to almost cover the pasta. Some noodles can stick above the waterline—this is fine and actually helps with even cooking. When the water reaches a boil, set a timer for the al dente time listed on your pasta box (usually 9-11 minutes). Keep the heat at high the entire time, and stir constantly. This constant motion prevents sticking and encourages the pasta to absorb sauce rather than just water. Add water in very small amounts as the pasta cooks. The goal is to have very little liquid remaining when the timer hits your pasta's target time. Different pasta shapes absorb water at different rates—tubular shapes like rigatoni absorb more slowly than thin shapes. You're aiming for that sweet spot where the pasta finishes cooking just as the liquid becomes creamy and almost entirely absorbed.
Step 6: Finish With Cheese and Create the Creamy Emulsion
- When about one minute remains on your timer and the water level is very low, check the pasta for doneness. If it's nearly there (slightly tender but still with a tiny bite), reduce heat to low. Add both the freshly grated parmesan and goat cheese all at once. Stir vigorously for about 30 seconds. The starch from the pasta water plus the fat from the cheese is creating an emulsion—a binding sauce that clings to every noodle. If the pasta still isn't done, add water in small amounts (1-2 tablespoons) and keep cooking until the pasta reaches perfect al dente. This is the magic moment. What seemed dry suddenly transforms into a luxurious, silky sauce without a drop of heavy cream. Restaurant chefs understand this emulsion science; now you do too.

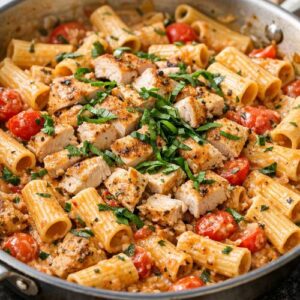
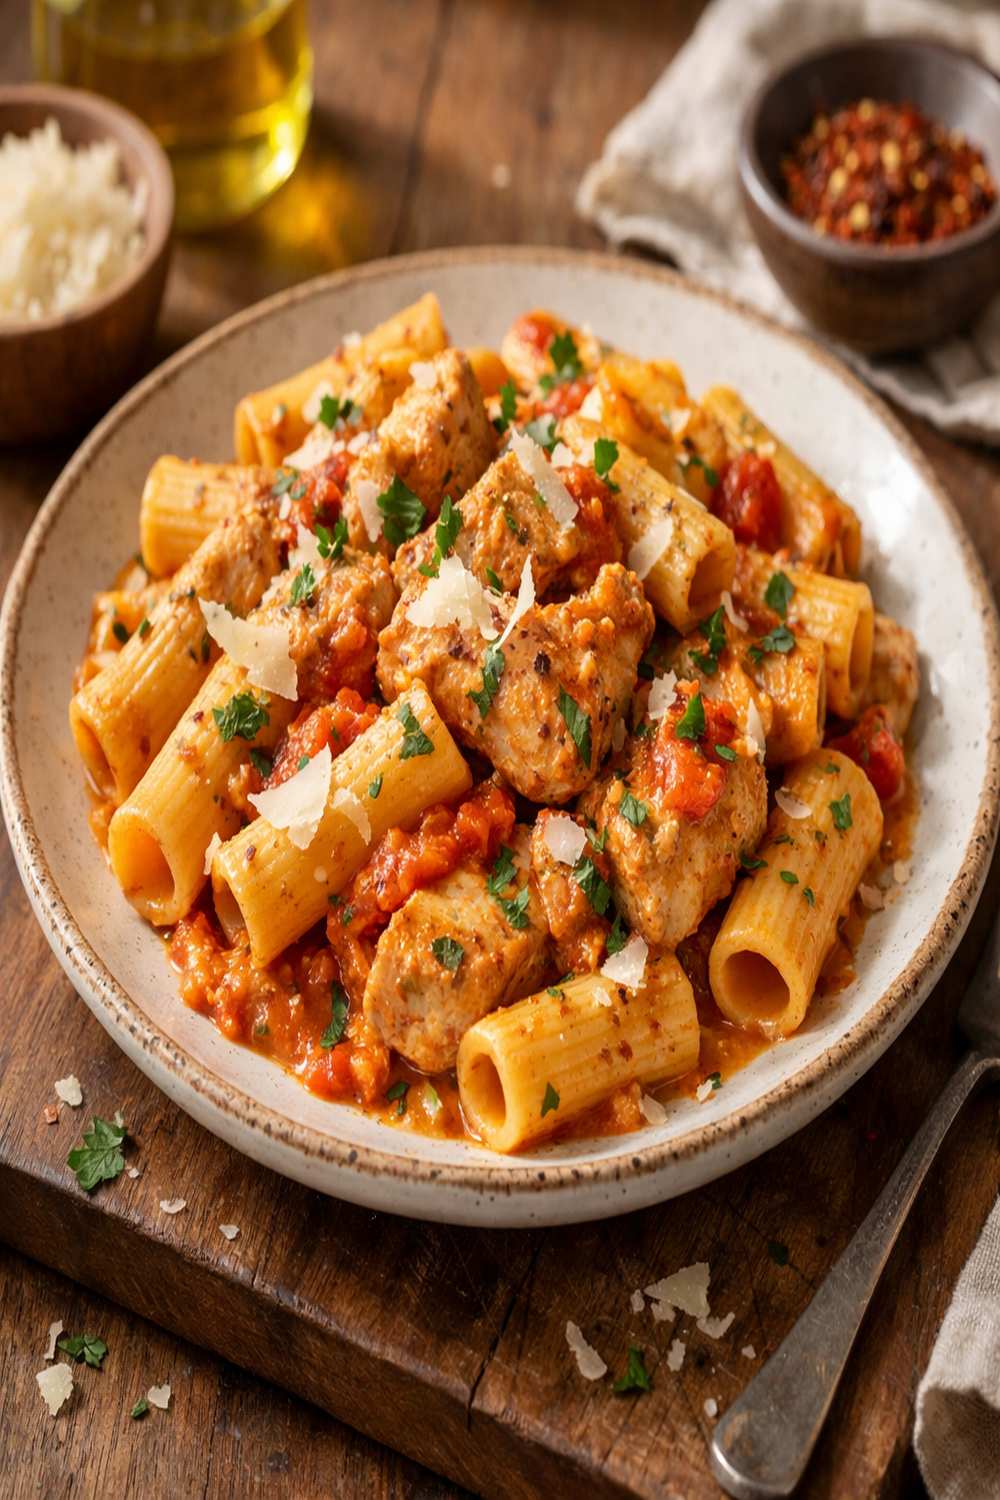
Step 7: Finish, Plate, and Serve Immediately
- Remove the pan from heat. Slice the rested chicken into bite-sized pieces and add it back to the pan along with half of your thinly sliced fresh basil. Stir gently to combine, being careful not to break up the pasta. Serve immediately into bowls or shallow plates while the dish is hot and steamy. Top with remaining fresh basil slices and an additional generous amount of freshly grated parmesan. The heat from the pasta will release the basil's aromatic oils, and the fresh cheese will create beautiful flavor contrast with the warm sauce.