Ingredients
Method
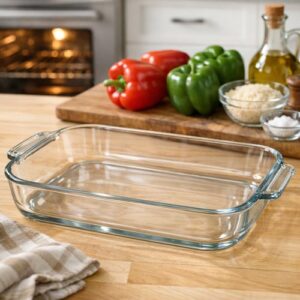
Step 1: Preheat Your Oven and Prep Your Workspace
- Heat your oven to 400°F (205°C). While it's warming, get a large baking dish ready—I prefer one that's roughly 9x13 inches so the peppers fit snugly without crowding. Never start cooking without confirming your oven temperature, as this ensures even baking and prevents undercooked peppers. If you have kids helping, this is a good moment for them to wash and dry their hands, gather small bowls for ingredients, and get excited about what's coming.
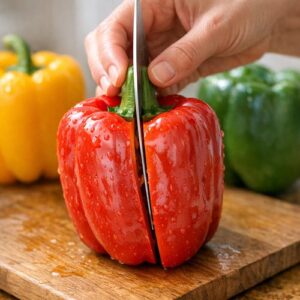
Step 2: Prepare Your Bell Peppers
- Rinse your bell peppers under cool running water. Stand each pepper upright on your cutting board, then carefully slice it in half from top to bottom, running your knife straight down through the stem. Remove the seeds and white inner ribs with your fingers or a small spoon—kids absolutely love this part, by the way. Arrange the pepper halves in your baking dish, cut-side up. If any pepper halves seem wobbly, you can slice a thin piece off the bottom to create a stable base, but usually they sit fine. Ensure all children wash their hands after handling raw peppers.
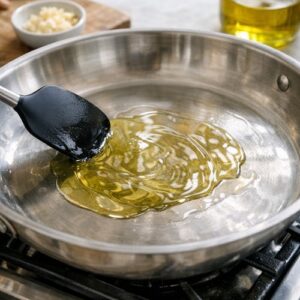
Step 3: Sauté Your Aromatic Base
- Place a large skillet over medium heat and add your tablespoon of olive oil. Once the oil shimmers (you'll see it ripple across the pan—this takes about 1 minute), add your diced shallot. Let it cook undisturbed for about 2-3 minutes, then stir and continue cooking for another 2-3 minutes until it becomes translucent and just beginning to soften. This isn't about browning; it's about releasing the shallot's natural sweetness. If kids are watching, explain that we're "waking up" the vegetable's flavor.
Step 4: Add Garlic and Broccoli, Building Flavor
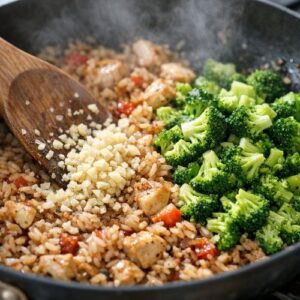
- Add your minced garlic to the pan and stir constantly for about 30 seconds—garlic burns quickly and becomes bitter, so timing matters here. Immediately add your finely chopped broccoli florets. Stir everything together and cook for 4-5 minutes, stirring occasionally. You're looking for that beautiful bright-green moment when the broccoli softens slightly but still has a little texture and hasn't turned gray or mushy. This is your visual cue that you've nailed it. The kitchen will smell absolutely incredible right now.
Step 5: Combine Chicken, Rice, Seasonings, and Half the Cheese
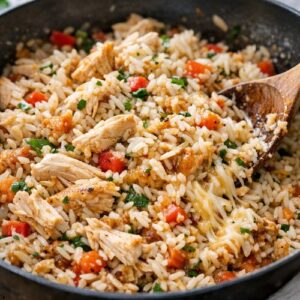
- Add your shredded rotisserie chicken directly to the skillet, breaking up any large clumps as you stir. Add your cooked jasmine rice next, then sprinkle in the oregano, salt, and pepper. Here's where I add half of each type of cheese—so ½ cup mozzarella and ½ cup cheddar. Stir everything together and let it sit on medium heat for about 2 minutes. You'll watch the cheese begin to melt into the warm rice and chicken, creating creamy pockets throughout. If supervising children near the stove, ensure they understand the difference between the warm steam rising from the pan and the actual heat, and keep them at a safe distance.
Step 6: Add Moisture and Achieve Perfect Texture
- Now comes the important part: moisture. Add ½ cup of chicken broth or water to your mixture and stir well. Let it cook for about 1-2 minutes, then assess the texture. Does it look creamy and cohesive, or does it seem dry? The filling should hold together when you scoop it, but it shouldn't be soupy. If it seems dry, add another 2-3 tablespoons of broth. This is a technical moment where experience matters—the amount of liquid needed depends on how much moisture was in your cooked rice and rotisserie chicken. I've learned over years of recipe testing that starting conservative and adding more is safer than having a soggy filling.

Step 7: Stuff Your Pepper Halves
- Remove the skillet from heat. Using a spoon or ice cream scoop, divide your filling evenly among the eight pepper halves. Pack it in gently so the filling stays put as the peppers bake. Sprinkle the remaining cheese (½ cup mozzarella and ½ cup cheddar) over each stuffed pepper half. This is absolutely the moment where kids can take over—the filling is cool enough to handle directly, and watching them carefully distribute cheese across each pepper is wonderful. Make sure hands are clean before any direct handling.

Step 8: First Bake – Covered for Gentle Cooking
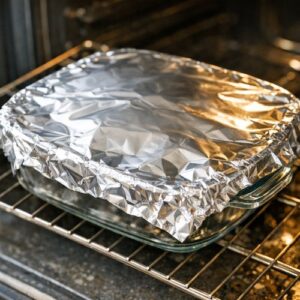
- Cover your baking dish tightly with aluminum foil. Bake at 400°F for 30 minutes. The foil traps steam, which gently cooks the peppers through while keeping them from drying out. During this time, you might prep a simple side dish or set the table—there's nothing else you need to do. The oven is doing the work.
Step 9: Second Bake – Uncovered for Golden Cheese
- After 30 minutes, carefully remove the foil (watch for escaping steam!). Bake uncovered for another 15-20 minutes. You're looking for the cheese to turn golden brown and the pepper skin to begin collapsing slightly, becoming soft and tender. If you slice into a pepper and it's still very firm, add another 5 minutes. The peppers should be yielding but not mushy. This stage creates that beautiful caramelized cheese that makes the dish memorable.

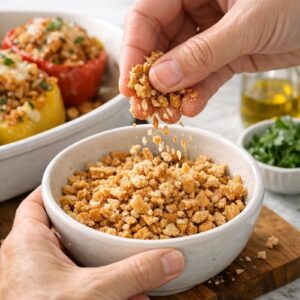
Step 10: Finish and Garnish
- Remove the baking dish from the oven and let it rest for 2-3 minutes. While it rests, take your crushed whole wheat crackers and toss them with the fresh chopped parsley. Just before serving, top each pepper half with this cracker-parsley mixture. The warmth will gently toast the crackers, creating a textural contrast against the creamy filling and soft peppers. This finishing step feels restaurant-quality and takes 30 seconds.