This post contains affiliate links. As an Amazon Associate I earn from qualifying purchases.
Getting kids to eat chicken rice stuffed peppers feels impossible—until you try this approach. I’ve watched picky eaters light up when they realize they get to build their own dinner, and suddenly those vibrant bell peppers become the most exciting thing on their plate. This recipe transforms what could be a “grown-up” dish into something your whole family will actually request. If you’re looking for other weeknight victories, check out our this cozy soup—another family favorite that sneaks in vegetables without the battle.
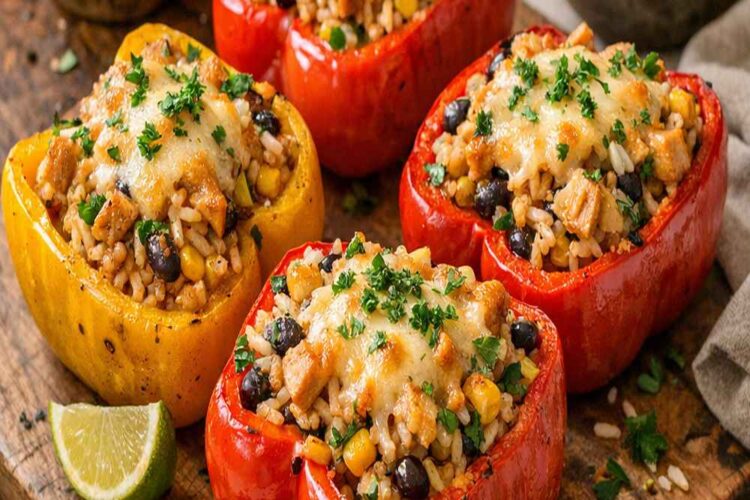
Chicken Rice Stuffed Peppers Recipe: The Whole Family Will Actually Eat (Picky Eaters Included)
I’ll never forget the evening my daughter, who was going through a phase of rejecting anything green, sat at our kitchen counter and watched me halve those gorgeous bell peppers. Instead of the usual pushback, she asked, “Can I help fill mine?” Something shifted in that moment. When kids have agency in what they’re eating, when they get to choose their own toppings and watch their creation bake golden in the oven, food stops being something imposed and becomes something they’ve created.
That’s the magic of this recipe. It’s not just delicious—it’s empowering. Over the years, I’ve developed this version specifically for families navigating picky eaters, time constraints, and the constant search for meals that don’t feel like a compromise between nutrition and actual flavor.
Why Kids Love This Version
This isn’t your typical adult dinner that happens to include children. Every element has been thoughtfully designed with young palates in mind—from the texture of the rice to the way the cheese melts into creamy pockets throughout the filling.
- Customize-able Building Blocks – Each component can be adjusted or swapped without ruining the whole dish. Kids who are skeptical about broccoli can request extra rice instead, or add their own favorite mix-ins.
- Familiar Comfort Food Elements – Chicken, cheese, and rice are trusted flavors. The bell pepper becomes the exciting vessel rather than an intimidating vegetable to conquer.
- Visual Appeal and Interactive Cooking – Stuffing peppers is tactile and fun. Kids can see exactly what’s going into their dinner and feel proud of their work.
- Mild, Approachable Seasoning – Rather than heavy spices that might overwhelm young taste buds, this recipe uses gentle herbs like oregano and lets natural flavors shine.
- Melty Cheese Topping – Because honestly, cheese makes everything better, and kids know it.
How to Get Kids Involved in Making This
The best part about this recipe is how naturally it invites participation across all ages. Here’s how to assign tasks that match your kids’ developmental stages:
- Ages 3-5: Sensory Helpers – Let little ones wash the bell peppers under running water (with supervision), tear pieces of parsley into smaller bits, or sprinkle crushed crackers onto the finished peppers. These tasks build confidence and connection to the food.
- Ages 6-9: Active Participants – School-age children can help dice the shallot (with a child-safe knife or under close guidance), measure rice into a bowl, shred rotisserie chicken using two forks, and fill the pepper halves. They’re developing real cooking skills while staying engaged.
- Ages 10+: Junior Chefs – Give older kids ownership over the stovetop step: they can sauté the shallots and garlic under supervision, stir in the broccoli, and determine when vegetables reach that bright-green moment. They can also manage the oven (with you present), checking doneness and removing the foil at the right time.
The Ingredients – Hidden Nutrition, Visible Deliciousness
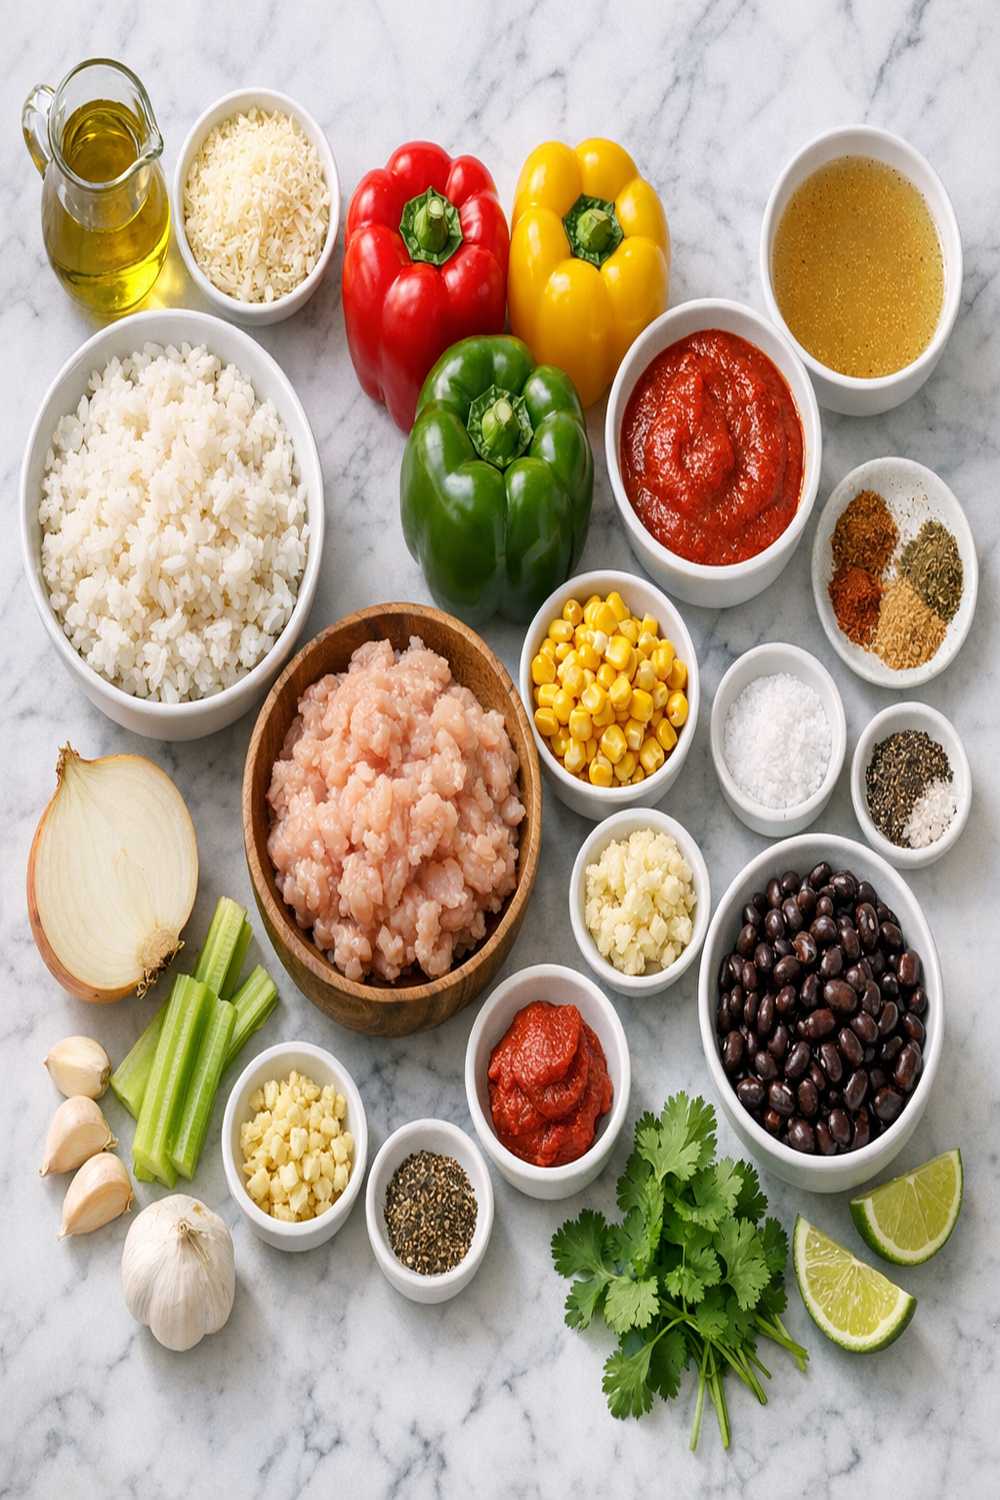
Here’s where the nutritional magic happens. This recipe packs in vegetables, lean protein, and whole grains while tasting like comfort food. The finely chopped broccoli becomes virtually invisible to skeptics but delivers fiber, vitamin C, and those powerful anti-inflammatory compounds kids’ growing bodies need. The rotisserie chicken saves time while providing high-quality protein for muscle development and sustained energy.
For the Stuffing
- ½ teaspoon kosher salt (adjust based on your rotisserie chicken’s saltiness)
- ½ teaspoon fresh ground black pepper (freshly ground tastes noticeably better than pre-ground)
- 1 medium shallot, diced (milder and sweeter than regular onion, less harsh on young palates)
- ½ to ¾ cup low-sodium chicken broth or water (to achieve the perfect moisture level)
- ½ teaspoon dried oregano (Italian herbs are universally kid-friendly)
- 2½ cups shredded rotisserie chicken (already cooked and perfectly seasoned for time savings)
- 1 tablespoon minced garlic (fresh delivers better flavor than jarred)
- 2 cups broccoli florets, finely chopped (chop smaller than you think—texture matters for picky eaters)
- 2 cups cooked jasmine rice (jasmine offers a subtle sweetness kids prefer over plain white rice)
- 1 tablespoon extra-virgin olive oil (for sautéing vegetables with high smoke point)
For the Peppers and Toppings
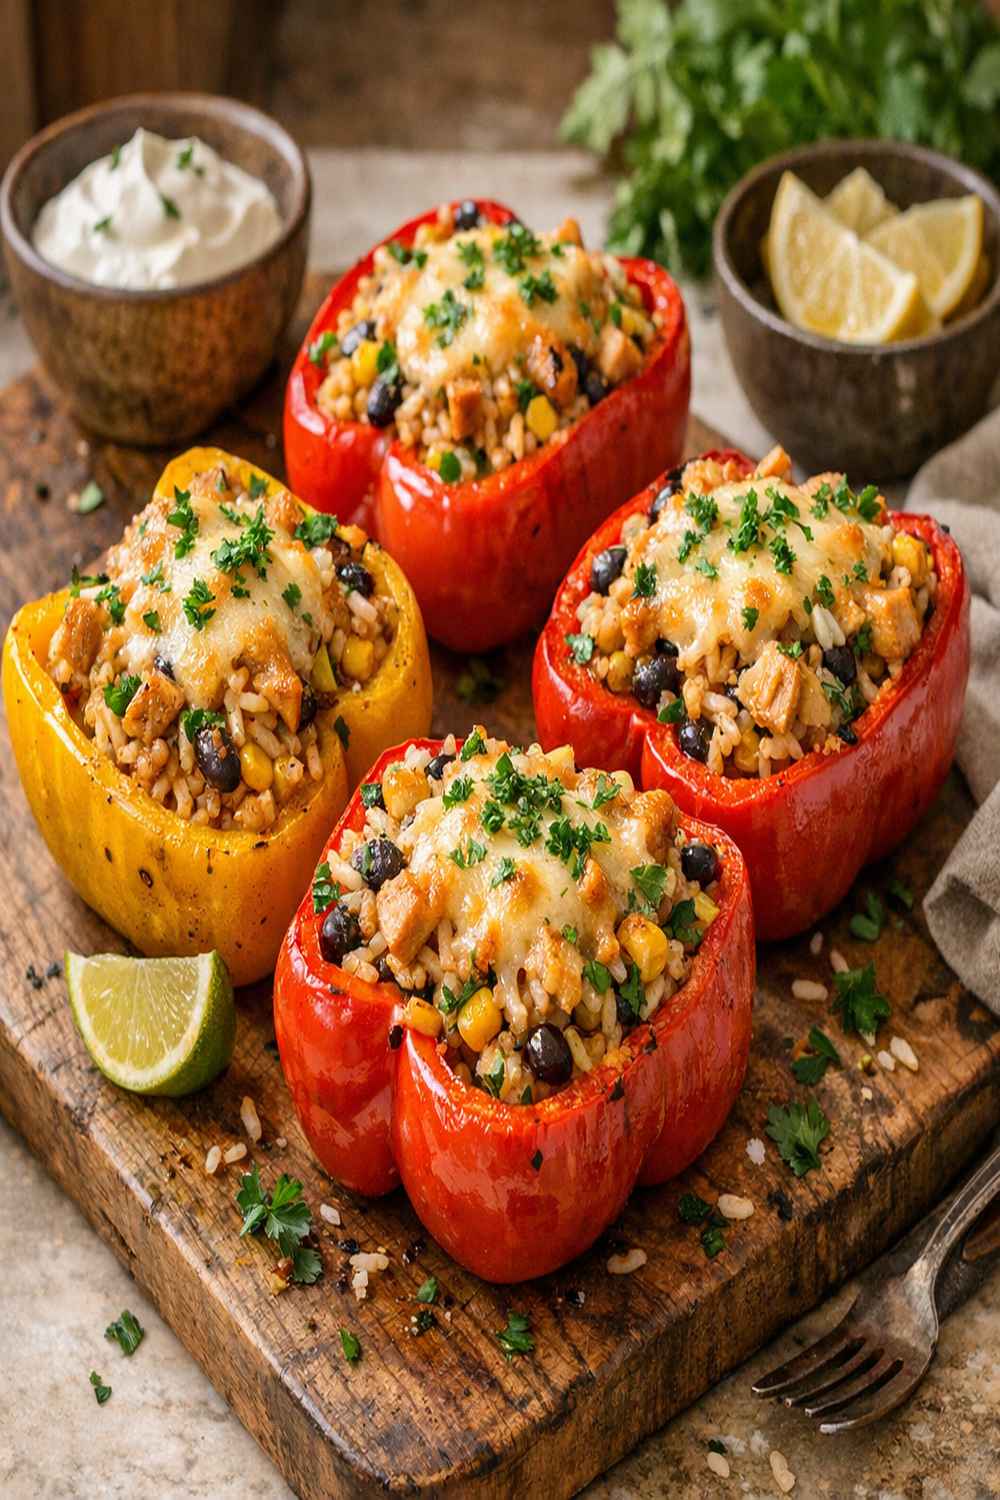
- 4 large bell peppers, any color (red and yellow are sweeter and more visually exciting for kids)
- 1 cup shredded mozzarella cheese (mild flavor that melts beautifully)
- 1 cup shredded cheddar cheese (adds just enough tang without overwhelming)
- 4-5 whole wheat crackers, crushed into coarse crumbs (adds textural contrast and whole grains)
- ⅓ cup fresh chopped parsley (bright color, fresh taste, and easier for kids to identify than dried herbs)
- The Filling Base – Offer the classic version plus a “plain chicken and rice” version for kids who are texture-sensitive about broccoli. Both are delicious; neither is wrong.
- The Cheese Options – Some kids prefer more cheese, others want less. Have extra shredded mozzarella on hand for generous topping.
- The Topping Choices – Crushed crackers, fresh parsley, a sprinkle of sesame seeds, or even a tiny drizzle of hot sauce for older kids and adults. Let people choose.
- The Pepper Color – Red and yellow peppers taste sweeter; green is more vegetal. If serving a mixed family, offer choice.
- Simple Garden Salad – Mixed greens with lemon vinaigrette. The bright acidity complements the richness of the cheese and rice perfectly. Kids who balk at leafy greens often surprise you when there’s a tasty dressing involved.
- Roasted Baby Carrots – Check out our Baby Carrots in the Oven for the perfect complement. Their natural sweetness pairs beautifully with the savory pepper filling, and roasting intensifies their flavor so kids forget they’re eating vegetables.
- Garlic Bread or Crusty Whole Grain Roll – If your family enjoys bread with dinner, add one warm roll per person for soaking up any filling that escapes the peppers.
- Steamed Corn or Green Beans – Light, familiar vegetable sides that don’t compete with the stuffed pepper’s flavors.
- Simple Fruit Plate – Sliced strawberries, grapes, or orange segments. The natural sugars and fiber balance the savory main course and set up a satisfied, complete meal.
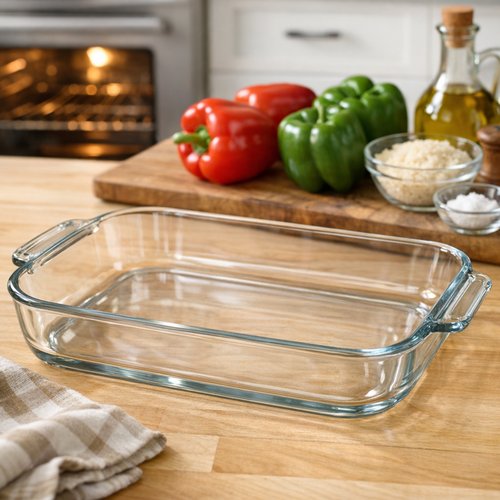
- Heat your oven to 400°F (205°C). While it's warming, get a large baking dish ready—I prefer one that's roughly 9x13 inches so the peppers fit snugly without crowding. Never start cooking without confirming your oven temperature, as this ensures even baking and prevents undercooked peppers. If you have kids helping, this is a good moment for them to wash and dry their hands, gather small bowls for ingredients, and get excited about what's coming.

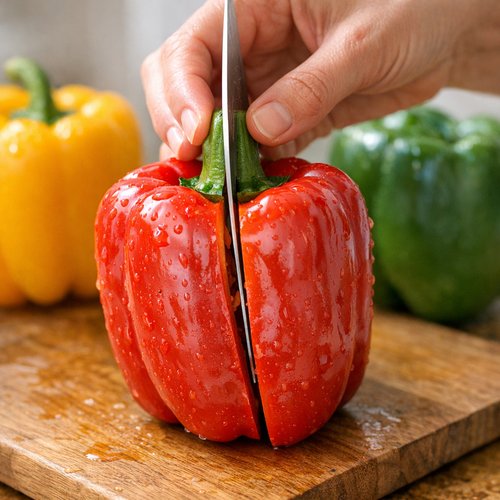
- Rinse your bell peppers under cool running water. Stand each pepper upright on your cutting board, then carefully slice it in half from top to bottom, running your knife straight down through the stem. Remove the seeds and white inner ribs with your fingers or a small spoon—kids absolutely love this part, by the way. Arrange the pepper halves in your baking dish, cut-side up. If any pepper halves seem wobbly, you can slice a thin piece off the bottom to create a stable base, but usually they sit fine. Ensure all children wash their hands after handling raw peppers.
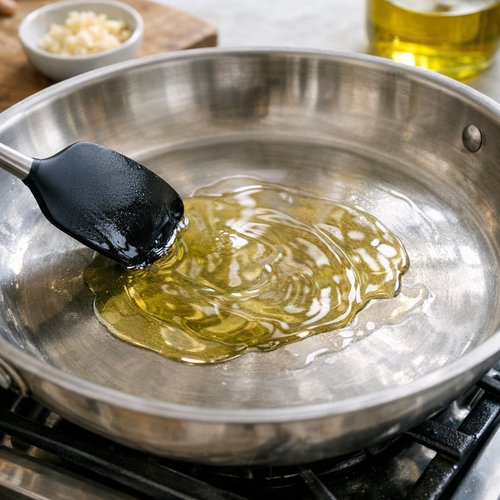
- Place a large skillet over medium heat and add your tablespoon of olive oil. Once the oil shimmers (you'll see it ripple across the pan—this takes about 1 minute), add your diced shallot. Let it cook undisturbed for about 2-3 minutes, then stir and continue cooking for another 2-3 minutes until it becomes translucent and just beginning to soften. This isn't about browning; it's about releasing the shallot's natural sweetness. If kids are watching, explain that we're "waking up" the vegetable's flavor.

- Add your minced garlic to the pan and stir constantly for about 30 seconds—garlic burns quickly and becomes bitter, so timing matters here. Immediately add your finely chopped broccoli florets. Stir everything together and cook for 4-5 minutes, stirring occasionally. You're looking for that beautiful bright-green moment when the broccoli softens slightly but still has a little texture and hasn't turned gray or mushy. This is your visual cue that you've nailed it. The kitchen will smell absolutely incredible right now.
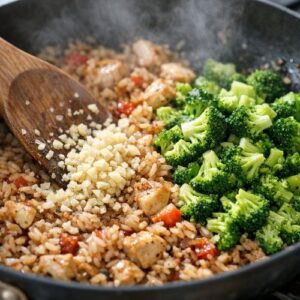
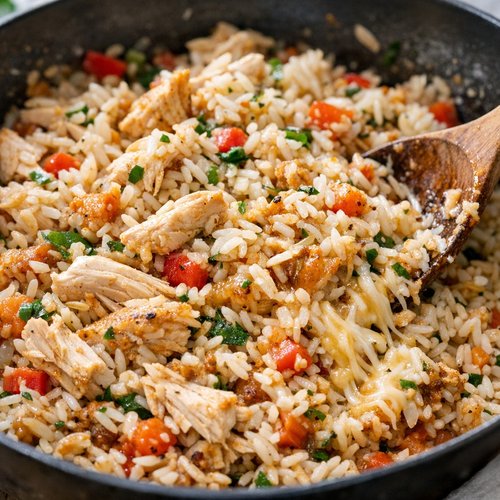
- Add your shredded rotisserie chicken directly to the skillet, breaking up any large clumps as you stir. Add your cooked jasmine rice next, then sprinkle in the oregano, salt, and pepper. Here's where I add half of each type of cheese—so ½ cup mozzarella and ½ cup cheddar. Stir everything together and let it sit on medium heat for about 2 minutes. You'll watch the cheese begin to melt into the warm rice and chicken, creating creamy pockets throughout. If supervising children near the stove, ensure they understand the difference between the warm steam rising from the pan and the actual heat, and keep them at a safe distance.

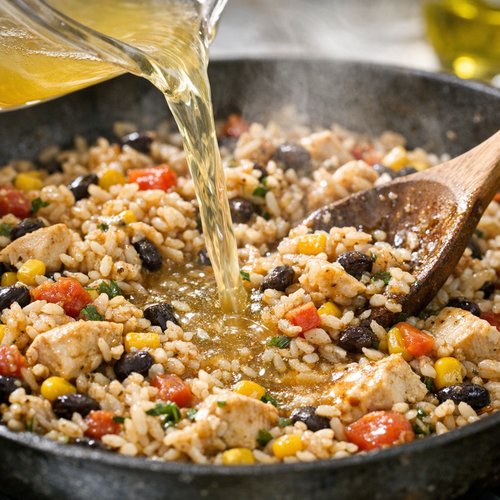
- Now comes the important part: moisture. Add ½ cup of chicken broth or water to your mixture and stir well. Let it cook for about 1-2 minutes, then assess the texture. Does it look creamy and cohesive, or does it seem dry? The filling should hold together when you scoop it, but it shouldn't be soupy. If it seems dry, add another 2-3 tablespoons of broth. This is a technical moment where experience matters—the amount of liquid needed depends on how much moisture was in your cooked rice and rotisserie chicken. I've learned over years of recipe testing that starting conservative and adding more is safer than having a soggy filling.

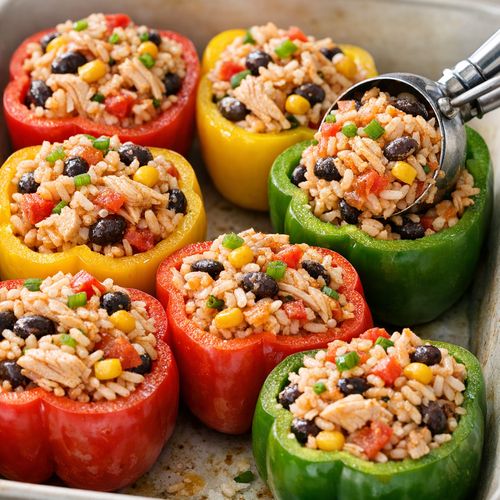
- Remove the skillet from heat. Using a spoon or ice cream scoop, divide your filling evenly among the eight pepper halves. Pack it in gently so the filling stays put as the peppers bake. Sprinkle the remaining cheese (½ cup mozzarella and ½ cup cheddar) over each stuffed pepper half. This is absolutely the moment where kids can take over—the filling is cool enough to handle directly, and watching them carefully distribute cheese across each pepper is wonderful. Make sure hands are clean before any direct handling.

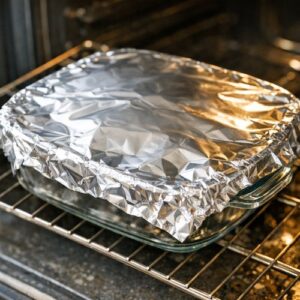
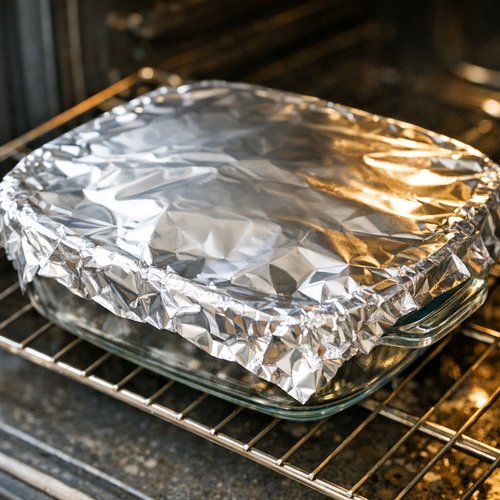
- Cover your baking dish tightly with aluminum foil. Bake at 400°F for 30 minutes. The foil traps steam, which gently cooks the peppers through while keeping them from drying out. During this time, you might prep a simple side dish or set the table—there's nothing else you need to do. The oven is doing the work.
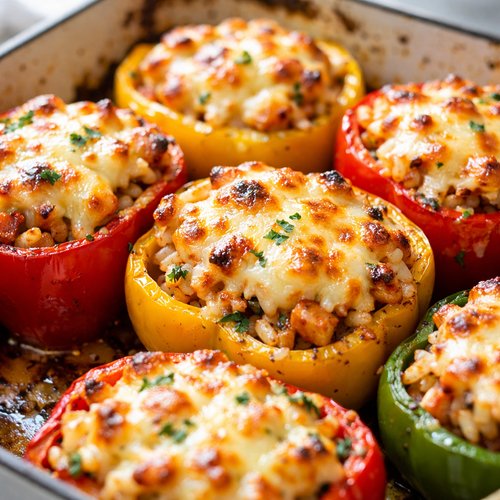
- After 30 minutes, carefully remove the foil (watch for escaping steam!). Bake uncovered for another 15-20 minutes. You're looking for the cheese to turn golden brown and the pepper skin to begin collapsing slightly, becoming soft and tender. If you slice into a pepper and it's still very firm, add another 5 minutes. The peppers should be yielding but not mushy. This stage creates that beautiful caramelized cheese that makes the dish memorable.

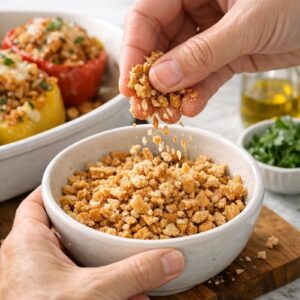
- Remove the baking dish from the oven and let it rest for 2-3 minutes. While it rests, take your crushed whole wheat crackers and toss them with the fresh chopped parsley. Just before serving, top each pepper half with this cracker-parsley mixture. The warmth will gently toast the crackers, creating a textural contrast against the creamy filling and soft peppers. This finishing step feels restaurant-quality and takes 30 seconds.
- Baked Ranch Chicken Without Breadcrumbs Recipe – Another kid-approved protein that comes together quickly and works beautifully with roasted vegetables for complete meals.
- Bacon Cheddar Dip – A crowd-pleasing appetizer that transforms game day or party time, with that same cheese appeal kids love.
- BLT Wraps With Secret Sauce Recipe – A fresh, interactive meal where kids can assemble their own, similar to the customization joy of stuffed peppers.
- This Easy Chicken Dinner – Worth adding to your recipe collection.
Makes 8 stuffed pepper halves (serves 4 as a main course with sides, or 2-3 adults for leftovers-based lunches).
How to Make Chicken Rice Stuffed Peppers Recipe for the Whole Family
This recipe comes together over about 75 minutes, with most of that time being hands-off oven work. The active cooking time is closer to 20 minutes, making it perfect for weeknights when everyone’s hungry. I love turning this into a family activity—assign tasks, play music, and let your kitchen fill with that wonderful aroma of garlic and broccoli sautéing.
Step 1: Preheat Your Oven and Prep Your Workspace
Heat your oven to 400°F (205°C). While it’s warming, get a large baking dish ready—I prefer one that’s roughly 9×13 inches so the peppers fit snugly without crowding. Never start cooking without confirming your oven temperature, as this ensures even baking and prevents undercooked peppers. If you have kids helping, this is a good moment for them to wash and dry their hands, gather small bowls for ingredients, and get excited about what’s coming.
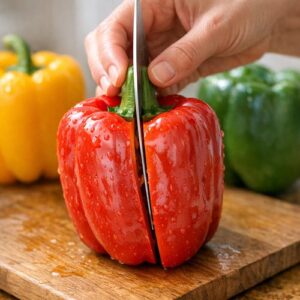
Step 2: Prepare Your Bell Peppers
Rinse your bell peppers under cool running water. Stand each pepper upright on your cutting board, then carefully slice it in half from top to bottom, running your knife straight down through the stem. Remove the seeds and white inner ribs with your fingers or a small spoon—kids absolutely love this part, by the way. Arrange the pepper halves in your baking dish, cut-side up. If any pepper halves seem wobbly, you can slice a thin piece off the bottom to create a stable base, but usually they sit fine. Ensure all children wash their hands after handling raw peppers.
Step 3: Sauté Your Aromatic Base
Place a large skillet over medium heat and add your tablespoon of olive oil. Once the oil shimmers (you’ll see it ripple across the pan—this takes about 1 minute), add your diced shallot. Let it cook undisturbed for about 2-3 minutes, then stir and continue cooking for another 2-3 minutes until it becomes translucent and just beginning to soften. This isn’t about browning; it’s about releasing the shallot’s natural sweetness. If kids are watching, explain that we’re “waking up” the vegetable’s flavor.
Step 4: Add Garlic and Broccoli, Building Flavor
Add your minced garlic to the pan and stir constantly for about 30 seconds—garlic burns quickly and becomes bitter, so timing matters here. Immediately add your finely chopped broccoli florets. Stir everything together and cook for 4-5 minutes, stirring occasionally. You’re looking for that beautiful bright-green moment when the broccoli softens slightly but still has a little texture and hasn’t turned gray or mushy. This is your visual cue that you’ve nailed it. The kitchen will smell absolutely incredible right now.

Step 5: Combine Chicken, Rice, Seasonings, and Half the Cheese
Add your shredded rotisserie chicken directly to the skillet, breaking up any large clumps as you stir. Add your cooked jasmine rice next, then sprinkle in the oregano, salt, and pepper. Here’s where I add half of each type of cheese—so ½ cup mozzarella and ½ cup cheddar. Stir everything together and let it sit on medium heat for about 2 minutes. You’ll watch the cheese begin to melt into the warm rice and chicken, creating creamy pockets throughout. If supervising children near the stove, ensure they understand the difference between the warm steam rising from the pan and the actual heat, and keep them at a safe distance.
Step 6: Add Moisture and Achieve Perfect Texture
Now comes the important part: moisture. Add ½ cup of chicken broth or water to your mixture and stir well. Let it cook for about 1-2 minutes, then assess the texture. Does it look creamy and cohesive, or does it seem dry? The filling should hold together when you scoop it, but it shouldn’t be soupy. If it seems dry, add another 2-3 tablespoons of broth. This is a technical moment where experience matters—the amount of liquid needed depends on how much moisture was in your cooked rice and rotisserie chicken. I’ve learned over years of recipe testing that starting conservative and adding more is safer than having a soggy filling.
Step 7: Stuff Your Pepper Halves
Remove the skillet from heat. Using a spoon or ice cream scoop, divide your filling evenly among the eight pepper halves. Pack it in gently so the filling stays put as the peppers bake. Sprinkle the remaining cheese (½ cup mozzarella and ½ cup cheddar) over each stuffed pepper half. This is absolutely the moment where kids can take over—the filling is cool enough to handle directly, and watching them carefully distribute cheese across each pepper is wonderful. Make sure hands are clean before any direct handling.
Step 8: First Bake – Covered for Gentle Cooking
Cover your baking dish tightly with aluminum foil. Bake at 400°F for 30 minutes. The foil traps steam, which gently cooks the peppers through while keeping them from drying out. During this time, you might prep a simple side dish or set the table—there’s nothing else you need to do. The oven is doing the work.
Step 9: Second Bake – Uncovered for Golden Cheese
After 30 minutes, carefully remove the foil (watch for escaping steam!). Bake uncovered for another 15-20 minutes. You’re looking for the cheese to turn golden brown and the pepper skin to begin collapsing slightly, becoming soft and tender. If you slice into a pepper and it’s still very firm, add another 5 minutes. The peppers should be yielding but not mushy. This stage creates that beautiful caramelized cheese that makes the dish memorable.
Step 10: Finish and Garnish
Remove the baking dish from the oven and let it rest for 2-3 minutes. While it rests, take your crushed whole wheat crackers and toss them with the fresh chopped parsley. Just before serving, top each pepper half with this cracker-parsley mixture. The warmth will gently toast the crackers, creating a textural contrast against the creamy filling and soft peppers. This finishing step feels restaurant-quality and takes 30 seconds.

Customization Station: Let Everyone Build Their Own
Here’s the secret weapon for picky eaters: control. When kids feel they have agency over what’s on their plate, they’re exponentially more likely to actually eat it. Consider setting up a simple customization station where family members can choose their components.
This approach transforms dinner from “eat what I made” to “build what you want”—a subtle psychological shift that creates buy-in and reduces mealtime conflict.
Scaling for Different Family Sizes
The beauty of stuffed peppers is how cleanly they scale. The recipe above serves 4 people as a main course (with simple sides) or makes 8 portions for a lighter meal with multiple sides.
For a family of 2: Use 2 large bell peppers (4 halves total) and cut all filling ingredients in half. You’ll have enough for dinner with possibly one lunch portion leftover, which isn’t bad considering fresh herbs and rotisserie chicken lose quality after a few days.
For a family of 6: Double the entire recipe. Use 8 large peppers, double all filling ingredients, and use two baking dishes for even heat distribution. Baking time remains the same.
For meal-prepping a week of lunches: Quadruple the recipe, prepare 16 pepper halves, and cool them completely before storing. Reheat individual portions in a 350°F oven for 12-15 minutes, covered with foil to prevent drying. They’ll reheat beautifully.
Can I Store Chicken Rice Stuffed Peppers Recipe?
In the refrigerator: Cooled stuffed peppers keep for up to 4 days in an airtight container. Store them in a single layer if possible, or separate with parchment to prevent cheese from sticking together. Kids often prefer them cold or at room temperature as lunchbox meals.
Freezing for later: You can absolutely freeze these. Assemble the peppers completely, don’t bake them, wrap individually in plastic wrap, place in a freezer bag, and freeze for up to 3 months. When ready to cook, add 10-15 minutes to the initial covered baking time since you’re starting from frozen. This is game-changing for meal prep—prepare multiple batches on a weekend and have quick dinners throughout the month.
Reheating: Cold peppers can be eaten straight from the container. To reheat, cover loosely with foil and warm at 350°F for 12-15 minutes until heated through. Avoid overheating, which dries out the cheese. If microwaving individual portions, use 50% power for 2-3 minutes, stirring halfway through.
Lunchbox packing: Cooled peppers transport beautifully in compartmentalized containers. Pack the parsley and cracker topping separately and add just before eating to maintain texture. Pair with a simple green salad or fruit for a complete, portable lunch.
Nutrition Information
Per serving (1 stuffed pepper half): Approximately 285 calories, 12g fat, 22g carbohydrates, 24g protein, 3g fiber, and 580mg sodium (based on USDA nutritional database standards for the component ingredients).
Here’s what excites me most about this recipe from a nutritional standpoint: it delivers complete protein from the chicken and dairy, supporting muscle development and recovery in growing bodies. The jasmine rice provides easily digestible carbohydrates for sustained energy throughout the afternoon or evening. The broccoli—often invisible in the filling—contributes sulforaphane, a compound researched for its anti-inflammatory benefits, plus vitamin C for immune function and vitamin K for bone health. For children, one of these peppers provides roughly 35% of their daily protein needs, significant fiber for digestive health, and calcium for bone development. This isn’t a “healthy dinner kids tolerate”—it’s genuinely nutritious food that tastes like a treat.
What to Serve Alongside for a Complete Family Meal
Stuffed peppers are protein and vegetable powerhouses, so you really only need light, fresh sides to round out the meal. These pairings all have the “kid-approval” stamp:
I typically serve this with a side salad and roasted carrots, which creates a meal that feels complete without being overwhelming. The combination of protein, vegetables, and whole grains means everyone leaves the table satisfied.
Common Mistakes to Avoid
After developing and teaching this recipe countless times, I’ve noticed patterns in where things go sideways. Here are the mistakes I see most often and how to sidestep them:
Overcrowding the Skillet When Sautéing Vegetables – If your broccoli pieces are too large or piled too high in the pan, they steam instead of lightly cook, becoming mushy and grayish rather than bright green. Chop your broccoli into small, uniform pieces and give them space in the pan. You might need to cook in two batches if working with limited skillet space—this is fine and actually preferable.
Not Adjusting Liquid Based on Your Specific Ingredients – Rotisserie chickens vary wildly in moisture content. Some are quite dry, others are nearly swimming in juices. Cooked rice also varies depending on brand and how it was prepared. Start with ½ cup liquid and taste-test the texture. Add more gradually rather than dumping in the full ¾ cup and ending up with soup-like filling that leaks everywhere during baking.
Skipping the Foil Cover During Initial Baking – The foil is essential. Without it, the pepper skins begin to collapse before the filling is heated through, resulting in waterlogged, overly soft peppers. The foil creates a gentle steaming environment. Remove it only for the final 15-20 minutes when you want the cheese to brown.
Baking at Too Low a Temperature or for Too Long – 400°F is the sweet spot. Lower temperatures take longer and the peppers become mushy. Temperatures above 425°F risk burning the cheese topping before the peppers soften. Stick to the temperature and watch for visual doneness rather than assuming a specific time—every oven behaves slightly differently.
Make-Ahead Guide: Meal Prep Like a Professional
One of my favorite aspects of developing recipes professionally is understanding how they work within real life. Most families don’t have three hours to cook dinner on a Tuesday night. This recipe was designed with make-ahead meals in mind.
Day-Before Prep: Prepare everything through Step 6 (combining the filling). Let it cool completely, then refrigerate in an airtight container. The next day, stuff your pepper halves (Step 7), top with cheese, cover with foil, and bake directly from the fridge. Add 5-10 minutes to the initial baking time since the filling is cold. This method saves about 20 minutes on busy evenings.
Two-Days-Ahead Assembly: Prep and stuff the peppers completely, don’t add the final cheese topping yet. Wrap individually in plastic wrap and refrigerate. When ready to cook, unwrap, top with cheese, and proceed with baking. The filling will be cold, so again add 5-10 minutes to initial bake time.
Weekend Batch Prep: Prepare 4-6 complete batches of stuffed peppers on a Sunday afternoon. Cool completely, wrap individually, and freeze. Throughout the week, pull out what you need and bake from frozen, adding 15 minutes to the covered baking time. This transforms a 75-minute recipe into a 90-minute project once, yielding six weeknight dinners. The payoff is enormous.
Component Prep Only: If full prep feels like too much, simply cook the filling in advance (Steps 1-6) and store for up to 4 days. Family members can stuff their own peppers at dinner time, creating that interactive experience while you’ve saved the time-intensive steps.
Expert’s Nutritional Tip: The Science Behind the Satisfaction
As someone who’s spent years studying how families actually eat, not just what nutrition labels say they should eat, I want to share something crucial about this recipe: the combination of macronutrients here is specifically designed for satiety and sustained energy.
The protein from the chicken and cheese creates fullness signals that tell growing brains “we’re satisfied.” The fiber from the broccoli and whole grain crackers slows digestion, preventing the blood sugar spikes and crashes that make kids (and adults) cranky an hour after eating. The jasmine rice provides the quick carbohydrates that make dinner feel comforting and delicious, while the healthy fat from olive oil and cheese helps absorb fat-soluble vitamins like vitamin K from the broccoli. In other words, this isn’t a balanced meal by accident—it’s engineered so kids actually stay full through homework and evening activities, and families aren’t hunting for snacks at 7 PM. This is the nutritional literacy I wish every parent understood: balanced meals prevent behavioral issues and energy crashes far more effectively than lecture-based nutrition does.
Seasonal Variations: Keep It Fresh Year-Round
Spring Version: Replace broccoli with fresh asparagus, finely chopped, and add ¼ cup fresh peas. Use yellow or red peppers for brightness. Add a sprinkle of fresh dill to the parsley topping for a spring herb profile.
Summer Version: Incorporate fresh corn kernels (about ¾ cup) into the filling. Use the lightest touch of garlic (just ½ teaspoon) and add fresh basil to the parsley topping. Summer peppers are at peak sweetness—lean into it.
Fall Version: Add ½ cup diced roasted sweet potato to the filling for subtle sweetness and earthiness. Use orange or red peppers. Include a touch of smoked paprika (⅛ teaspoon) in the seasoning for cozy, warming depth.
Winter Version: Swap broccoli for finely chopped spinach or kale (cook down first, as raw greens take up too much space). Add ½ cup diced roasted butternut squash. Use crushed toasted walnuts instead of crackers for the topping, which adds nutty richness to winter meals.
Chicken Rice Stuffed Peppers Recipe
Ingredients
Method
Nutrition
Tried this recipe?
Let us know how it was!FAQs
Can I Use Frozen Broccoli Instead of Fresh?
Absolutely! Use frozen broccoli florets, thawed and patted very dry, then finely chopped. Frozen actually works beautifully here because the blanching process that happens during freezing softens it slightly, making it easier to chop finely and more discreet in the filling. The only consideration: squeeze out excess moisture before cooking, as frozen vegetables release water. This prevents a soggy filling.
My Child Will Only Eat One Type of Cheese—Can I Use Just One?
Yes, but with a small adjustment. If using only mozzarella (total 2 cups), the result will be milder and creamier. If using only cheddar (total 2 cups), it’ll be slightly tangier. Either works perfectly fine. Where I personally notice the difference is in the melting behavior—mozzarella melts into smooth pockets, while cheddar creates slightly more texture. For picky eaters, I’d lean toward all mozzarella, which is the most universally beloved cheese flavor among young kids.
What If My Kids Really Won’t Eat the Peppers Themselves?
Here’s the honest truth: you can scoop out the filling and serve it without the pepper “vessel.” It’s not as visually exciting, but nutritionally and flavor-wise, it’s identical. Serve the filling over rice on their plate, and offer the pepper half on the side for adventurous bites. Sometimes removing the “scary vegetable” exterior makes the filling itself more approachable. Many kids will eventually become curious about the pepper once they’ve enjoyed the filling multiple times. Food acceptance is a journey, not a destination.
Can I Make This Without Cheese for a Dairy-Free Version?
You can, though the dish loses some of its creamy appeal. For dairy-free: use dairy-free mozzarella and cheddar alternatives (cashew-based versions melt better than most others), add an extra tablespoon of olive oil to the filling for richness, and perhaps add 2 tablespoons of nutritional yeast for a subtle savory depth. Nutritionally, you’ll miss the calcium boost from cheese, so ensure your family is getting calcium from other sources.
How Do I Know When the Peppers Are Actually Done Baking?
Pierce the thickest part of a pepper half with a fork or knife. It should slide through with gentle pressure—not rock-hard, but not mushy either. The skin should have collapsed slightly and look shiny. The cheese topping should be visibly browned. These visual and tactile cues matter more than time, since ovens vary. If peppers still feel very firm at the 45-minute mark, bake another 5-10 minutes. It’s impossible to overbake them—worst case is very soft, which is still delicious.
More Family-Friendly Recipes
More Recipes You Will Love
Cooking together, building meals with intention, and watching your family actually enjoy vegetables—this is the legacy I hope you create around your dinner table. Stuffed peppers start as a simple weeknight dinner, but they become the recipe your kids remember, the one they text you for when they’re in college, the comfort food they eventually make for their own families. That’s the real magic. The nutrition is wonderful, the flavors are delicious, but the moments created around that meal are what matter most. I hope your family makes this recipe soon and fills your kitchen with that gorgeous aroma of roasting peppers and melting cheese. Enjoy!