This post contains affiliate links. As an Amazon Associate I earn from qualifying purchases.
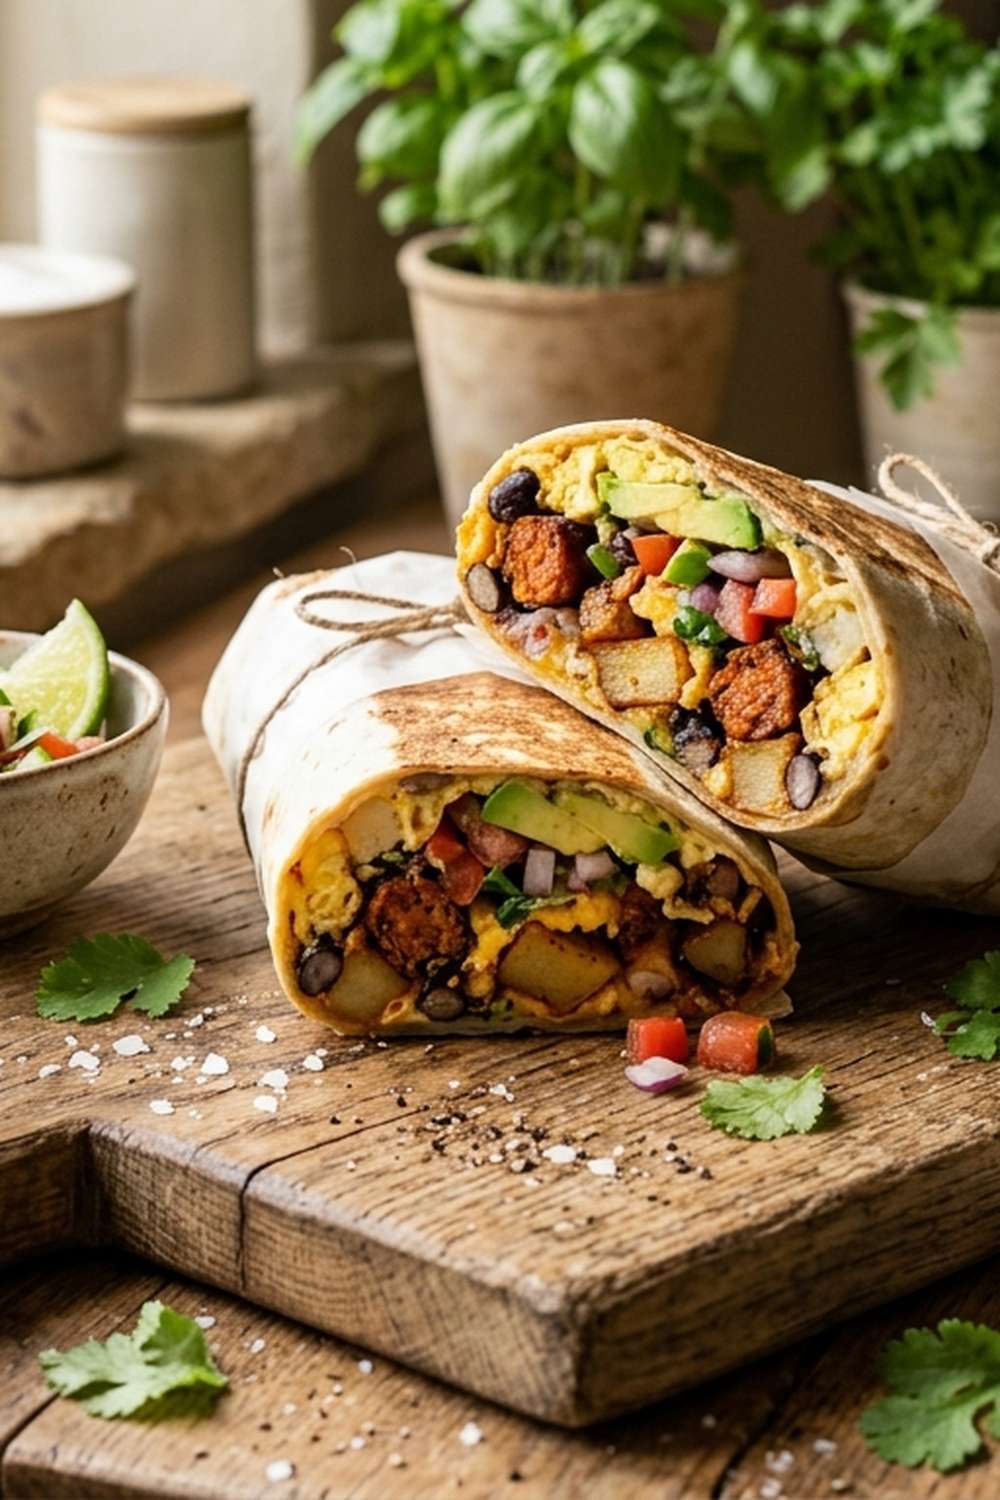
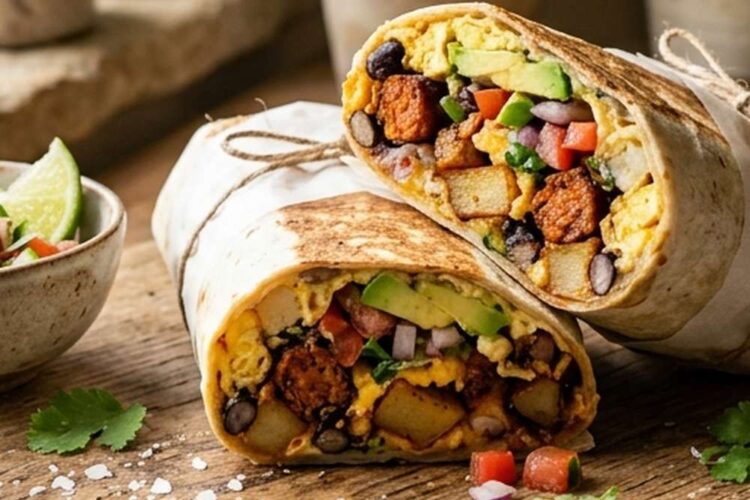
If you’ve always wanted to make chorizo and potato burritos but felt intimidated by the rolling technique or worried about soggy tortillas, this is your starting point. I’m going to walk you through every single step with the kind of detail that makes first-timers feel like pros. These burritos are packed with savory spiced meat, crispy potatoes, fluffy eggs, and creamy avocado—and honestly, once you nail this technique, you’ll be making them for every brunch gathering, meal prep session, or lazy Saturday morning.
The best part? You can make these ahead of time and reheat them perfectly. Whether you’re feeding a crowd or stocking your freezer for busy mornings, this recipe scales beautifully and teaches you foundational skills you’ll use in countless other dishes.
How to Make Chorizo And Potato Burritos for the First Time (You’ve Got This)
I still remember the first breakfast burrito I attempted to make—it was years ago, during a family reunion at my grandmother’s house in New Mexico. I was so confident walking in with my mise en place all prepped, but when it came time to roll, my first tortilla tore clean in half because I’d overstuffed it like I was packing a suitcase for a month-long trip.
My grandmother just laughed, showed me the gentle art of filling just the bottom third, and suddenly everything clicked. That moment taught me that breakfast burritos aren’t about being precious or perfect—they’re about balance: the right ratio of filling to tortilla, warmth to pliability, and confidence in your technique. The chorizo’s spice against the buttery eggs, the earthiness of golden potatoes catching those crispy brown edges—it’s comfort food that tastes restaurant-quality when you understand a few simple principles.
These burritos have become my answer to “what can I make that impresses everyone and takes less than an hour?” They’re the recipe I return to when I want to teach someone that home cooking isn’t complicated—it just requires paying attention to the details that actually matter.
What to Expect Before You Start
This recipe is genuinely beginner-friendly, but let’s set realistic expectations so you know exactly what you’re walking into. The entire process takes about 45 minutes from start to finish, with most of that time being hands-on. You’ll be managing three components simultaneously (chorizo, vegetables, and eggs), which might feel like juggling at first—but that’s actually where the fun starts.
Success looks like golden-brown chorizo that’s broken into small, seasoned pieces; potatoes with tender interiors and slightly crispy edges; and scrambled eggs that are creamy but fully cooked. Your tortillas should be warm enough to roll without tearing, and your filling should be contained enough that nothing explodes when you take a bite.
- The difficulty level is genuinely beginner-friendly — The hardest part isn’t the cooking; it’s the rolling technique. But that’s actually learnable in under five minutes once you see it done right. No flipping, no precise timing, no temperature targets that stress you out.
- You’ll be working with multiple components at once — Don’t let this scare you. One pan sears the chorizo, then the vegetables go in that same pan. While those cook, you’re whisking eggs in a bowl. It’s efficient, not chaotic. The timing naturally spaces everything out so you’re not panicking.
- Tortilla rolling is genuinely the only technique that requires practice — Your first burrito might not be perfect. Your third one will be noticeably better. By burrito five, you’ll understand the physics instinctively. This is skill-building, not failure.
Equipment You’ll Need (And What You Can Skip)
Here’s what you actually need versus what’s nice to have. I’m a firm believer that good home cooking doesn’t require fancy equipment—it requires the right equipment. Let me be specific about what matters and where you can substitute.
- One large skillet (12-inch is ideal) — This is where your chorizo and vegetables cook. You need enough surface area that the potatoes can actually get some browning rather than steaming themselves. Cast iron, stainless steel, or nonstick all work beautifully. Budget alternative: a large sauté pan works perfectly fine.
- One medium nonstick skillet — For scrambling eggs without them sticking to the pan. If you don’t have nonstick, a well-seasoned cast iron or regular skillet with a bit of extra butter works. Nonstick just makes cleanup faster.
- A sharp chef’s knife — For dicing potatoes, peppers, and onions evenly. Uneven pieces cook at different rates, so this matters more than you’d think. Your knife doesn’t need to be expensive; it needs to be sharp. A dull knife is genuinely more dangerous than a sharp one.
- A cutting board — Wood or plastic, doesn’t matter. Just make sure it’s stable and large enough that you’re not hunting for vegetables.
- A medium mixing bowl — For whisking eggs and milk together. Any bowl works; there’s nothing special happening here.
- A whisk or fork — To beat your eggs with milk. A fork works just fine if you don’t have a whisk.
- A microwave and microwave-safe plate — For warming tortillas. This is the easiest, fastest method, and it works consistently.
- Wooden spoon or silicone spatula (optional but helpful) — For stirring vegetables and eggs. You can use a fork or regular spoon, but these make the job easier.
That’s genuinely it. No special burrito roller, no fancy equipment required. Just good knives, clean pans, and confidence.
The Ingredients—A Beginner’s Shopping Guide
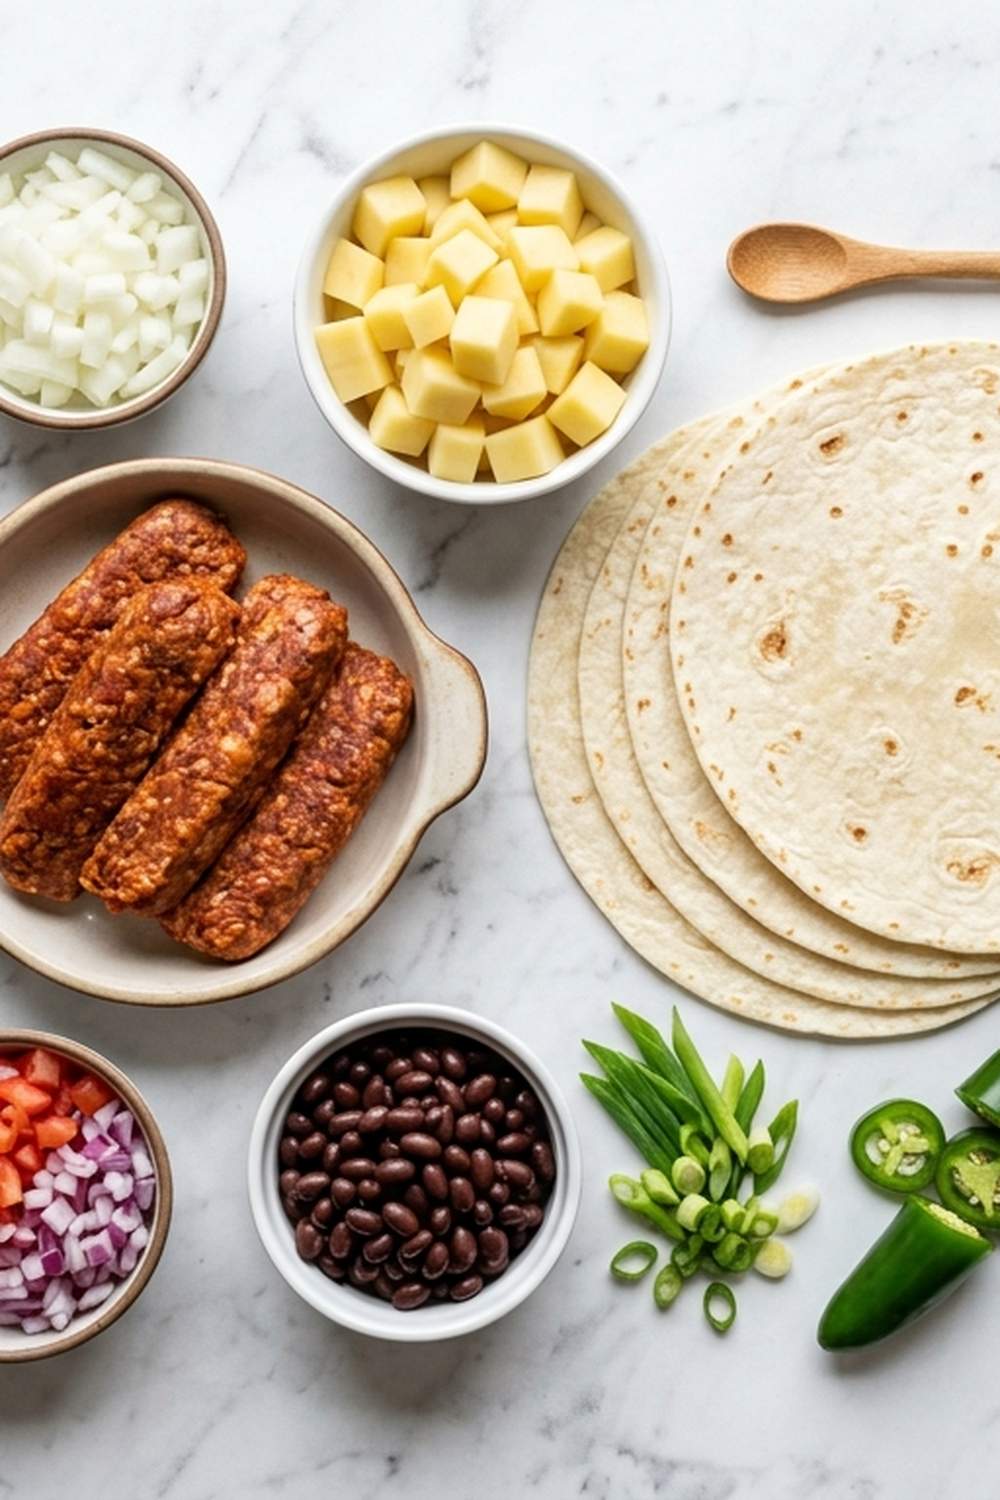
Let me walk you through where to find each ingredient and what to look for when buying. I’ve included beginner-friendly substitutions because I know not everyone has access to the same specialty items, and this recipe is flexible enough to accommodate your local grocery store.
For the Filling and Protein
- 2 tablespoons unsalted butter (for cooking eggs)
- 3 tablespoons whole milk (full-fat creates a creamier scramble)
- 8 large eggs (room temperature scrambles more evenly than cold eggs)
- 1 pound chorizo (casings removed, fresh Mexican chorizo from the meat counter works best)
For the Vegetables and Seasoning
- ¼ teaspoon freshly ground black pepper (freshly ground makes a real difference)
- 1 red bell pepper (stem and seeds removed, diced; red peppers are sweeter than green, which complements the spiced chorizo beautifully)
- ½ teaspoon kosher salt (for seasoning vegetables)
- 3 medium Yukon gold potatoes (diced into small ½-inch pieces; look for firm potatoes with no soft spots)
- ½ medium white onion (diced; yellow onion works if you can’t find white)
- 2 tablespoons extra-virgin olive oil (for cooking vegetables)
- 2 cloves fresh garlic (minced; fresh garlic tastes dramatically better than jarred, trust me on this)
For Assembly
- 1 ripe avocado (add this just before serving to prevent browning)
- ¼ cup sour cream (for serving)
- ½ cup salsa (fresh salsa from the refrigerated section tastes best, but jarred salsa works perfectly fine)
- ½ cup shredded sharp Cheddar cheese (or Monterey Jack if you prefer milder flavor)
- 6 large flour tortillas (burrito-size, not taco-size; check the package—you want 10-inch or larger)
Shopping Tips from My Kitchen
Chorizo: Look for fresh chorizo in the refrigerated meat section, not the shelf-stable stuff. Mexican chorizo has a more authentic, nuanced flavor than Spanish chorizo. Ask the butcher for help if you’re unsure—they can point you to the right variety and even remove the casings for you if you ask nicely.
Potatoes: Yukon golds have a naturally buttery flavor and creamy texture that works beautifully here. If you can only find russets, they work—just expect them to be slightly starchier. Waxy potatoes like fingerlings or red potatoes also work well.
Eggs: Pastured or farm-fresh eggs have more vibrant yolks and better flavor. If that’s outside your budget, regular large eggs from the grocery store work perfectly fine. Cold eggs take longer to scramble, so leave them on the counter for 10 minutes before cooking.
Avocado: Buy it a day ahead if it’s rock-hard. To check ripeness, gently squeeze—it should yield slightly to pressure. If you’re not using it immediately, store it in the refrigerator. The moment you slice it, toss it with a tiny squeeze of lime juice to slow browning.
Step-by-Step: Your First Chorizo And Potato Burrito Recipe
Before we dive in, take a breath. I’m going to walk you through every single movement like I’m standing next to you. Read through the entire recipe once before you start—this takes five minutes and prevents surprises. Have all your ingredients prepped and measured before you turn on the heat. Professional cooks call this “mise en place” (everything in its place), and it’s the single biggest thing that makes home cooking feel controlled and fun rather than frantic.
You’re making six burritos with this recipe. Each one should be a complete meal—protein, vegetables, eggs, cheese, and fat (avocado) all working together. Let’s go.
Step 1: Cook the Chorizo Until Deeply Browned and Fragrant
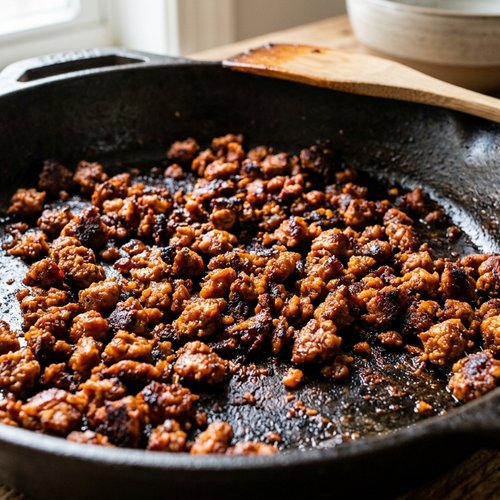
Place your large skillet over medium-high heat. Let it get hot for about one minute—you should feel significant heat radiating from it when you hold your hand a few inches above the surface. Add the chorizo to the dry pan (no oil needed; chorizo releases its own fat as it cooks). This is important: you’re not adding it all at once and stirring gently. You’re breaking it apart with a wooden spoon or spatula as it hits the hot pan, encouraging it into small, bite-sized pieces.
Here’s what you’re listening for: the chorizo should sizzle immediately when it hits the pan. If it doesn’t, your pan isn’t hot enough—wait another 30 seconds. As it cooks, you’ll see it go from raw-looking reddish-brown to darker brown with crispy edges. The house will smell incredible—spiced, slightly smoky, deeply savory. This takes 7-8 minutes total. You want the chorizo broken into small pieces (no large chunks) and showing some browning on the edges, not still wet-looking.
When it’s done, transfer the cooked chorizo to a clean plate using a slotted spoon. This leaves behind all the delicious fat in the pan—don’t drain it. That fat is liquid gold for cooking your vegetables.
Step 2: Cook the Potatoes and Peppers Until Tender and Slightly Crispy
Keep that same skillet on medium-high heat. Add the olive oil to the chorizo fat in the pan. Now add your diced potatoes, diced bell pepper, and diced onion. Stir everything together so the vegetables are coated in the oil and fat. Sprinkle the salt and pepper over top and stir again.
Here’s what happens next: the vegetables will make a sizzling sound. They’ll release moisture and start to soften. Your job is to stir every two to three minutes rather than constantly fussing. This gives the potatoes a chance to actually brown on their edges instead of steaming themselves soft. You’re looking for potatoes that are golden brown in places, tender inside when you poke them with a fork, and not mushy. The onion should be translucent and slightly caramelized at the edges. The pepper should be soft but still hold its shape.
This takes 10-12 minutes total. In the last minute of cooking, add your minced garlic and stir constantly. Garlic burns quickly and turns bitter if you’re not watching, so don’t step away during this final minute. You’ll know it’s done when the garlic smells fragrant (not burned and acrid) and the potatoes are genuinely fork-tender.
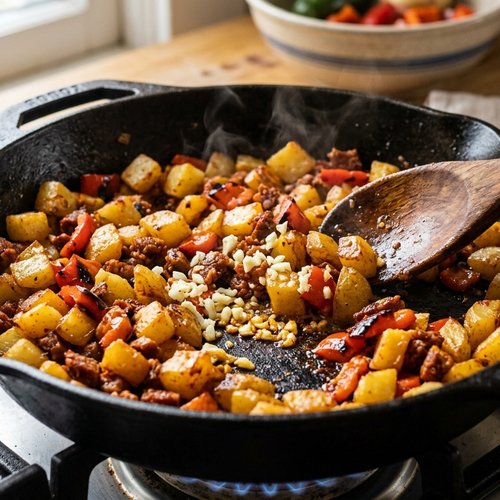
Transfer the cooked vegetables to the plate with the chorizo. Keep them separate for now—you’ll be combining everything when you assemble the burritos.
Step 3: Whisk Eggs With Milk Until Completely Combined
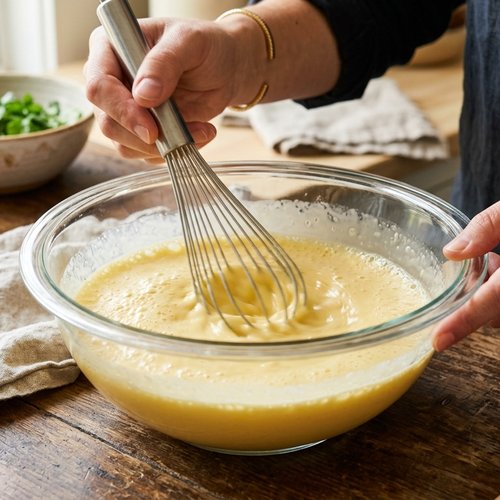
While the vegetables are still cooking, grab your medium mixing bowl. Crack all 8 eggs directly into the bowl. Add the milk. Using a whisk or fork, beat the eggs and milk together vigorously for about 30 seconds. You want everything homogeneous—no streaks of white egg white, no separated yolks. The mixture should be pale yellow and uniform.
This is the moment to notice: does it smell like raw eggs? Yes. That’s completely normal and expected. Once cooked, it’ll smell warm, buttery, and delicious.
Step 4: Scramble the Eggs Until Just Set (Creamy, Not Rubbery)
Place your medium nonstick skillet over medium-low heat. Add the butter and let it melt completely, swirling it around to coat the entire pan. Once the butter is foamy and fragrant, pour in your egg mixture. This is critical: keep the heat at medium-low. Too high and your eggs cook too fast, becoming rubbery and dry. Too low and they’ll take forever and get watery.
Let the eggs sit undisturbed for about 30 seconds. You’ll see them start to set around the edges. Using your spatula, gently push the set eggs toward the center of the pan and tilt the pan slightly so the uncooked egg flows to the edges. Repeat this motion every 20-30 seconds. This creates larger curds of egg rather than tiny, overworked scrambled pieces.
Watch for the moment when most of the egg is set but still slightly glossy and wet-looking. This is the moment you pull the pan off the heat. The residual heat will continue cooking the eggs for another 10 seconds, and they’ll finish perfectly creamy. If you wait until they look completely cooked in the pan, they’ll be slightly overcooked by the time they get to your burrito. This takes 4-5 minutes total, and it’s where the difference between creamy and rubbery eggs lives.
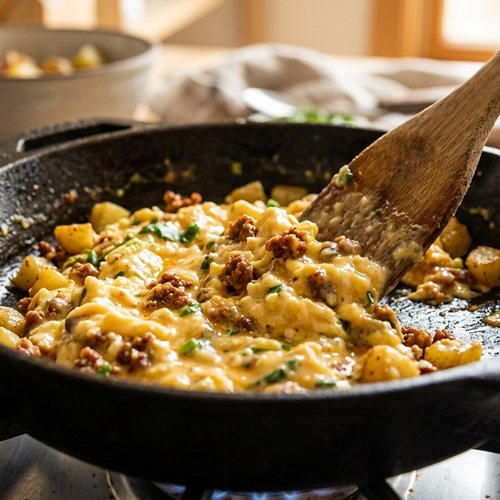
Step 5: Warm Your Tortillas Until Flexible and Pliable
This might seem like a small step, but warm tortillas roll. Cold tortillas tear. Stack your six flour tortillas on a microwave-safe plate. Dampen a paper towel under cool running water (squeeze out the excess—you want it moist, not soaking wet). Lay the damp paper towel over the tortillas. Microwave on high for 30 seconds.
Open the microwave and carefully touch a tortilla at the edge. It should be warm and flexible. If it’s still a bit stiff, microwave for another 15 seconds. Keep the damp paper towel over the stack while you work so they stay warm. You’ve got about 5-7 minutes before they start cooling down, so work efficiently but not frantically.
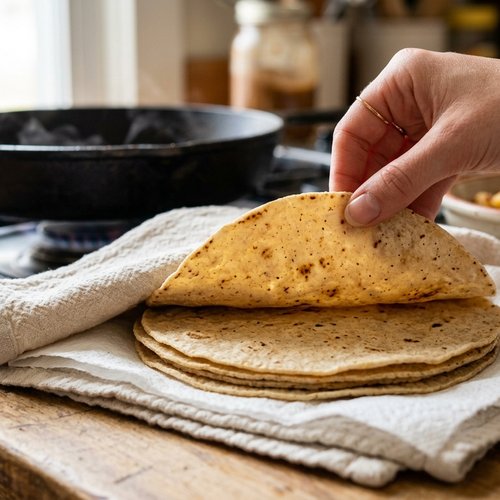
Step 6: Assemble Your Burritos With Proper Technique
Lay one warm tortilla flat on your work surface. Here’s the filling ratio that works beautifully: imagine the tortilla divided into three vertical sections. You’re going to fill only the bottom third of the tortilla—this is the most common mistake beginners make, and it’s an easy one to catch and prevent.
In this bottom third, layer in order: first, a handful of scrambled eggs (roughly ⅓ cup); then some of the chorizo and potato mixture (about ¼ cup); then a small pinch of shredded Cheddar (maybe 1 tablespoon); then 2-3 slices of avocado; then a tiny dollop of sour cream.
Now the rolling: Fold the bottom edge of the tortilla up and over the filling, creating a tight cylinder. Don’t roll loosely—you want it snug. Once you’ve rolled it once (and the filling is now wrapped), fold in the left and right sides of the tortilla, creating a envelope-like closure. Then continue rolling upward until the entire tortilla is wrapped around the filling.
The burrito should be compact, with the seam facing down. Place it on a plate seam-side down—this helps it stay sealed and looks prettier. Repeat with the remaining five tortillas.
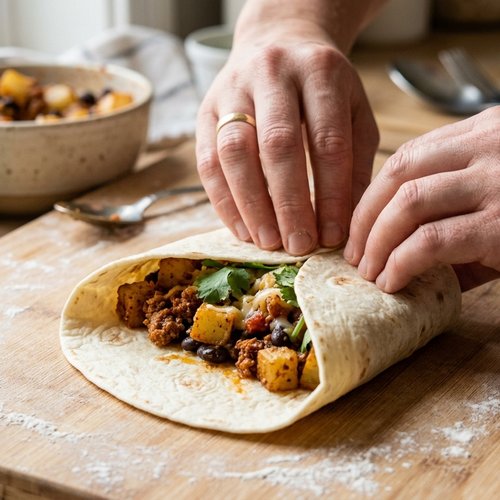
Step 7: Serve Immediately With Toppings on the Side
Serve the burritos immediately while they’re warm. Alongside each burrito, offer small bowls or ramekins of salsa and sour cream for people to drizzle or dip as they like. The avocado inside keeps things creamy, but the extra sour cream and salsa add brightness and richness that make every bite more interesting.
If you’re making these ahead of time (more on that later), wrap each cooled burrito tightly in foil and store in the refrigerator. Reheat by unwrapping and microwaving for 60-90 seconds, or wrapping back in foil and warming in a 350°F oven for 15-20 minutes. The oven method keeps the tortilla from getting tough.
How to Tell If You Did It Right
Success in this recipe has specific visual, smell, and texture markers. You’ll know you nailed it when you see these signs at each stage.
- Chorizo is deeply browned, broken into small pieces, and smells spiced and slightly smoky — If it looks pale and wet, it needs more cooking time. If it’s dark brown to almost black, you might have cooked it a touch too long, but it’ll still taste delicious.
- Potatoes are golden brown on the edges, fork-tender inside, and have actual texture (not mushy) — If they’re translucent and soft but not browned, give them another minute or two on higher heat. If they’re still hard, they need more time on medium-high.
- Eggs are pale yellow, creamy, and glossy when you remove them from heat — If they look rubbery and dry in the pan, you cooked them too long or too hot. Next time, pull them off the heat sooner. If they’re still visibly wet and runny, they need another minute.
- Tortillas are warm, flexible, and pliable without being dried out — They should drape slightly over your hand when you hold them. If they’re stiff, they’re not warm enough. If they’re steaming and falling apart, they’re too wet.
- The finished burrito is compact, doesn’t leak filling when you pick it up, and has a nice seam on the bottom — If it’s leaking, you overfilled it. Next time, use less filling in the same space (fill it higher up the tortilla rather than piling more in the bottom third).
What Went Wrong? Beginner Fixes
- Your tortillas tore while rolling — This happens when tortillas are cold. The fix is ridiculously simple: warm them longer next time. Thirty seconds might not be enough in a weaker microwave. Aim for tortillas that are almost steaming. You can also reheat them one at a time right before rolling if you’re taking a while on each burrito.
- Your eggs came out rubbery and dry — You either cooked them on too-high heat or waited until they looked completely done in the pan. Medium-low heat is non-negotiable here. And pull them off when they still look slightly wet—that glossy appearance is your target. They’ll finish cooking with residual heat while you assemble.
- Your potatoes are still hard in the center — Your heat was too high, or you didn’t cook them long enough. Make sure you’re actually dicing them into ½-inch pieces (smaller pieces cook faster), and give them the full 10-12 minutes. If you’re in a rush, diced potatoes can go in the microwave for 2-3 minutes first to partially cook them, then finish in the pan.
- Your burrito is bulging and falling apart — You overfilled it. Use less filling (about ¾ cup total per burrito rather than cramming in more), and make sure you’re rolling tightly and folding in the sides firmly. The fold-and-roll technique matters more than the amount of filling.
- Your chorizo is greasy and wet-looking instead of browned and crispy — Your heat wasn’t high enough, or you didn’t cook it long enough. Turn the heat up to medium-high and let it cook undisturbed for a minute or two to develop some browning before you start breaking it apart.
Your Next Steps After Mastering This
This recipe teaches you several fundamental cooking skills that unlock dozens of other dishes. You’ve now practiced searing meat (which you’ll use for tacos, chili, and ground beef dishes), softening vegetables on the stovetop (building blocks for stir-fries, soups, and side dishes), and scrambling eggs perfectly (essential for omelets, frittatas, and breakfast scrambles). You’ve learned how to judge doneness by look and feel rather than timers, and you’ve practiced a rolling and folding technique that’s literally the same technique used for enchiladas, crepes, and wraps.
Once you’re comfortable with this burrito, try breakfast tacos with the same fillings—it’s the exact same components, just a different tortilla and no rolling required. Then move on to building your own breakfast scrambles with different proteins and vegetables. If you want to explore the Spanish spice profile in different contexts, try our Slow Cooker Spanish Chicken Stew, which uses similar aromatics and builds flavor in a completely different way.
Can I Store Chorizo And Potato Burritos?
In the refrigerator: Wrap each cooled burrito individually in foil or plastic wrap. They’ll keep for 3-4 days. To reheat, unwrap and microwave for 60-90 seconds on high, or wrap in foil and warm in a 350°F oven for 15-20 minutes. The oven method keeps the tortilla from getting rubbery.
In the freezer: Wrap each cooled burrito in foil, then place in a freezer bag with as much air removed as possible. Label with the date. They’ll keep for up to 3 months. To reheat from frozen, wrap in foil and warm in a 350°F oven for 25-30 minutes, or microwave directly (still wrapped in foil is fine) for 2-3 minutes, checking at 1.5 minutes. Microwave is faster but oven is gentler on the texture.
Pro tip from my kitchen: I recommend freezing before assembling if you’re doing major meal prep. Cook all the components separately, cool them completely, store them in separate containers, and then assemble fresh when you want to eat them. This way, you get fresh-tasting burritos without the extra time on breakfast morning. It’s meal prep for people who actually want their food to taste good, not just “meal preppy.”
Do NOT store the assembled burritos in the refrigerator for more than 4 days because the tortilla eventually absorbs moisture from the filling and becomes tough and chewy. Freeze or eat within 3-4 days.
Expert’s Nutritional Insight: Building Sustainable Satiety
Each burrito contains a complete protein (from the eggs and chorizo), complex carbohydrates (from the potato), healthy fat (from the avocado), and vegetables (from the pepper and onion). This macronutrient balance is exactly why these burritos keep you satisfied for hours rather than leaving you hungry an hour later. The fat and protein slow down digestion, while the fiber in the potato and avocado support stable blood sugar. That’s not marketing speak—that’s actual nutritional science that you can feel in your body.
The chorizo is worth mentioning specifically because it’s a seasoned meat product with spices that actually enhance digestion and nutrient absorption. Cumin, paprika, and garlic all have compounds that support gut health. Your body isn’t just getting calories; it’s getting compounds that make you work better.
Make-Ahead Guide: Meal Prep Like a Professional
If you’re prepping these for the week ahead, here’s how I do it in my own kitchen:
Sunday Prep (60 minutes total time): Cook all three components (chorizo, vegetables, eggs) and let them cool to room temperature. Store in separate airtight containers in the refrigerator. The chorizo and potatoes will keep for 5 days. The eggs will keep for 4 days (they dry out faster). Write the date on each container.
Weekday Assembly (3 minutes per burrito): Warm your tortillas, reheat each component gently in the microwave (chorizo mixture: 30-45 seconds; eggs: 20-30 seconds), and assemble. Fresh tortilla, warm filling, fresh avocado (add this fresh, never store it with the burrito), and you’re eating breakfast in under 10 minutes.
Alternative Method—Full Assembly on Sunday: If you want grab-and-go burritos, assemble them completely on Sunday (skip the avocado). Wrap individually in foil and freeze immediately. Each morning, grab one, unwrap, and microwave for 90-120 seconds. Less fresh avocado this way, but you get true convenience.
The Seasonal Variation You Haven’t Considered: In summer, I add fresh cilantro and use lime juice instead of sour cream. In fall and winter, I add roasted poblano pepper and increase the garlic. In spring, I add fresh asparagus or snap peas to the veggie mix. The core technique stays the same—only the vegetables change.
Nutrition Information
Per burrito (based on USDA FoodData Central nutritional analysis, makes 6 burritos):
- Calories: 485
- Protein: 18g
- Fat: 28g (including 9g saturated fat)
- Carbohydrates: 38g
- Fiber: 4g
- Sodium: 680mg
This is a substantial breakfast that provides legitimate fuel. The protein and fat combination means you’re not crashing at mid-morning. If you’re sodium-conscious, use low-sodium chorizo and reduced-salt cheese—you’ll save about 200mg per burrito without sacrificing flavor.
What Can I Serve With Chorizo And Potato Burritos?
These burritos are actually complete meals on their own, but here are some complementary items that turn breakfast into an entire experience:
- Fresh fruit on the side — Sliced orange, berries, or melon provide brightness and cut through the richness of the burrito. I usually aim for about ½ cup of fruit per person.
- Refried beans — A small cup of warm refried beans (or black beans, if that’s what you have) on the side adds another layer of comfort and heartiness. They’re perfect for dipping.
- Avocado toast on the side — If you want to go bigger, toast some good bread and spread with the extra avocado. It’s gilding the lily, but sometimes that’s the right move.
- Mexican rice or Spanish rice — A small portion (½ cup) of seasoned rice alongside the burrito makes this feel like restaurant service.
- Fresh salsa and hot sauce selection — Put out three different salsas (mild, medium, hot) so everyone can customize their heat level. This is how you make breakfast interesting without much effort.
- Fresh cilantro and lime wedges — These aren’t traditional sides, but they’re beautiful garnishes that make people feel cared-for.
My personal favorite pairing is cold brew coffee alongside these burritos. The brightness of good coffee next to the richness of the filling creates perfect balance.

Chorizo And Potato Burrito Recipe
Ingredients
Method
- Place your large skillet over medium-high heat. Let it get hot for about one minute—you should feel significant heat radiating from it when you hold your hand a few inches above the surface. Add the chorizo to the dry pan (no oil needed; chorizo releases its own fat as it cooks). This is important: you're not adding it all at once and stirring gently. You're breaking it apart with a wooden spoon or spatula as it hits the hot pan, encouraging it into small, bite-sized pieces. Here's what you're listening for: the chorizo should sizzle immediately when it hits the pan. If it doesn't, your pan isn't hot enough—wait another 30 seconds. As it cooks, you'll see it go from raw-looking reddish-brown to darker brown with crispy edges. The house will smell incredible—spiced, slightly smoky, deeply savory. This takes 7-8 minutes total. You want the chorizo broken into small pieces (no large chunks) and showing some browning on the edges, not still wet-looking. When it's done, transfer the cooked chorizo to a clean plate using a slotted spoon. This leaves behind all the delicious fat in the pan—don't drain it. That fat is liquid gold for cooking your vegetables.
- Keep that same skillet on medium-high heat. Add the olive oil to the chorizo fat in the pan. Now add your diced potatoes, diced bell pepper, and diced onion. Stir everything together so the vegetables are coated in the oil and fat. Sprinkle the salt and pepper over top and stir again. Here's what happens next: the vegetables will make a sizzling sound. They'll release moisture and start to soften. Your job is to stir every two to three minutes rather than constantly fussing. This gives the potatoes a chance to actually brown on their edges instead of steaming themselves soft. You're looking for potatoes that are golden brown in places, tender inside when you poke them with a fork, and not mushy. The onion should be translucent and slightly caramelized at the edges. The pepper should be soft but still hold its shape. This takes 10-12 minutes total. In the last minute of cooking, add your minced garlic and stir constantly. Garlic burns quickly and turns bitter if you're not watching, so don't step away during this final minute. You'll know it's done when the garlic smells fragrant (not burned and acrid) and the potatoes are genuinely fork-tender. Transfer the cooked vegetables to the plate with the chorizo. Keep them separate for now—you'll be combining everything when you assemble the burritos.
- While the vegetables are still cooking, grab your medium mixing bowl. Crack all 8 eggs directly into the bowl. Add the milk. Using a whisk or fork, beat the eggs and milk together vigorously for about 30 seconds. You want everything homogeneous—no streaks of white egg white, no separated yolks. The mixture should be pale yellow and uniform. This is the moment to notice: does it smell like raw eggs? Yes. That's completely normal and expected. Once cooked, it'll smell warm, buttery, and delicious.
- Place your medium nonstick skillet over medium-low heat. Add the butter and let it melt completely, swirling it around to coat the entire pan. Once the butter is foamy and fragrant, pour in your egg mixture. This is critical: keep the heat at medium-low. Too high and your eggs cook too fast, becoming rubbery and dry. Too low and they'll take forever and get watery. Let the eggs sit undisturbed for about 30 seconds. You'll see them start to set around the edges. Using your spatula, gently push the set eggs toward the center of the pan and tilt the pan slightly so the uncooked egg flows to the edges. Repeat this motion every 20-30 seconds. This creates larger curds of egg rather than tiny, overworked scrambled pieces. Watch for the moment when most of the egg is set but still slightly glossy and wet-looking. This is the moment you pull the pan off the heat. The residual heat will continue cooking the eggs for another 10 seconds, and they'll finish perfectly creamy. If you wait until they look completely cooked in the pan, they'll be slightly overcooked by the time they get to your burrito. This takes 4-5 minutes total, and it's where the difference between creamy and rubbery eggs lives.
- This might seem like a small step, but warm tortillas roll. Cold tortillas tear. Stack your six flour tortillas on a microwave-safe plate. Dampen a paper towel under cool running water (squeeze out the excess—you want it moist, not soaking wet). Lay the damp paper towel over the tortillas. Microwave on high for 30 seconds. Open the microwave and carefully touch a tortilla at the edge. It should be warm and flexible. If it's still a bit stiff, microwave for another 15 seconds. Keep the damp paper towel over the stack while you work so they stay warm. You've got about 5-7 minutes before they start cooling down, so work efficiently but not frantically.
- Lay one warm tortilla flat on your work surface. Here's the filling ratio that works beautifully: imagine the tortilla divided into three vertical sections. You're going to fill only the bottom third of the tortilla—this is the most common mistake beginners make, and it's an easy one to catch and prevent. In this bottom third, layer in order: first, a handful of scrambled eggs (roughly ⅓ cup); then some of the chorizo and potato mixture (about ¼ cup); then a small pinch of shredded Cheddar (maybe 1 tablespoon); then 2-3 slices of avocado; then a tiny dollop of sour cream. Now the rolling: Fold the bottom edge of the tortilla up and over the filling, creating a tight cylinder. Don't roll loosely—you want it snug. Once you've rolled it once (and the filling is now wrapped), fold in the left and right sides of the tortilla, creating a envelope-like closure. Then continue rolling upward until the entire tortilla is wrapped around the filling. The burrito should be compact, with the seam facing down. Place it on a plate seam-side down—this helps it stay sealed and looks prettier. Repeat with the remaining five tortillas.
- Serve the burritos immediately while they're warm. Alongside each burrito, offer small bowls or ramekins of salsa and sour cream for people to drizzle or dip as they like. The avocado inside keeps things creamy, but the extra sour cream and salsa add brightness and richness that make every bite more interesting. If you're making these ahead of time (more on that later), wrap each cooled burrito tightly in foil and store in the refrigerator. Reheat by unwrapping and microwaving for 60-90 seconds, or wrapping back in foil and warming in a 350°F oven for 15-20 minutes. The oven method keeps the tortilla from getting tough.
Nutrition
Notes
Tried this recipe?
Let us know how it was!FAQs
Can I make these burritos vegetarian?
Absolutely. Skip the chorizo (you won’t miss it—the eggs, potatoes, and cheese are the stars). Roast or sauté extra vegetables instead: add zucchini, mushrooms, spinach, or broccoli to increase volume. Season aggressively with cumin, paprika, and garlic powder to get that same warm, spiced flavor that makes chorizo special. You’ll still get a satisfying, filling breakfast burrito. The technique is identical; you’re just changing the protein source.
What if I can’t find fresh chorizo?
Fresh chorizo is ideal, but you can use crumbled cooked chorizo from a package (the kind you find precooked in the meat section). You’ll get similar flavor, though it won’t brown quite as nicely. Add an extra tablespoon of olive oil to the pan so it gets some color. Spanish chorizo (the sliced kind) works too—just cube or crumble it before cooking. The flavor profile shifts slightly (Spanish is smokier, Mexican is spicier), but both taste delicious.
Can I make these with corn tortillas instead of flour?
Corn tortillas are more authentic in many regions, but they’re also more prone to tearing. You’d need 2-3 corn tortillas per burrito to have enough structural support. The rolling technique stays the same, but you might find it easier to overlap two tortillas slightly