This post contains affiliate links. As an Amazon Associate I earn from qualifying purchases.
Picture this: it’s the middle of winter, and you’re standing in your kitchen at 3 PM on a Saturday afternoon. The light is soft and golden through the windows, and you’ve got time to create something that’ll make your entire family forget about the cold outside. That’s when chocolate lasagna comes to mind—a showstopper dessert that looks like you spent hours in a professional kitchen, but honestly? We’re going to build it in layers that practically assemble themselves. If you love make-ahead desserts that impress without stress, this is your moment. And if you’re looking for more decadent treats that fit the same elegant-but-approachable vibe, check out our this simple cake and this simple cake for inspiration.
The Chocolate Lasagna Recipe That Steals Every Occasion
I grew up watching my grandmother layer desserts with the same precision she brought to savory cooking. She’d say that presentation was half the battle—that people eat with their eyes first. This chocolate lasagna is exactly that philosophy in a 9×13 pan. I created this recipe during a particularly hectic holiday season when I needed something that could be made ahead, looked absolutely stunning, and tasted like pure indulgence without requiring culinary school credentials. My family’s reaction? Absolute silence the first bite, followed by “can you make this every time we gather?” That’s when I knew I’d nailed it.
When to Make Chocolate Lasagna Recipe
This dessert isn’t just for random Tuesdays—though honestly, it could be. This is the recipe for moments when you want to feel like you’ve created something extraordinary. Let me paint some specific scenarios where this absolutely shines:
- Holiday Dinner Parties (Thanksgiving, Christmas, New Year’s Eve) – You can make this three days ahead, and it actually tastes better as flavors meld. Plus, one dessert that feeds a crowd means less stress on your day-of timeline. No last-minute frosting or flambéing required.
- Spring and Summer Gatherings – When temperatures climb, this chilled chocolate creation becomes your MVP. Make it the night before, and it’s ready to present without heating up your kitchen. It’s especially perfect for outdoor entertaining where you need something that travels well in a cooler.
- Milestone Celebrations (Anniversaries, Promotions, Birthdays) – This feels fancy enough for special occasions but achievable enough that you can execute it perfectly even if cooking isn’t your primary love language. The visual impact of those layers speaks volumes about the care you’ve invested.
- Cold Weather Comfort (Winter Weekends, Cozy Nights In) – There’s something about chocolate and cream when the world outside is gray. Make this on a snowy Sunday afternoon and watch how it transforms the mood of your home.
What Makes This Chocolate Lasagna Recipe Special
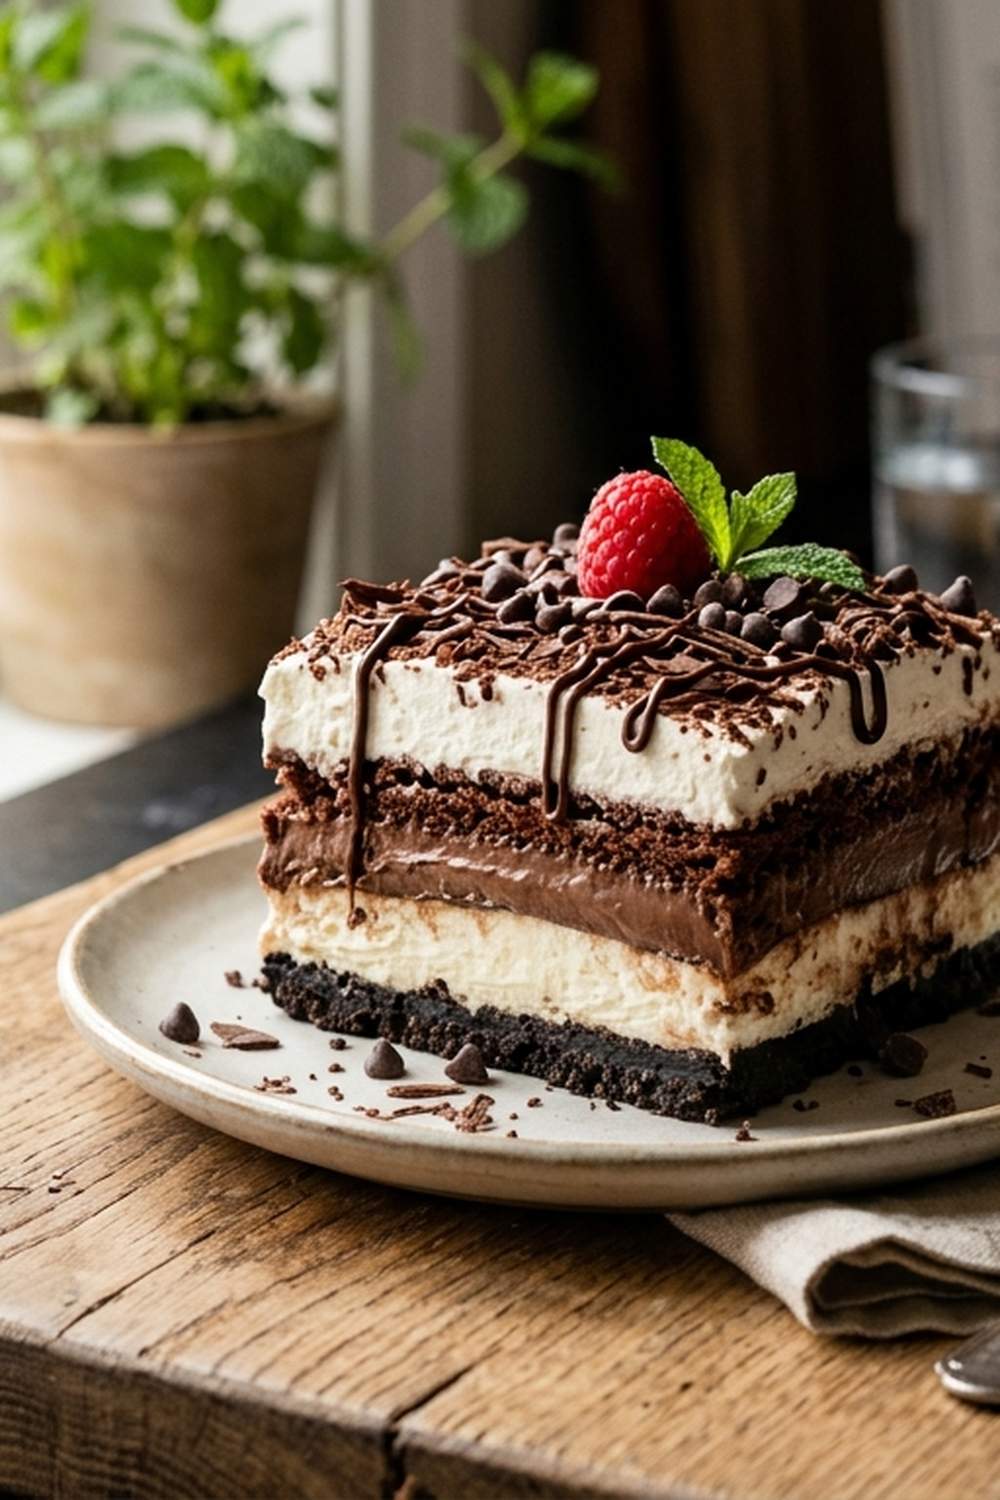
Here’s what elevates this from “nice dessert” to “what IS this magic?” First, we’re building with texture contrast—the crunchy cookie crust, the silky cream cheese layer, the dense chocolate pudding middle, and the cloud-like whipped topping. Each spoonful is an experience, not just sweetness on a plate. Second, this recipe works with items most of us already have or can grab from any grocery store. There’s no hunting for specialty chocolate or tempering involved. Third—and this matters for people who want to entertain—we’re building confidence through layers. Each component sits and sets, giving us natural checkpoints where we can pause, breathe, and ensure everything’s perfect.
From a technical standpoint, I’m using the science of gelatin-based pudding and the stability of whipped topping to create a structure that holds beautifully for days. The cream cheese layer acts as a flavor bridge, preventing the cookie crust from absorbing moisture while keeping the pudding from being too heavy. It’s constructed comfort, and that’s what makes it special.
Scaling for Your Crowd
One of my favorite things about this recipe is its flexibility. Whether you’re serving two or twenty, we can adjust without losing the structural integrity or flavor balance. Here’s how I think about scaling:
- For 4-6 people (intimate gathering) – Make the full recipe as written in a 9×13 pan. You’ll have generous servings with maybe one or two leftover portions. Even for small groups, this quantity makes sense because the make-ahead nature means you’re not scrambling day-of, and the leftovers are genuinely better after a day or two in the fridge.
- For 8-12 people (standard dinner party) – Make the recipe exactly as written. This yields approximately 12-16 servings depending on how generously you cut. If you want larger portions, make 1.5 times the recipe and use two 9×13 pans, staggering your assembly by 10 minutes so one layer isn’t setting while you’re still building the other.
- For 15+ people (crowd feeding) – Double the entire recipe completely and use two 9×13 pans. Follow the same timeline, but give yourself an extra 15 minutes between each layering step since you’re working with double volume. Pro tip: assemble both pans at the same time so they chill together and are ready simultaneously.
- For 2 people (just for us) – Make the full recipe and freeze half in an airtight container for up to two months. Or, scale everything by 60% and use an 8×8 baking dish instead. The timing remains the same; you’re just working with smaller quantities. The beauty is that this actually tastes better after 24 hours, so even for two people, the full batch works because you get multiple perfect servings across several days.
The Ingredients
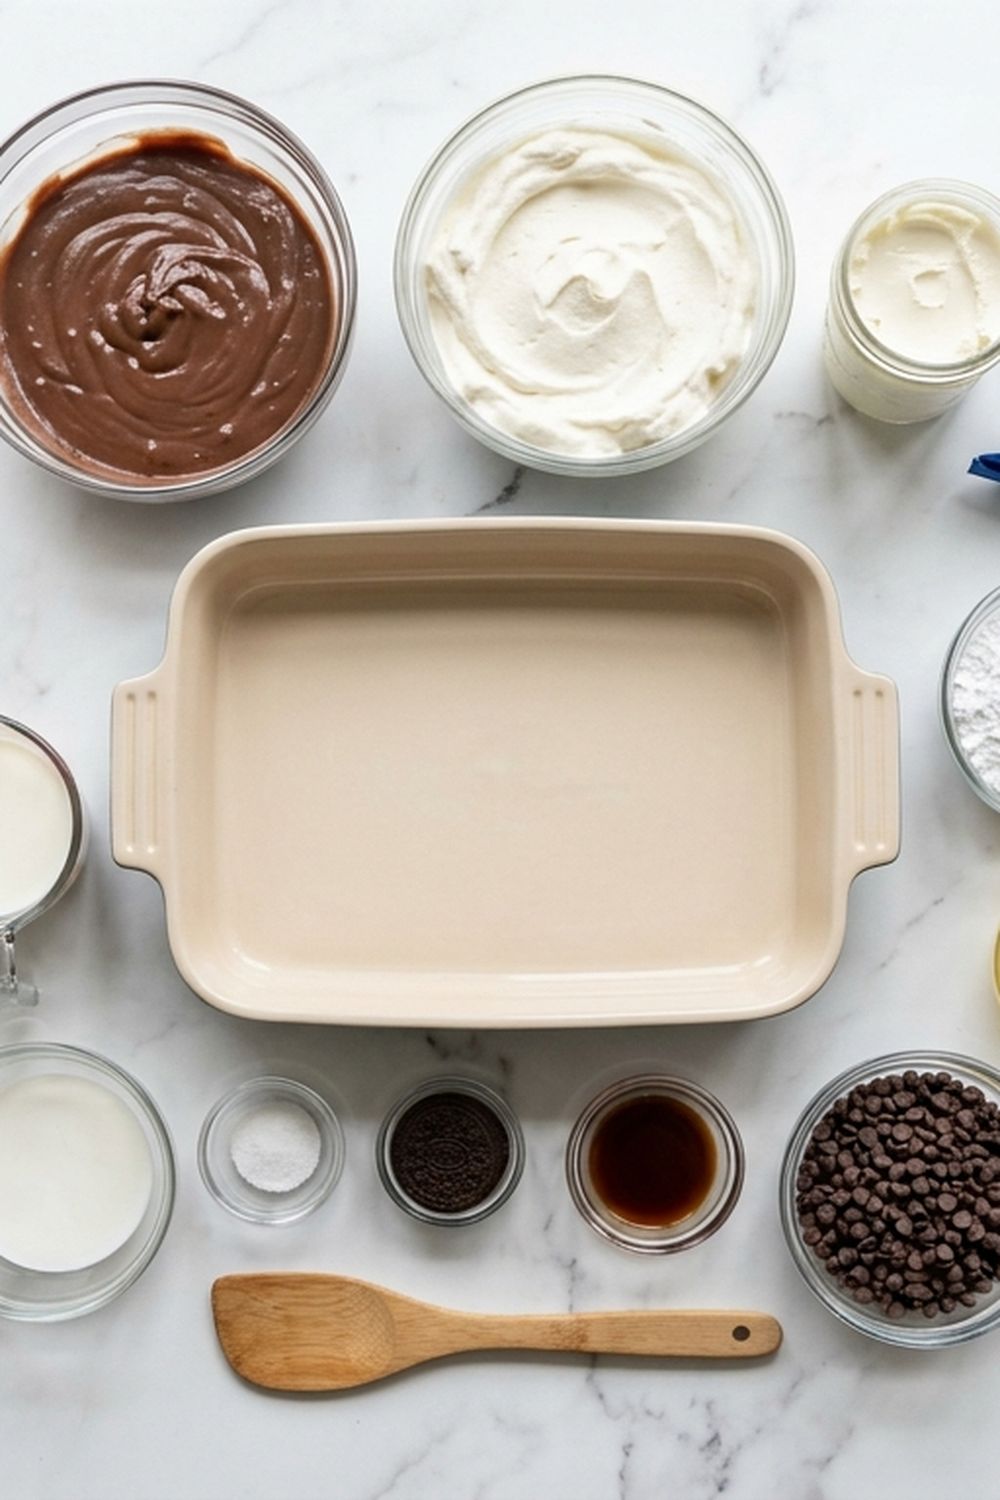
Here’s everything you need to build this impressive layered dessert. Each ingredient serves a specific purpose in the structure, so I’ve included notes about why they matter:
- 2¾ cups cold whole milk (creates proper pudding consistency when whisked with the dry mix)
- 2 tablespoons whole milk (1% or full-fat works, helps achieve the right consistency in the cream cheese mixture)
- 36 sandwich-style cookies with cream filling intact, such as Oreos (the full package, unopened, crushed into fine crumbs creates our structural foundation)
- 1 teaspoon vanilla extract (optional but recommended, enhances the chocolate without competing)
- 6 tablespoons unsalted butter (melted and cooled slightly, binds the cookie crumbs into a cohesive crust)
- Pinch of fine sea salt (rounds out the sweetness and deepens chocolate notes, professional touch many home cooks skip)
- ¼ cup granulated sugar (adds sweetness to the cream cheese layer without overwhelming it)
- 8 ounces cream cheese (softened to room temperature at least 30 minutes before mixing, ensures smooth blending without lumps)
- 7.8 ounces instant chocolate pudding mix, unprepared (two 3.9-ounce boxes for deep chocolate flavor without cooking)
- 16 ounces whipped topping, non-fat (divided into two 8-ounce containers kept separate, creates cloud-like layers)
- ¾ cup miniature chocolate chips (scattered across the top layer as the final flourish)
Yield: Makes 12-16 generous servings depending on portion size
How to Make Chocolate Lasagna Recipe for Your Occasion
I’m going to walk you through this step-by-step, and I promise that even if you’ve never made a layered dessert before, you’ll feel like a pastry chef by the time you’re done. The key is giving each layer time to set properly—this isn’t a rush job, but the actual hands-on time is maybe 20 minutes spread across the afternoon. Think of it as a meditation practice where you’re building something beautiful.
Step 1: Create the Cookie Crust Foundation
First, we’re going to transform those sandwich cookies into fine crumbs. You have two routes here: the food processor method (my preference for pristine, even crumbs) or the zip-top bag method (my backup when I don’t want to wash extra equipment). If using a food processor, place about 18 cookies at a time inside and pulse until you’ve got uniform crumbs that look like damp sand. Don’t overthink it—you want fine pieces, not dust, and definitely not whole cookies still visible. If using the bag method, seal your cookies inside a gallon-sized zip-top bag and use a rolling pin to crush them thoroughly, working systematically from one end to the other. This method actually works beautifully and takes about four minutes. Important tip: leave the cream filling in place—those cookies with their centers intact are crucial for flavor and binding.
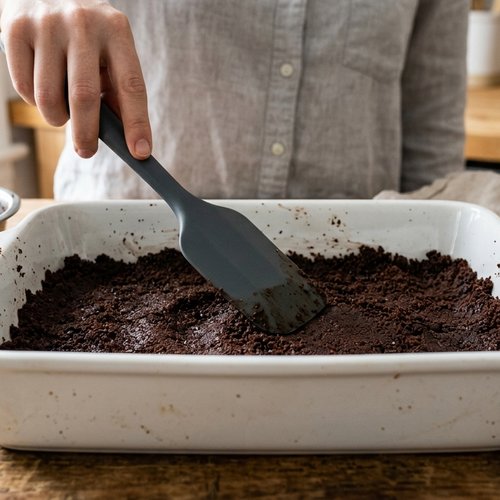
Once you have your crumbs, pour them into a medium bowl and add your melted, slightly cooled butter. Stir this mixture until every single crumb is coated and moistened—you’re looking for the texture of wet sand at the beach. This usually takes about 1-2 minutes of consistent stirring. The butter is your binder, so this step matters.
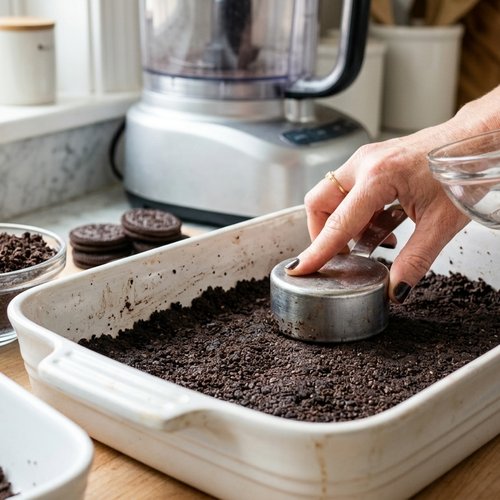
Step 2: Press the Crust into Your Pan
Pour the buttered crumbs into your 9×13 baking dish and begin pressing firmly and evenly across the entire bottom. I use a spatula or the flat bottom of a measuring cup for this, working from the center outward. Press down with confidence—you want an even, compact layer about ¼-inch thick. This becomes your foundation, so take an extra 30 seconds here to make sure it’s level. If you have time and a freezer available, pop this crust in for 15-20 minutes. This step is optional but makes spreading the next layer infinitely easier because the crust firms up and provides a stable surface.
Pro tip from my kitchen: If your butter melted too warm, place the finished crust in the fridge for 10 minutes before moving to the next step. A firm crust means clean, confident layers.
Step 3: Build the Silky Cream Cheese Layer
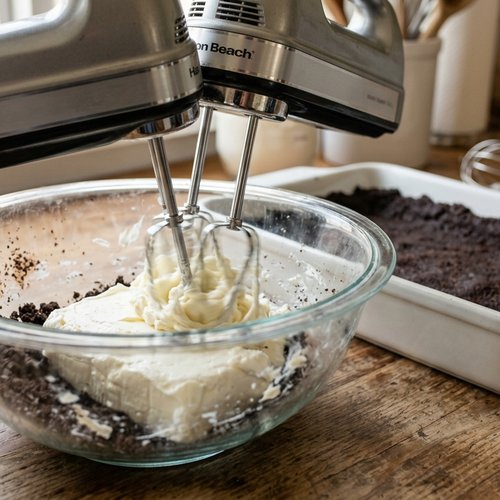
Use the same medium bowl (no need to wash—those cookie crumbs add nothing harmful here) and add your softened cream cheese. With a hand mixer on medium speed, beat this cheese until it’s light and fluffy, about 1-2 minutes. You’ll notice it going from dense and thick to noticeably lighter in texture and paler in color. This aeration matters—it creates airiness in the layer. Now, add your 2 tablespoons of milk and ¼ cup sugar, mixing until completely smooth with no lumps visible. This should take another 30 seconds of mixing.
Next comes the technique that elevates this: gently fold one of your 8-ounce containers of whipped topping into the cream cheese mixture. Use a spatula and fold (don’t stir—folding preserves airiness), making about 8-10 folds until the white streaks disappear and you have one cohesive, fluffy mixture. This now has the texture of mousse.
Spread this mixture evenly over your cookie crust, using an offset spatula or the back of a spoon to create an even layer about ½-inch thick. Return the pan to the refrigerator for about 10 minutes. This brief chill sets the cream cheese layer just enough that the next layer won’t sink into it, maintaining those beautiful distinctions between flavors.
Step 4: Create the Chocolate Pudding Layer
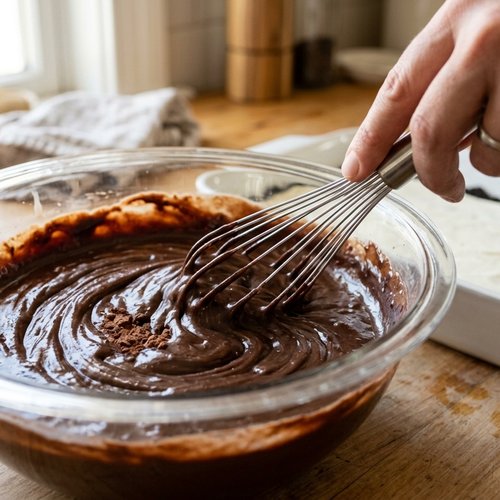
While that cream cheese sets, pour your 2¾ cups of cold milk into a large bowl and add both boxes of instant chocolate pudding mix (unprepared, straight from the box). Using your hand mixer on medium speed, beat this for about 1-2 minutes until you see it beginning to thicken noticeably. You’re looking for it to reach soft-serve ice cream consistency—it should coat the back of a spoon but still be pourable. Don’t overbeat or you’ll create a grainy texture. This is the one step where timing matters because pudding can seize up quickly once beaten.
Remove your pan from the fridge and spread the chocolate pudding mixture evenly over the cream cheese layer. Use that same spatula to create an even surface, about ½-inch thick. The pudding is forgiving—don’t stress about perfection here because the final layer will cover any imperfections. Return to the refrigerator for another 10 minutes.
Why instant pudding? I’m using the instant version specifically because it requires no cooking and achieves proper consistency in minutes. The cornstarch and thickening agents are already engineered into the mix, creating a stable layer that won’t weep or separate.
Step 5: Crown with Whipped Topping and Chocolate Chips
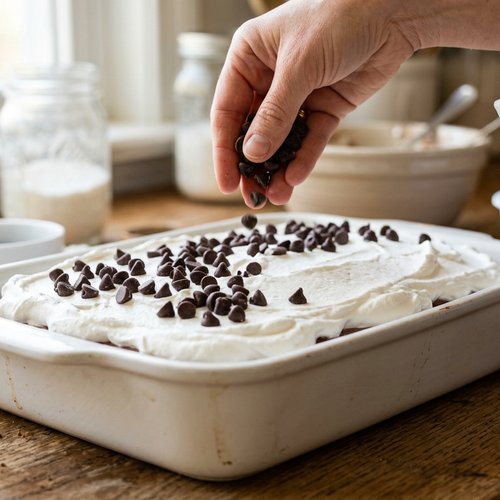
Once your pudding layer has set for those 10 minutes, remove the pan from the fridge. Take your second 8-ounce container of whipped topping (the one you haven’t used) and gently spread it evenly over the chocolate pudding. You want a generous ½-inch layer here because this is your crowning beauty. Use an offset spatula or the back of a spoon, working gently so you don’t disturb the pudding layer below. Here’s the pro move: dip your spatula in warm water and wipe it dry between strokes—this creates smooth, even coverage instead of a streaky appearance.
Finish by scattering your ¾ cup of miniature chocolate chips across the entire surface. These do two things: they look stunning and they add one more textural element when you bite into the finished dessert. A light sprinkle is elegant; a heavy scatter is also delicious—you choose the vibe you want.
Step 6: Final Chill and Serve
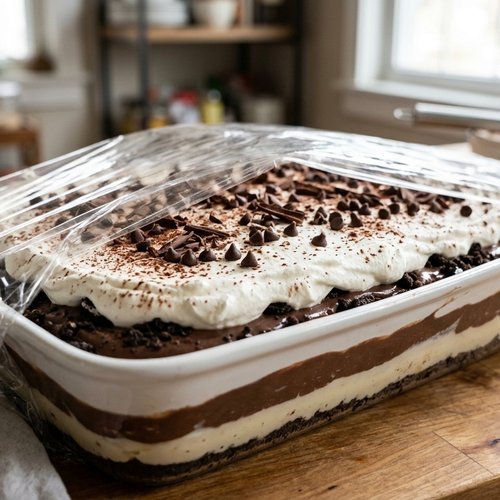
Cover your pan loosely with plastic wrap (you don’t want it touching the whipped topping) and refrigerate for at least 4 hours before serving. I genuinely recommend overnight chilling because the flavors deepen and marry together beautifully. The structure also becomes more stable, which means cleaner cuts and a more impressive presentation. If you’re in a time crunch, 4 hours is your minimum, but I promise 24 hours is better.
When ready to serve, use a sharp knife dipped in warm water (wipe between cuts for cleanliness) and cut into 12-16 pieces. The warm knife prevents the whipped topping from bunching up and the chocolate chips from dragging. Serve cold, directly from the pan or on individual plates with a light dusting of cocoa powder if you want to fancy it up.
Expert’s Nutritional Tip
One thing I always mention when developing recipes with whipped topping: the non-fat variety I’m using here is actually lighter in calories and saturated fat than traditional whipped cream, which is why I chose it. However, it contains added sugars and stabilizers that full-fat whipped cream doesn’t require. If you have access to quality heavy cream and want to make your own whipped topping (just whip with a tablespoon of powdered sugar), that’s absolutely an upgrade path. From a nutritional standpoint, you’re looking at roughly 245 calories per serving in the recipe as written, with about 12g of sugar and 10g of fat. The instant pudding provides calcium and adds richness without the heaviness of cooked chocolate custard. Not health food, obviously, but constructed with genuine attention to balance within the indulgence.
Make-Ahead Timeline
- Three days before – Crush your cookies and store them in an airtight container at room temperature. This saves you 5 minutes on assembly day and you can grab them whenever you’re ready to build.
- Two days before – Make the entire dessert following the complete recipe. Cover with plastic wrap and refrigerate. It actually improves after 24 hours as flavors meld and the structure becomes more stable.
- One day before – If you haven’t made it yet, now’s the time. This timing gives you a finished dessert that’s perfect by your serving date and allows you to focus on other menu items the day of.
- Day of event – Remove from the refrigerator about 10 minutes before serving (optional, helps the flavors open up slightly). Cut, plate, and serve. That’s it. You’re done with this component and can focus on everything else.
How to Present and Plate Chocolate Lasagna Recipe
The beauty of this dessert is that it’s already gorgeous in the pan, but when you plate individual servings, those layers become the star. Here’s how I present it to maximum impact:
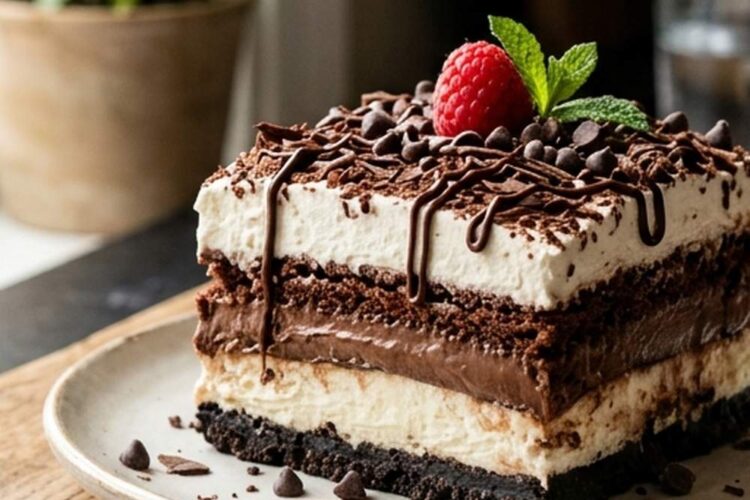
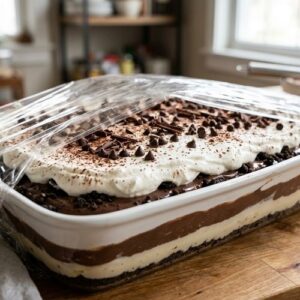
- Use a sharp, warm knife for clean cuts – Dip your knife in hot water, wipe it dry, and cut through to the bottom of the pan in one confident motion. The warmth prevents the whipped topping from bunching and keeps chocolate chips from dragging. You’ll get a clean cross-section showing all four layers, and that visual is half the appeal.
- Plate on chilled dessert plates with intention – Chill your serving plates for 10 minutes before plating. This keeps the dessert cold longer and creates a professional presentation. Position each square slightly off-center, leaning it at a subtle angle so those layers are visible from the front.
- Add a finishing garnish – A light dusting of cocoa powder on the white whipped topping creates contrast and sophistication. Or add a fresh mint leaf if you’re leaning into a more refined presentation. A few extra chocolate chips scattered around the plate (not on the dessert itself) adds visual interest without overdoing it.
- The pan presentation – For casual gatherings, serve straight from the pan with a spatula. Cut into squares and let guests see those layers as you serve. There’s something approachable and inviting about that presentation—it says “I made this and I’m proud of it.”
Seasonal Variations
- Spring and Summer Version: Chocolate-Mint Lasagna – Add ½ teaspoon of peppermint extract to your cream cheese layer for a refreshing chocolate-mint combination. Replace regular chocolate chips with chocolate-covered mint chips on top. Switch your sandwich cookies to mint-filled versions if available. This version feels lighter and brighter, perfect for warm weather entertaining when you want chocolate but not pure heaviness.
- Fall and Winter Version: Chocolate-Espresso Lasagna – Add 1 teaspoon of instant espresso powder dissolved in the 2 tablespoons of milk before mixing your cream cheese layer. Replace regular chocolate pudding with chocolate-espresso instant pudding (or make chocolate pudding and add ½ teaspoon espresso powder). Sprinkle the top with espresso powder mixed with a tiny bit of cocoa powder before adding chocolate chips. This deepens the chocolate and adds sophistication—perfect for holiday gatherings and winter entertaining.
What to Serve Alongside Chocolate Lasagna Recipe
One dessert doesn’t exist in a vacuum—it’s part of a complete dining experience. Here’s how I build a menu around this showstopper, thinking about balance and flow:
Since this is a rich, decadent finale, I serve lighter main courses beforehand. If you’re doing a full dinner party, pair this with something like a simple grilled chicken or fish dish, something with fresh vegetables that won’t compete with the chocolate. You want your guests’ palates refreshed before they hit the dessert course, not already heavy from butter-laden mains.
- Beverage pairing – Strong coffee, espresso, or hot tea cuts through the richness beautifully. Cold milk is also excellent and feels nostalgic. For evening events, I often offer dessert wines or a simple Brachetto d’Acqui sparkling wine that complements chocolate without overpowering it. Non-alcoholic option: serve with sparkling water and fresh lemon to cleanse the palate between bites.
- Before-dessert course – A simple green salad with vinaigrette or something like my favorite salad right before dessert refreshes the palate and prepares your guests for the richness coming. The acidity and brightness are crucial counterpoints.
- Complementary small bites – If you’re doing an elegant coffee and dessert evening, add fresh berries (raspberries or strawberries) alongside each plate. The tartness contrasts beautifully with the chocolate richness. Or offer a small cookie like a biscotti for dunking in coffee.
- Make it a dessert board – Serve this alongside something lighter like this simple cake for a varied dessert spread. Guests can choose their richness level, and you’ve covered multiple flavor profiles in one menu.
Can I Store Chocolate Lasagna Recipe?
Storage is actually one of this dessert’s superpowers. Here’s exactly how to keep it perfect:
Refrigerator: Cover tightly with plastic wrap and refrigerate for up to 5 days. The flavors actually improve on day 2-3 as everything melds together. After day 4, the cookie crust begins absorbing moisture and becomes softer (not bad, just different), so I recommend enjoying it by day 4 if you want that original texture contrast.
Freezer: You can freeze the entire uncut pan, wrapped tightly in plastic wrap and then aluminum foil, for up to 2 months. When you’re ready to serve, thaw in the refrigerator for about 8 hours, then allow 10 minutes at room temperature before cutting. The texture remains nearly identical because we’re not dealing with temperature-sensitive components like fresh fruit or delicate pastry.
Individual slices: If you’ve already cut the pan into pieces, wrap individual slices in plastic wrap and then aluminum foil. These keep for 3-4 days in the fridge and up to 6 weeks in the freezer. Thaw at room temperature for about 20 minutes before eating if you prefer it slightly less cold.
Pro move for entertaining: Make this 2-3 days before your event and keep it refrigerated. The make-ahead nature means zero stress on your hosting day—this component is completely finished and ready to serve.
Common Mistakes to Avoid
- Not letting your cream cheese soften enough – This is the number one issue I see. Cold, straight-from-the-fridge cream cheese won’t blend smoothly and creates lumpy texture in your layer. Set it on the counter 30 minutes before using. Non-negotiable. If you forget, microwave it in 10-second bursts, stirring between, until it’s soft but not melted.
- Overbeating the pudding – I know it’s tempting to keep mixing until it’s completely firm, but instant pudding seizes up and becomes grainy if overworked. Beat for 1-2 minutes, you’ll see it thicken noticeably, and then stop. Trust the process. Grainy pudding layer ruins the texture of the whole experience.
- Skipping the chill time between layers – I recommend 10 minutes between each layer, and I mean it. This isn’t arbitrary. The brief chill sets each layer just enough that the next layer won’t sink into it. You’ll see the difference between layers staying distinct versus everything blurring together if you skip this.
- Not pressing the crust firmly enough – A loose, crumbly crust will fall apart when you serve. Press with confidence, use the bottom of a measuring cup if needed, and don’t be gentle. You want a solid, compact base that holds everything above it. A loose crust is your recipe’s weak point.
Nutrition Information
Per serving (based on 14 servings): 245 calories, 12g fat (7g saturated), 32g carbohydrates, 2g protein, 120mg sodium, 12g sugar. This analysis is based on USDA nutritional database standards for the ingredients listed. Values may vary slightly depending on specific brands used (store-brand instant pudding versus name-brand, for instance). The cream cheese and whipped topping provide the fat content, while the cookies and pudding contribute carbohydrates and sugar. This isn’t a nutritionally dense dessert—it’s intentional indulgence—but it’s proportioned so that one serving satisfies without requiring people to eat multiple slices for that satisfaction.

Chocolate Lasagna Recipe
Ingredients
Method
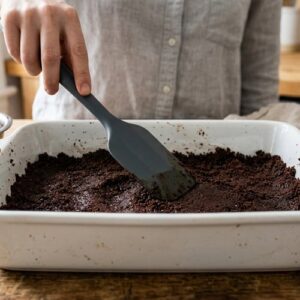
- First, we're going to transform those sandwich cookies into fine crumbs. You have two routes here: the food processor method (my preference for pristine, even crumbs) or the zip-top bag method (my backup when I don't want to wash extra equipment). If using a food processor, place about 18 cookies at a time inside and pulse until you've got uniform crumbs that look like damp sand. Don't overthink it—you want fine pieces, not dust, and definitely not whole cookies still visible. If using the bag method, seal your cookies inside a gallon-sized zip-top bag and use a rolling pin to crush them thoroughly, working systematically from one end to the other. This method actually works beautifully and takes about four minutes. Important tip: leave the cream filling in place—those cookies with their centers intact are crucial for flavor and binding. Once you have your crumbs, pour them into a medium bowl and add your melted, slightly cooled butter. Stir this mixture until every single crumb is coated and moistened—you're looking for the texture of wet sand at the beach. This usually takes about 1-2 minutes of consistent stirring. The butter is your binder, so this step matters.
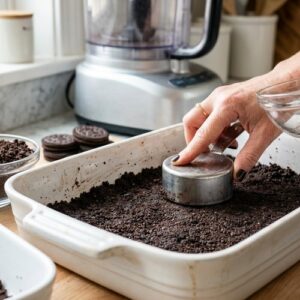
- Pour the buttered crumbs into your 9x13 baking dish and begin pressing firmly and evenly across the entire bottom. I use a spatula or the flat bottom of a measuring cup for this, working from the center outward. Press down with confidence—you want an even, compact layer about ¼-inch thick. This becomes your foundation, so take an extra 30 seconds here to make sure it's level. If you have time and a freezer available, pop this crust in for 15-20 minutes. This step is optional but makes spreading the next layer infinitely easier because the crust firms up and provides a stable surface. Pro tip from my kitchen: If your butter melted too warm, place the finished crust in the fridge for 10 minutes before moving to the next step. A firm crust means clean, confident layers.
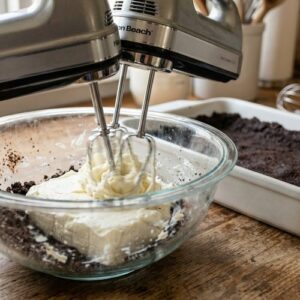
- Use the same medium bowl (no need to wash—those cookie crumbs add nothing harmful here) and add your softened cream cheese. With a hand mixer on medium speed, beat this cheese until it's light and fluffy, about 1-2 minutes. You'll notice it going from dense and thick to noticeably lighter in texture and paler in color. This aeration matters—it creates airiness in the layer. Now, add your 2 tablespoons of milk and ¼ cup sugar, mixing until completely smooth with no lumps visible. This should take another 30 seconds of mixing. Next comes the technique that elevates this: gently fold one of your 8-ounce containers of whipped topping into the cream cheese mixture. Use a spatula and fold (don't stir—folding preserves airiness), making about 8-10 folds until the white streaks disappear and you have one cohesive, fluffy mixture. This now has the texture of mousse. Spread this mixture evenly over your cookie crust, using an offset spatula or the back of a spoon to create an even layer about ½-inch thick. Return the pan to the refrigerator for about 10 minutes. This brief chill sets the cream cheese layer just enough that the next layer won't sink into it, maintaining those beautiful distinctions between flavors.
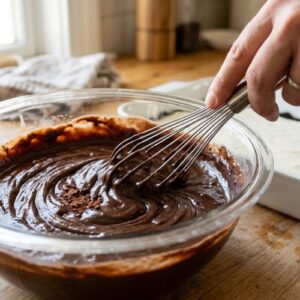
- While that cream cheese sets, pour your 2¾ cups of cold milk into a large bowl and add both boxes of instant chocolate pudding mix (unprepared, straight from the box). Using your hand mixer on medium speed, beat this for about 1-2 minutes until you see it beginning to thicken noticeably. You're looking for it to reach soft-serve ice cream consistency—it should coat the back of a spoon but still be pourable. Don't overbeat or you'll create a grainy texture. This is the one step where timing matters because pudding can seize up quickly once beaten. Remove your pan from the fridge and spread the chocolate pudding mixture evenly over the cream cheese layer. Use that same spatula to create an even surface, about ½-inch thick. The pudding is forgiving—don't stress about perfection here because the final layer will cover any imperfections. Return to the refrigerator for another 10 minutes. Why instant pudding? I'm using the instant version specifically because it requires no cooking and achieves proper consistency in minutes. The cornstarch and thickening agents are already engineered into the mix, creating a stable layer that won't weep or separate.
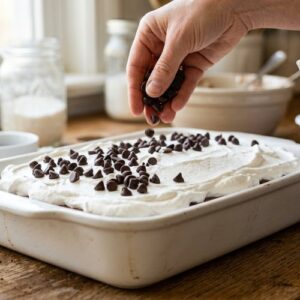
- Once your pudding layer has set for those 10 minutes, remove the pan from the fridge. Take your second 8-ounce container of whipped topping (the one you haven't used) and gently spread it evenly over the chocolate pudding. You want a generous ½-inch layer here because this is your crowning beauty. Use an offset spatula or the back of a spoon, working gently so you don't disturb the pudding layer below. Here's the pro move: dip your spatula in warm water and wipe it dry between strokes—this creates smooth, even coverage instead of a streaky appearance. Finish by scattering your ¾ cup of miniature chocolate chips across the entire surface. These do two things: they look stunning and they add one more textural element when you bite into the finished dessert. A light sprinkle is elegant; a heavy scatter is also delicious—you choose the vibe you want.
- Cover your pan loosely with plastic wrap (you don't want it touching the whipped topping) and refrigerate for at least 4 hours before serving. I genuinely recommend overnight chilling because the flavors deepen and marry together beautifully. The structure also becomes more stable, which means cleaner cuts and a more impressive presentation. If you're in a time crunch, 4 hours is your minimum, but I promise 24 hours is better. When ready to serve, use a sharp knife dipped in warm water (wipe between cuts for cleanliness) and cut into 12-16 pieces. The warm knife prevents the whipped topping from bunching up and the chocolate chips from dragging. Serve cold, directly from the pan or on individual plates with a light dusting of cocoa powder if you want to fancy it up.
Nutrition
Notes
Tried this recipe?
Let us know how it was!FAQs
Can I make this dessert ahead for a party that’s three days away?
Absolutely, and honestly it’s ideal. Make the complete dessert 2-3 days before your event and refrigerate it covered with plastic wrap. The flavors meld beautifully, and you’ll have zero stress on your hosting day. This is one of my favorite aspects of this recipe for entertaining—it’s completely finished days in advance. Just pull it from the fridge about 10 minutes before serving if you prefer it slightly less cold, though it’s delicious straight from the cold.
What if I can’t find the exact sandwich cookies mentioned, or want to use a different type?
The beauty of using sandwich-style cookies is the cream filling, which adds flavor and moisture to your crust. If you can’t find the specific cookies mentioned, any filled sandwich cookie works beautifully—chocolate-filled wafer cookies, peanut butter sandwich cookies, even vanilla are delicious. You might need to adjust your milk slightly in the pudding layer depending on how your crust affects moisture, but the principle remains the same. Just avoid cookies that are overly hard and dense (like biscotti) because they won’t crush into the fine crumbs you need for binding.
Is there a way to make this less sweet for people who prefer less sugar?
You have a couple of options. First, reduce the sugar in the cream cheese layer from ¼ cup to 2 tablespoons—you’ll still get sweetness from the cookies and pudding, but it’s less aggressive. Second, you could use sugar-free instant pudding mix, which maintains the same texture and consistency with reduced sugar. I’d avoid reducing the pudding amount itself because texture depends on proper hydration ratios. Third option: serve smaller portions and pair with something acidic like fresh raspberries or a tart coffee to balance the sweetness perception.
How do I cut clean slices without the whipped topping smudging?
Use a long, sharp chef’s knife and dip it in hot water between each cut, wiping it dry on a clean towel. The warmth slightly softens the whipped topping temporarily, allowing it to cut cleanly without dragging. Work with confident, downward motions rather than sawing back and forth. Some people also freeze the dessert for an extra 30 minutes before cutting (3.5-4 hours of chill time instead of 4 hours) to firm up the whipped topping, which makes cuts even cleaner.
Can I substitute regular whipped cream for the whipped topping product?
Yes, with adjustments. Heavy cream whipped to stiff peaks works beautifully—use 2 cups heavy cream whipped with 2 tablespoons powdered sugar to yield approximately 4 cups whipped cream (about equivalent to your two 8-ounce containers of whipped topping). The texture will be slightly richer and more delicate. The downside is that homemade whipped cream can weep or collapse over several days, so I’d recommend using this option only if you’re serving within 24 hours. For longer storage, stick with the whipped topping product, which has stabilizers designed to hold for days.
More Recipes for Your Table
- Cranberry Sauce Mini Cheesecakes – elegant individual cheesecakes perfect for plated dessert courses at dinner parties
- Mini Pumpkin Greek Yogurt Cheesecake – lighter, seasonal alternative that pairs beautifully on a dessert board alongside rich chocolate desserts
- Almond Bark Cake Pops – bite-sized chocolate treats that complement larger desserts in a mixed spread
There’s something profound about gathering around a table with people you love and sharing something you’ve created with your own hands. This chocolate lasagna represents that philosophy perfectly—it looks like you’ve labored for hours, but you’ve actually created moments of peace and intention as you’ve assembled it. Your guests will taste that care in every layer. They’ll cut through the cloud-like topping, hit the deep chocolate middle, and discover the hidden cookie base, and in that moment, they’ll understand that you were thinking about their joy when you built this. That’s what cooking is really about. I hope you make this soon, and I hope you make it often, and I hope it becomes the dessert people specifically request when they’re celebrating with you. Enjoy!