This post contains affiliate links. As an Amazon Associate I earn from qualifying purchases.
Getting kids to eat a sophisticated dessert like chocolate cherry cheesecake feels impossible—until you try this no-bake approach. I’ve watched countless families transform their dinner table with this recipe, and here’s what I’ve learned: when children have agency in the kitchen and understand what’s going into their food, they’re infinitely more willing to try new flavors. This no-bake version eliminates the intimidation factor of traditional cheesecake, requires zero oven time, and delivers that café-quality result that makes parents feel like culinary wizards. If you’re looking for other make-ahead desserts that family members will genuinely request, try our this simple cake—equally impressive and surprisingly simple.
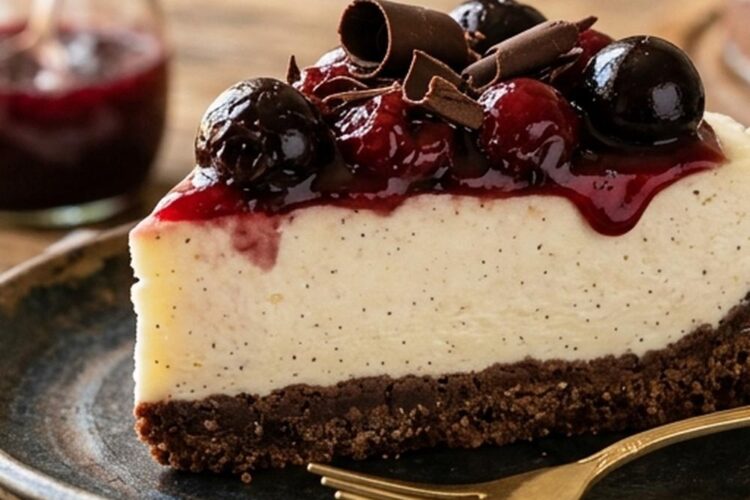
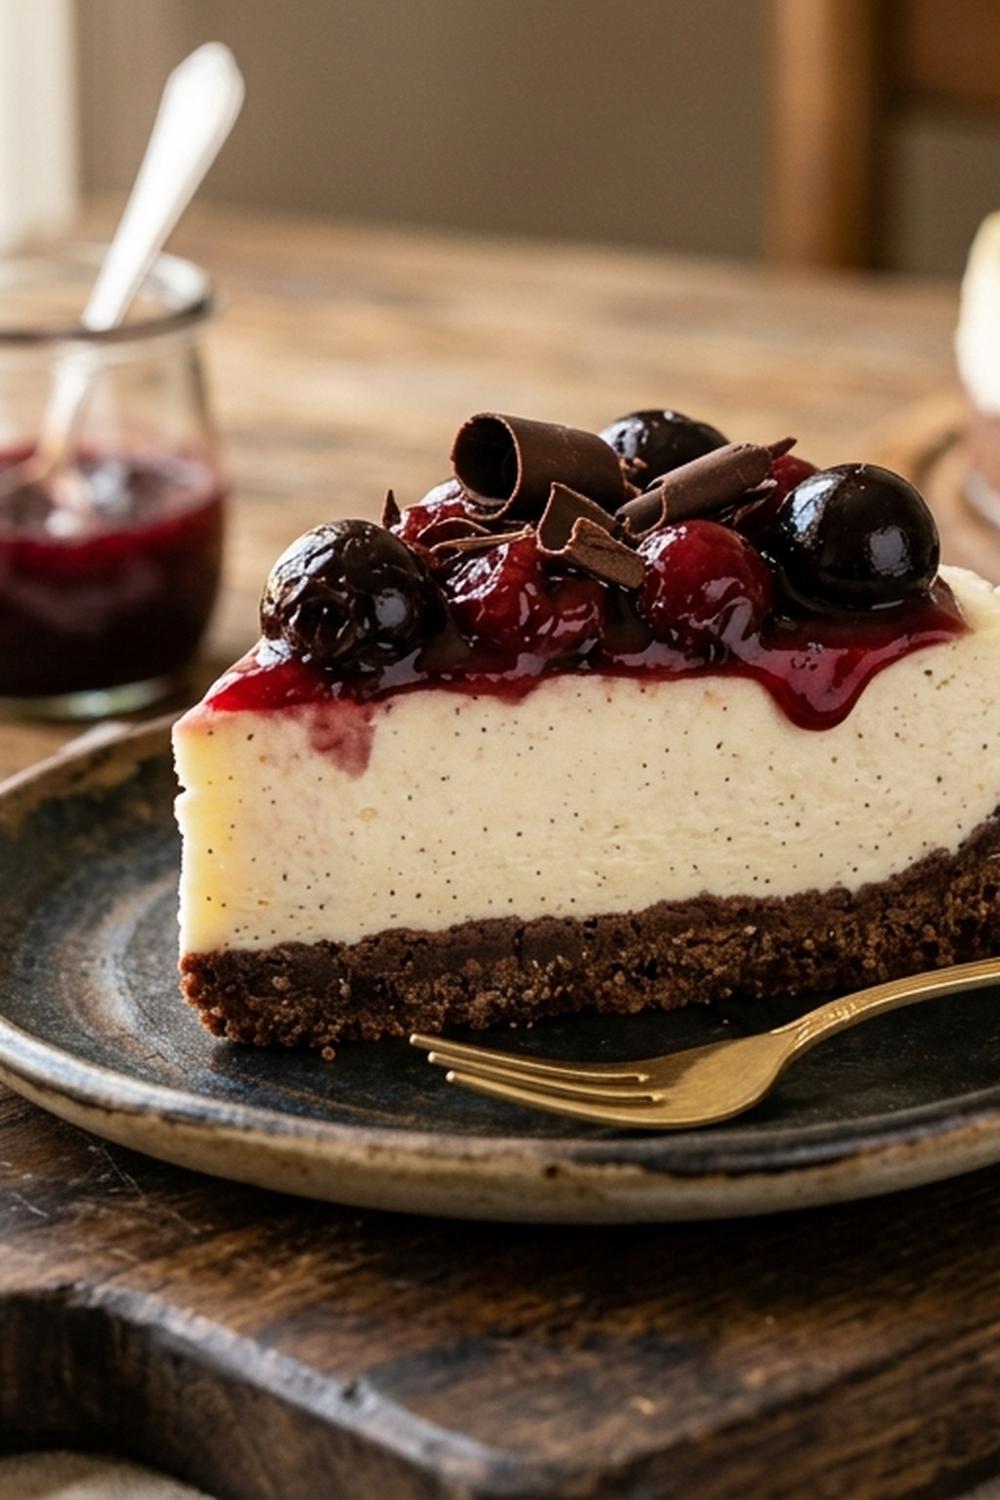
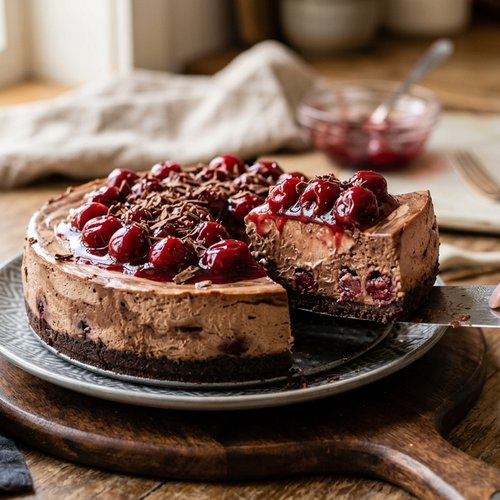
Chocolate Cherry Cheesecake No-Bake Recipe: The Whole Family Will Actually Eat (Picky Eaters Included)
I’ll never forget the afternoon my niece, Emma, who was notoriously resistant to “fancy” foods, watched me assemble this cheesecake. She was seven years old and convinced that anything involving cream cheese was “gross.” But something shifted when she got to help layer the cherry compote—she became invested in the outcome. When we pulled that cheesecake from the refrigerator hours later and she took her first bite, her face lit up in genuine surprise. “This tastes like chocolate-covered cherries,” she said, as if discovering treasure. From that moment forward, it became her signature request for family gatherings.
That’s the magic of this recipe. It bridges the gap between “I don’t like it” and “Can I have seconds?” by combining familiar flavors—chocolate, cherries, and a slightly sweet filling—in a format that feels manageable to assemble and exciting to customize.
Why Kids Love This Version
This no-bake chocolate cherry cheesecake works because it taps into what actually motivates picky eaters: textural contrast, visible ingredients they recognize, and the ability to control their own portion and toppings. The crumbly cookie crust is something kids inherently understand. The silky cheesecake layer feels luxurious without being intimidating. And the jewel-toned cherry topping is visually stunning—something that matters more than we often acknowledge when it comes to kids eating new foods.
- No-Bake Simplicity – There’s no mysterious oven transformation happening. Kids see the layers go in, and they come out exactly as expected. This predictability builds confidence and curiosity rather than hesitation.
- Textural Variety – The crunchy cookie base, creamy filling, and jammy cherry layer hit multiple sensory notes that keep young palates engaged. Many picky eaters are texture-driven rather than flavor-driven.
- Cherry Recognition – Unlike some desserts where ingredients become unidentifiable, children can actually see the whole cherries in the topping. There’s comfort in knowing exactly what you’re eating.
- Portion Control Magic – Because this is assembled in a springform pan rather than served as one unified cake, kids feel like they’re getting their own special slice rather than being served a “big person” dessert.
How to Get Kids Involved in Making This
One of the most underrated aspects of cooking with children is that involvement increases their willingness to taste. This recipe has natural entry points for every age group, which means your entire family can participate in meaningful ways.
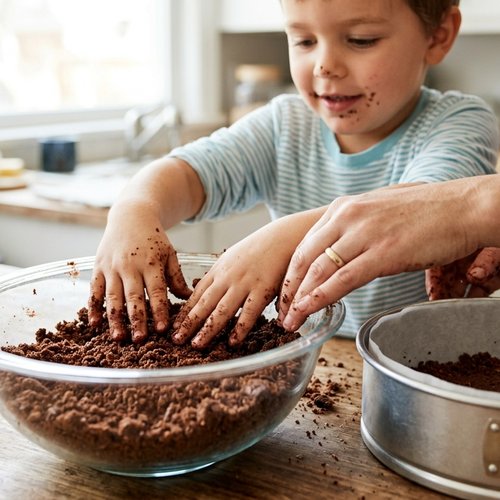
- Ages 3-5 (Toddlers and Preschoolers) – Assign the crucial task of pressing the cookie-crumb mixture into the springform pan. This is tactile, feels important, and requires no sharp tools or heat exposure. Young children love the sensory experience of squishing the mixture with their hands, and they’ll be enormously proud that they “made” the bottom layer.
- Ages 6-9 (Early Elementary) – Let school-age kids measure the cream cheese and sugar, then beat it together with an electric mixer. They can also handle the cherry layering process once you’ve made the compote. Kids this age can follow multi-step instructions and enjoy seeing cause-and-effect (mixing creates smoothness).
- Ages 10+ (Older Kids and Teens) – Give them ownership of the entire gelatin blooming process, the cherry compote creation, and the assembly of the chocolate layer. This age group can handle timing, temperature awareness, and multi-tasking. Many young teens enjoy having a sophisticated recipe they can genuinely say they made.
The Ingredients – Hidden Nutrition, Visible Deliciousness
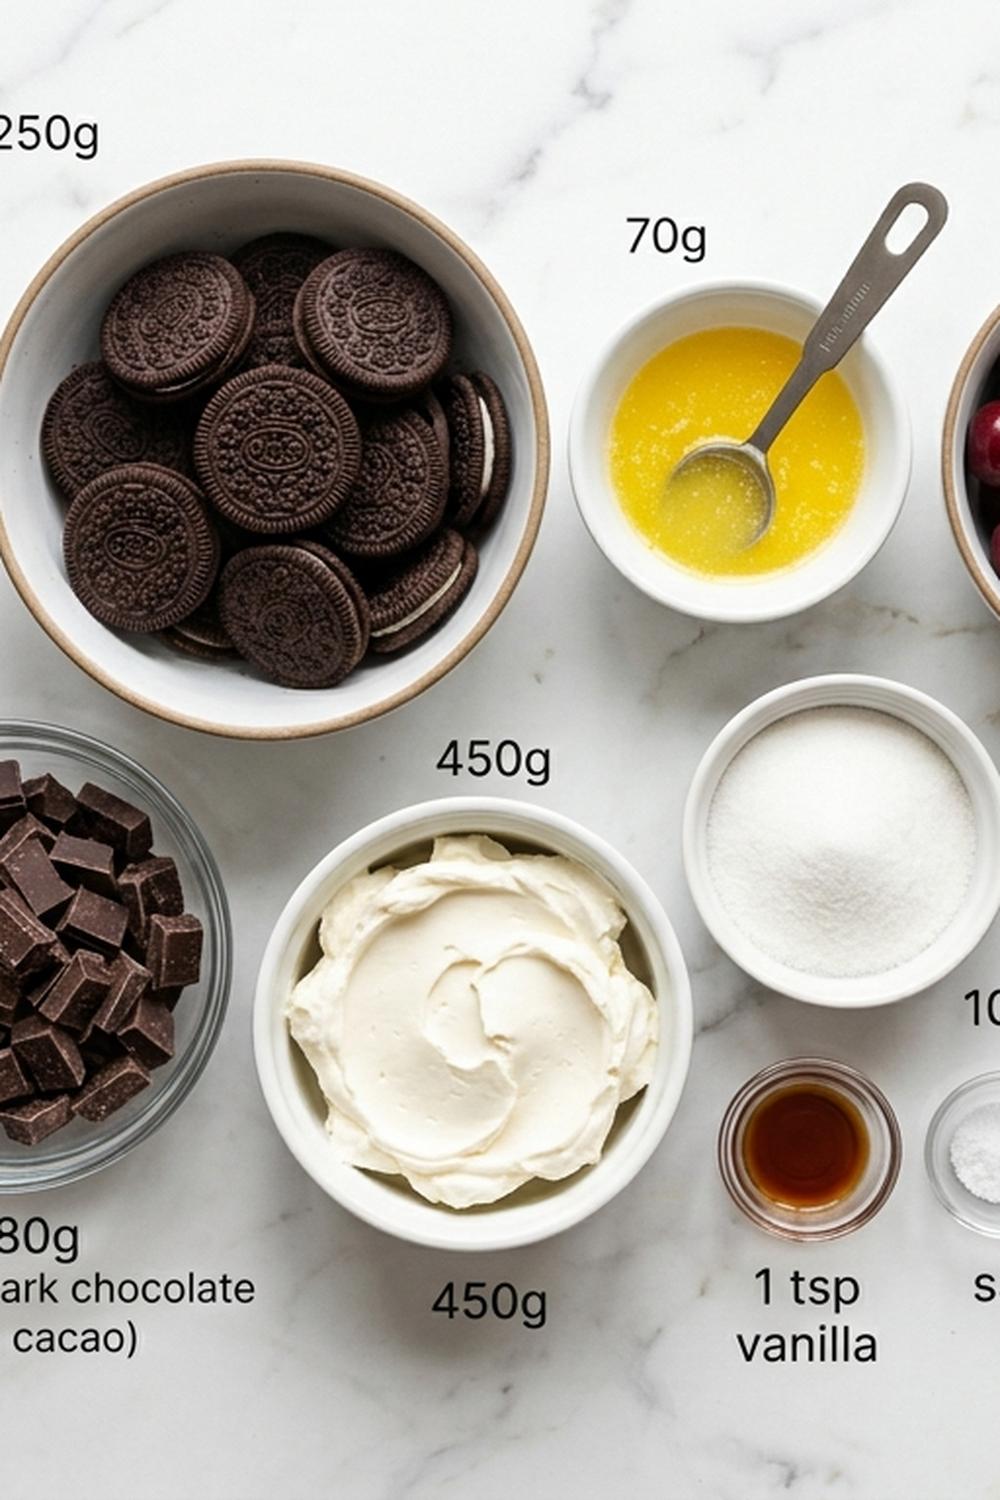
Before we dive into the ingredient list, I want to highlight something important: this dessert actually contains real fruit and dairy proteins, which means it’s delivering nutritional value alongside those indulgent flavors. The heavy cream adds satiety-promoting fats, the cream cheese provides calcium and B vitamins, and those fresh or frozen cherries are packed with antioxidants. This isn’t a “health food,” but it’s far more nutritionally balanced than many desserts children eat. I always tell parents: better a smaller portion of something real than larger portions of overly processed alternatives.
For the Cookie Crust
- ½ teaspoon coarse kosher salt (table salt will make the crust overly salty—use only ¼ teaspoon if you must substitute)
- ½ cup unsalted butter (melted and slightly cooled to room temperature)
- 30 chocolate sandwich cookies with cream filling removed (I prefer high-quality brands; the cookie structure matters more than you’d think)
For the Chocolate Cheesecake Layer
- 1 pound cream cheese (must be softened at room temperature for at least 30 minutes—cold cream cheese won’t blend smoothly)
- ¾ cup powdered sugar (spooned and leveled, never packed)
- 2 teaspoons pure vanilla extract (not imitation—the flavor difference is noticeable in no-bake recipes)
- ¾ cup cold heavy whipping cream (reserve from the total amount listed below)
- 3 ounces good-quality dark chocolate (melted and cooled to lukewarm)
- ¼ cup Dutch-processed cocoa powder (this creates deeper chocolate flavor than natural cocoa)
For the Cherry Topping
- 1 tablespoon fresh lemon juice (brightens cherry flavor and prevents the topping from tasting one-dimensional)
- 2 tablespoons cornstarch (prevents the topping from being too liquidy)
- 1 pound fresh or frozen pitted cherries (frozen works beautifully and is often more consistent in flavor)
- ½ cup granulated sugar (adjust based on cherry tartness)
For Assembly and Whipping
- 1 envelope (¼ ounce) unflavored powdered gelatin (creates the perfect mousse-like texture)
- ¾ cup cold heavy whipping cream (the second portion—whipped for volume and lightness)
Yield: Makes one 9-inch springform pan cheesecake, approximately 10-12 servings
How to Make Chocolate Cherry Cheesecake No-Bake Recipe for the Whole Family
This is where we turn cooking into a family activity rather than just a recipe you execute alone. I’ve structured these steps to include natural points where different family members can jump in, take ownership, and feel the satisfaction of building something together. The entire process takes about 20 minutes of active work, plus 4-6 hours of chilling time—perfect for an afternoon project with payoff at dinner.
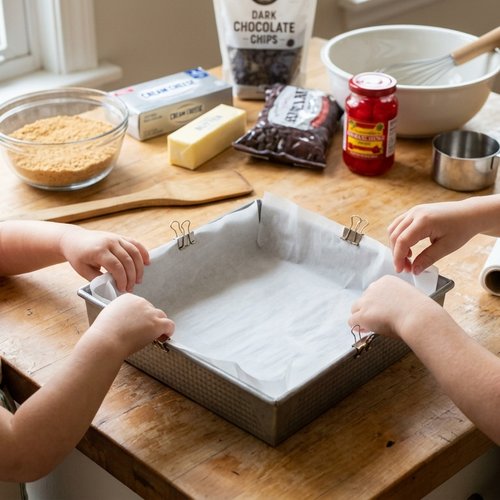
Step 1: Prepare Your Workspace and Pan
Before touching a single ingredient, line a 9-inch springform pan with parchment paper, letting it extend slightly up the sides. This prevents the crust from sticking and makes unmolding infinitely easier. Place the pan on a baking sheet (this catches any leaks and makes the whole thing easier to move in and out of the refrigerator). If you have young kids helping, this is their moment to shine—they can line the pan under your supervision while you gather remaining ingredients. Having everything prepped and visible also reduces stress and keeps the energy positive.
Step 2: Create the Cookie Crust Foundation
Process your chocolate sandwich cookies in a food processor until you have fine crumbs—you’re aiming for the texture of wet sand. This takes about 30-45 seconds of pulsing. Never over-process; you want texture, not flour. Pour the crumbs into a bowl, add the kosher salt, and stir to combine evenly.
Pour the melted butter over the crumb mixture and stir until everything is moistened—the mixture should hold together when you squeeze it but still have some texture. This is where your 3-5-year-old can help: they can stir and mix with their hands, which is both fun and educational. Press this mixture firmly into the prepared springform pan, creating an even layer across the bottom. Use the bottom of a measuring cup to compress it evenly. The crust should be about ¼ inch thick.
Step 3: Bloom the Gelatin (This Is Important)
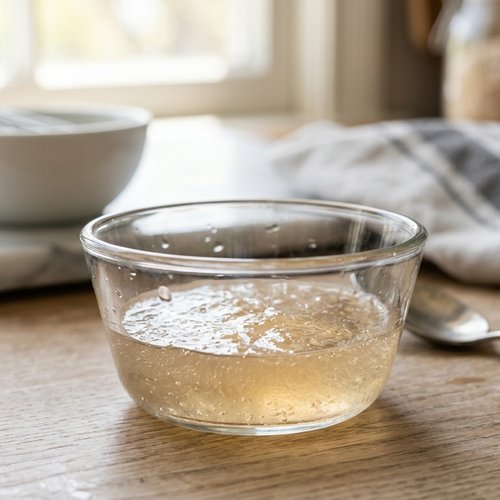
In a small bowl, sprinkle the unflavored gelatin over 3 tablespoons of cold water. Don’t stir immediately. Let it sit for exactly 5 minutes—this is called “blooming” and allows the gelatin granules to fully absorb the liquid. This ensures your cheesecake layer will have that perfect, cloud-like texture rather than becoming rubbery or grainy.
After 5 minutes, microwave the gelatin mixture for 15-20 seconds until it’s completely dissolved and warm (but not hot). It should look like clear liquid with no visible granules. If you see any remaining particles, microwave for another 5 seconds. Set it aside to cool slightly.
Step 4: Build the Chocolate Filling Base
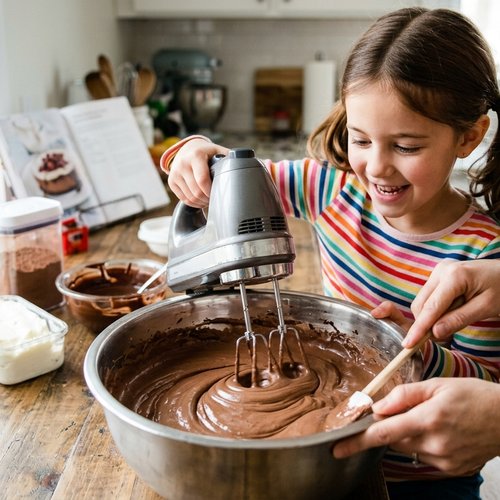
This is where things get real. In a large mixing bowl, combine your softened cream cheese, powdered sugar, Dutch-processed cocoa powder, and vanilla extract. Using an electric mixer on medium speed, beat for 2-3 minutes until the mixture is completely smooth and fluffy. You’re looking for no visible lumps and a texture that’s noticeably lighter than when you started. This step cannot be rushed—under-mixing will result in a grainy filling that lacks the silky mouthfeel we’re after.
School-age kids (ages 6-9) can operate the mixer under supervision, which they find genuinely exciting and empowering.
Add the cooled melted chocolate to the cream cheese mixture and beat again for 1-2 minutes until completely incorporated and uniform in color.
Step 5: Incorporate the Whipped Cream and Gelatin
Pour the cooled (but still liquid) gelatin into the chocolate cream cheese mixture and beat on medium speed for 1 minute, making sure it’s fully combined. Now comes the crucial step: in a separate bowl, whip the ¾ cup of cold heavy whipping cream to stiff peaks using an electric mixer. This takes about 2-3 minutes. The cream should be thick, glossy, and hold its shape when you lift the beaters.
Here’s where technique matters: gently fold the whipped cream into the chocolate mixture in two additions, using a rubber spatula and a folding motion (down the center, across the bottom, and up the side—rotate the bowl and repeat). Do not stir vigorously. We’re trying to preserve all those air bubbles we just whipped into the cream. The result should be light, mousse-like, and noticeably airier than the mixture was before.

Step 6: Layer the Cheesecake Filling
Pour the chocolate mousse filling over the cookie crust in your springform pan, smoothing the top with an offset spatula or the back of a spoon. This is an excellent task for older kids (ages 10+) who can handle the spreading without pressure to be perfect. Any swirls or imperfections actually look charming and artisanal. Place the pan in the refrigerator while you prepare the cherry topping.
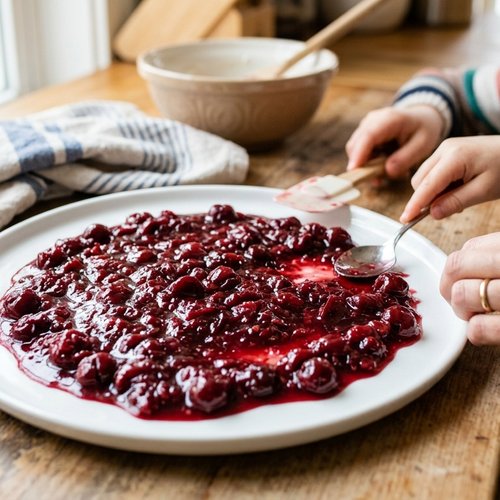
Step 7: Prepare the Cherry Compote Topping
In a medium saucepan, combine the pitted cherries, granulated sugar, and cornstarch. Stir everything together gently—if using frozen cherries, no need to thaw them first. Place the pan over medium heat and cook, stirring occasionally, for 6-8 minutes until the mixture begins to bubble and thicken. The cherries will release their juice, and the cornstarch will absorb most of it, creating a glossy compote rather than runny sauce.
Once the mixture is noticeably thickened and the cherries are tender, remove from heat and stir in the fresh lemon juice. This step is crucial: lemon juice prevents the cherry topping from becoming cloying and adds brightness that balances the rich chocolate layer. Let the compote cool completely to room temperature—this prevents it from melting through your cheesecake layer. You can speed this up by spreading it on a plate for 10 minutes.
Kids of all ages can help stir the cherry mixture at the stove with close supervision. The transformation from whole cherries to jammy topping is genuinely magical to witness.
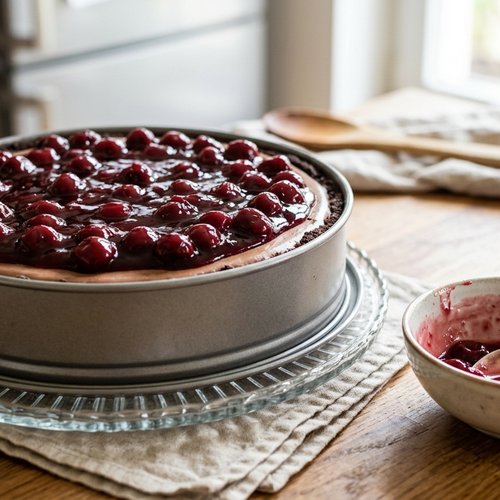
Step 8: Add the Topping and Final Chill
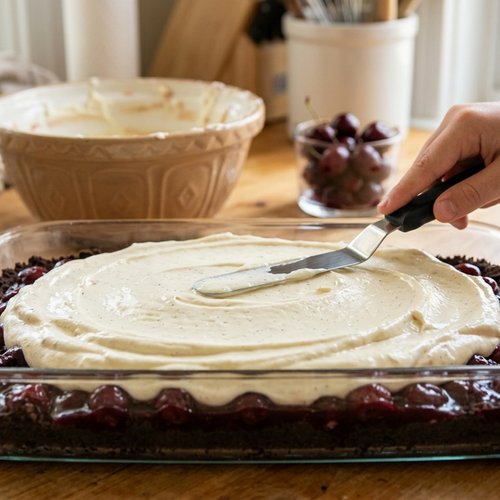
Once the chocolate cheesecake layer is set (it should feel firm to the touch but not rock-hard) and the cherry compote is completely cool, spread the cherry mixture evenly over the top. Do not skip the cooling step—warm fruit will sink into the chocolate layer and create an unpleasant texture.
Return the entire cheesecake to the refrigerator for at least 4 hours, though overnight is even better. This allows all the layers to set completely and the flavors to meld. The cheesecake will actually improve in texture and flavor after sitting overnight.
Step 9: Unmold and Serve
When you’re ready to serve, remove the cheesecake from the refrigerator and let it sit at room temperature for 5-10 minutes. This slight warming makes cutting cleaner. Run a thin, warm knife around the edges between the cheesecake and the pan rim, then release the springform latch. If the parchment paper is still attached to the sides, peel it away gently.
For the cleanest slices, dip a sharp knife in hot water, wipe it dry, cut a slice, then repeat—the warm blade prevents the filling from sticking. If you’re serving this to young kids, make smaller slices—the richness is intense, and a smaller portion is more appropriate and less overwhelming.
Expert’s Nutritional Tip: The Science Behind the Satiety
One thing I’ve observed across my years developing recipes is that no-bake cheesecakes with whipped cream and gelatin have a notably lower caloric density than traditional baked versions, despite tasting equally indulgent. This is because we’re using air (from whipped cream) to create volume, rather than relying solely on fat and eggs for structure. The gelatin also allows us to use less cream cheese overall while maintaining that silky texture. A typical slice of this cheesecake contains approximately 380-420 calories, with about 12-14 grams of protein from the cream cheese and eggs (if using traditional whipped cream). The cherry layer adds fiber and polyphenols—compounds with anti-inflammatory properties. This isn’t a health food, but it’s nutritionally honest in a way that matters.
Customization Station: Let Everyone Build Their Own
Here’s where picky eaters regain agency and suddenly become willing participants: let them customize their own serving. Set up a little “station” with component options, and let each family member build according to their preferences. This works because control—real or perceived—is incredibly motivating for resistant eaters.
- The Crust Situation – Some kids genuinely dislike cookie crumbs for textural reasons. Have extra-crumbly crust available in a separate small container, and let them add as much or as little as they want. Some might prefer just the cheesecake and cherry layers. That’s completely valid.
- The Cherry Topping Amount – Offer the cherry compote on the side for drizzling rather than as a pre-layered component. Some kids love cherries in moderation but feel overwhelmed by generous amounts. When they control the topping quantity, resistance often dissolves.
- Texture Modifications – Have some whipped cream available to dollop on top for added creaminess and a slightly lighter mouthfeel. Older kids often love this addition, and it increases the perceived “specialness” of their serving.
- Flavor Bridges – Offer a tiny drizzle of chocolate sauce for kids who want to emphasize that flavor element, or a touch of fresh mint for those who want brightness beyond what the lemon juice provides.
Make-Ahead Guide: Because Life Requires Planning
One of the beautiful aspects of this recipe is how forgiving it is for meal planning. Let me break down exactly when you can prepare each component:
The Cookie Crust – You can prepare this up to 2 days in advance. Press it into the springform pan, cover tightly with plastic wrap, and refrigerate. The crust will actually become more stable and easier to work with after a day of setting.
The Chocolate Filling – This is best prepared no more than 4 hours before serving, as the whipped cream component can begin to weep (release liquid) if it sits too long. However, you can prepare the base filling (cream cheese through melted chocolate) up to 1 day ahead, cover it, and refrigerate. When you’re ready to serve, simply whip the fresh cream and fold it in with the bloomed gelatin.
The Cherry Compote – This can be made up to 3 days ahead and refrigerated in an airtight container. In fact, the flavor deepens as it sits. Bring it to room temperature before adding to the cheesecake, or gently reheat it in a small saucepan over low heat.
The Complete Cheesecake – Once fully assembled and chilled, this will keep beautifully in the refrigerator for up to 4 days. After that, the cream cheese component begins to separate slightly from the gelatin. For the best texture, serve within 3 days of completing assembly.
Scaling for Different Family Sizes
The recipe as written makes one 9-inch springform cheesecake. Here’s how to adjust for different situations:
For a Family of 2-3 (Smaller Portions or Extended Enjoyment): Make the full recipe exactly as written. This yields 10-12 slices, giving you 3-6 servings per person with moderate portions, or you can freeze half the cheesecake (well-wrapped in plastic wrap and aluminum foil) for up to 2 months. Defrost overnight in the refrigerator before serving.
For a Family of 4-6 (Standard Serving): Make the recipe exactly as written. You’ll have one generous slice per person with 4-6 people, or comfortable portions with seconds available.
For a Larger Gathering (8+ People or Party Dessert): Double the entire recipe and use two 9-inch springform pans, or assemble in one 9×13-inch rectangular pan (increase chilling time to 5-6 hours for the larger surface area). The layering process will be identical; you’ll simply have more volume.
For Individual Servings (Portion Control or Special Occasion): Divide the recipe components equally among small mason jars or individual cups. Layer the crust first (about 2 tablespoons), then filling (about ¼ cup), then cherry topping. These individual versions chill in about 2 hours and feel special when served directly in their containers.
Can I Store Chocolate Cherry Cheesecake No-Bake Recipe?
Storage for this cheesecake is straightforward and forgiving. Here’s the complete breakdown:
Room Temperature Storage: This cheesecake should not sit at room temperature for more than 2 hours. The cream cheese component will soften, and the texture will become compromised. Always keep it refrigerated except during the brief time you’re serving it.
Refrigerator Storage: Covered tightly with plastic wrap or aluminum foil, this cheesecake keeps beautifully for up to 4 days in the refrigerator. After the 4-day mark, the cream cheese begins to separate slightly from the gelatin layer, and the texture becomes less appealing. The cherry topping may also begin to release excess liquid. For best results, enjoy within 3 days.
Freezer Storage: Yes, you can freeze this cheesecake, though the texture of the mousse-like filling will become slightly denser when thawed. Wrap individual slices or the entire cheesecake (in the springform pan) very tightly in plastic wrap, then aluminum foil. Freeze for up to 2 months. Thaw overnight in the refrigerator before serving. The texture will be slightly less cloud-like than the fresh version but still delicious.
Lunchbox Transport: For packed school lunches or day trips, individual slices work best. Pack a slice in a small plastic container with an ice pack, and it will thaw to perfect temperature by lunchtime (about 3-4 hours). The creamy filling and cherry topping hold up beautifully during transport.
Common Mistakes to Avoid
After developing and teaching this recipe countless times, I’ve identified the specific mistakes that most commonly occur. Avoiding these will guarantee success:
Mistake 1: Using Cold Cream Cheese – Attempting to beat cold cream cheese is the fastest way to end up with a lumpy filling. The mixture won’t incorporate smoothly, and even extended beating won’t fully fix it. Always soften cream cheese at room temperature for at least 30 minutes. If you’re in a time crunch, unwrap it and let it sit in a warmer room, or cut it into chunks to speed the process.
Mistake 2: Skipping the Gelatin Bloom – Some home cooks try to skip the 5-minute bloom step and go straight to microwaving. This results in unpleasant, grainy texture because not all the gelatin granules fully dissolve. The bloom is non-negotiable. It takes 5 minutes and makes a massive difference.
Mistake 3: Vigorously Stirring Instead of Folding – When incorporating whipped cream, aggressive stirring deflates all the air you just whipped in, and your filling becomes dense and heavy rather than light and mousse-like. Use a gentle folding motion and your result will be noticeably superior. This step matters.
Mistake 4: Adding Warm Cherry Topping to the Filling – If the cherry compote is still warm when you add it to the cheesecake, it will sink into the chocolate layer and create an unappealing texture situation. The topping must be completely cooled. Patience here pays off.
Seasonal Variations: Adapting Through the Year
While this chocolate cherry combination is timeless, there are beautiful ways to adapt it seasonally, which keeps things fresh if you find yourself making it multiple times per year:
Spring Version: Replace the cherry topping with a fresh strawberry compote (using the same technique—cook 1 pound fresh strawberries with ½ cup sugar, 2 tablespoons cornstarch, and 1 tablespoon balsamic vinegar instead of lemon juice). The balsamic deepens the strawberry flavor and prevents it from being too bright or simple.
Summer Version: Create a raspberry-blackberry topping by cooking 12 ounces mixed fresh berries with ¼ cup sugar and 1 tablespoon cornstarch. Stir in 1 tablespoon of fresh basil-infused simple syrup at the end for unexpected sophistication.
Fall Version: Substitute the cherry topping with a spiced apple-walnut compote. Cook 1 pound diced apples (Honeycrisp or Granny Smith) with ¼ cup sugar, 1 tablespoon cornstarch, ½ teaspoon cinnamon, and a pinch of nutmeg. Fold in ¼ cup toasted walnuts at the end. Pair with the chocolate filling for a warm, autumn-forward dessert.
Winter Version: Create a dried cherry and pomegranate topping by heating 1 cup dried tart cherries with ½ cup pomegranate juice, ¼ cup sugar, 1 tablespoon cornstarch, and a pinch of cardamom. The result is darker, more concentrated, and feels celebratory for holiday gatherings.
The Ingredients – A Second Look at Sourcing
Quality ingredients matter more in a recipe with only 10-12 total components. You can’t hide anything. Here’s what I prioritize:
Cookie Selection: I use high-quality chocolate sandwich cookies because the cookie structure actually affects the crust texture. Premium brands have a higher cocoa content in the cookies themselves, which deepens flavor. Avoid store brands that taste overly sweet or artificial.
Cocoa Powder Selection: Dutch-processed cocoa powder is non-negotiable here. The alkalization process creates deeper color and more complex flavor compared to natural cocoa. This is one of those small investments that noticeably improves the final result.
Chocolate Quality: Use chocolate that contains at least 60-70% cacao. This provides bitter notes that balance the sweetness of the cheesecake and prevent it from tasting cloying. Single-origin chocolate from reputable brands creates additional complexity, but even good quality from your grocery store will work beautifully.
Cherry Sourcing: Fresh cherries during season (May through July) are ideal, but frozen pitted cherries work equally well and often have more consistent flavor. I actually prefer frozen for this recipe because they’re picked at peak ripeness and frozen immediately, preserving their tartness and complexity. Canned cherries tend to be sweeter and less nuanced.
Nutrition Information
Per serving (based on 12 servings, USDA FoodData Central): Approximately 415 calories, 24 grams total fat (14 grams saturated), 48 grams carbohydrates (36 grams from sugar, 2 grams dietary fiber), and 6 grams protein. Contains approximately 185 milligrams sodium.
What This Means for Growing Bodies: The protein content supports muscle development and cellular repair. The dairy products provide calcium and vitamin D, essential for bone development in children and teens. The cherry layer contributes anthocyanins and other polyphenols with antioxidant and anti-inflammatory properties. A single slice provides approximately 8% of a child’s daily calcium needs. The sugar content is substantial (as expected in a dessert), so this is best served as an occasional treat rather than daily food. The fat content, while high, is derived from whole food sources (cream, butter, eggs) rather than processed oils.
What to Serve Alongside for a Complete Family Meal
This cheesecake is rich and substantial enough to be a complete dessert experience on its own, but if you’re serving it as part of a larger meal, here are complementary options that keep the focus on the cheesecake while adding balance:
- Fresh Whipped Cream or Crème Fraîche – A dollop adds creaminess without overwhelming the existing flavors. Kids often enjoy the ability to customize with an additional topping.
- Strong Brewed Coffee or Espresso – The bitter notes of coffee beautifully complement the chocolate-cherry combination. Perfect for adult meals while kids enjoy milk or hot chocolate.
- Sparkling Water with Lemon – The acidity and effervescence cleanse the palate between bites, preventing the richness from becoming overwhelming. This is especially appreciated by kids who find the cheesecake very rich.
- Simple Green Salad – If serving this cheesecake after a full dinner, a light, acidic salad (like mixed greens with lemon vinaigrette) provides balance and aids digestion. It also gives the meal structure that makes kids feel satisfied.
For complete meal inspiration and additional sides that pair beautifully with rich desserts, check out our Vanilla Bourbon Cherry Smash, which shares similar flavor profiles and can inspire beverage pairings.
Chocolate Cherry Cheesecake No Bake Recipe
Ingredients
Method
- Before touching a single ingredient, line a 9-inch springform pan with parchment paper, letting it extend slightly up the sides. This prevents the crust from sticking and makes unmolding infinitely easier. Place the pan on a baking sheet (this catches any leaks and makes the whole thing easier to move in and out of the refrigerator). If you have young kids helping, this is their moment to shine—they can line the pan under your supervision while you gather remaining ingredients. Having everything prepped and visible also reduces stress and keeps the energy positive.
- Process your chocolate sandwich cookies in a food processor until you have fine crumbs—you're aiming for the texture of wet sand. This takes about 30-45 seconds of pulsing. Never over-process; you want texture, not flour. Pour the crumbs into a bowl, add the kosher salt, and stir to combine evenly. Pour the melted butter over the crumb mixture and stir until everything is moistened—the mixture should hold together when you squeeze it but still have some texture. This is where your 3-5-year-old can help: they can stir and mix with their hands, which is both fun and educational. Press this mixture firmly into the prepared springform pan, creating an even layer across the bottom. Use the bottom of a measuring cup to compress it evenly. The crust should be about ¼ inch thick.
- In a small bowl, sprinkle the unflavored gelatin over 3 tablespoons of cold water. Don't stir immediately. Let it sit for exactly 5 minutes—this is called "blooming" and allows the gelatin granules to fully absorb the liquid. This ensures your cheesecake layer will have that perfect, cloud-like texture rather than becoming rubbery or grainy. After 5 minutes, microwave the gelatin mixture for 15-20 seconds until it's completely dissolved and warm (but not hot). It should look like clear liquid with no visible granules. If you see any remaining particles, microwave for another 5 seconds. Set it aside to cool slightly.
- This is where things get real. In a large mixing bowl, combine your softened cream cheese, powdered sugar, Dutch-processed cocoa powder, and vanilla extract. Using an electric mixer on medium speed, beat for 2-3 minutes until the mixture is completely smooth and fluffy. You're looking for no visible lumps and a texture that's noticeably lighter than when you started. This step cannot be rushed—under-mixing will result in a grainy filling that lacks the silky mouthfeel we're after. School-age kids (ages 6-9) can operate the mixer under supervision, which they find genuinely exciting and empowering. Add the cooled melted chocolate to the cream cheese mixture and beat again for 1-2 minutes until completely incorporated and uniform in color.
- Pour the cooled (but still liquid) gelatin into the chocolate cream cheese mixture and beat on medium speed for 1 minute, making sure it's fully combined. Now comes the crucial step: in a separate bowl, whip the ¾ cup of cold heavy whipping cream to stiff peaks using an electric mixer. This takes about 2-3 minutes. The cream should be thick, glossy, and hold its shape when you lift the beaters. Here's where technique matters: gently fold the whipped cream into the chocolate mixture in two additions, using a rubber spatula and a folding motion (down the center, across the bottom, and up the side—rotate the bowl and repeat). Do not stir vigorously. We're trying to preserve all those air bubbles we just whipped into the cream. The result should be light, mousse-like, and noticeably airier than the mixture was before.
- Pour the chocolate mousse filling over the cookie crust in your springform pan, smoothing the top with an offset spatula or the back of a spoon. This is an excellent task for older kids (ages 10+) who can handle the spreading without pressure to be perfect. Any swirls or imperfections actually look charming and artisanal. Place the pan in the refrigerator while you prepare the cherry topping.
- In a medium saucepan, combine the pitted cherries, granulated sugar, and cornstarch. Stir everything together gently—if using frozen cherries, no need to thaw them first. Place the pan over medium heat and cook, stirring occasionally, for 6-8 minutes until the mixture begins to bubble and thicken. The cherries will release their juice, and the cornstarch will absorb most of it, creating a glossy compote rather than runny sauce. Once the mixture is noticeably thickened and the cherries are tender, remove from heat and stir in the fresh lemon juice. This step is crucial: lemon juice prevents the cherry topping from becoming cloying and adds brightness that balances the rich chocolate layer. Let the compote cool completely to room temperature—this prevents it from melting through your cheesecake layer. You can speed this up by spreading it on a plate for 10 minutes. Kids of all ages can help stir the cherry mixture at the stove with close supervision. The transformation from whole cherries to jammy topping is genuinely magical to witness.
- Once the chocolate cheesecake layer is set (it should feel firm to the touch but not rock-hard) and the cherry compote is completely cool, spread the cherry mixture evenly over the top. Do not skip the cooling step—warm fruit will sink into the chocolate layer and create an unpleasant texture. Return the entire cheesecake to the refrigerator for at least 4 hours, though overnight is even better. This allows all the layers to set completely and the flavors to meld. The cheesecake will actually improve in texture and flavor after sitting overnight.
- When you're ready to serve, remove the cheesecake from the refrigerator and let it sit at room temperature for 5-10 minutes. This slight warming makes cutting cleaner. Run a thin, warm knife around the edges between the cheesecake and the pan rim, then release the springform latch. If the parchment paper is still attached to the sides, peel it away gently. For the cleanest slices, dip a sharp knife in hot water, wipe it dry, cut a slice, then repeat—the warm blade prevents the filling from sticking. If you're serving this to young kids, make smaller slices—the richness is intense, and a smaller portion is more appropriate and less overwhelming.
Tried this recipe?
Let us know how it was!FAQs
Can I Make This Cheesecake Without Gelatin?
Technically yes, but the result will be significantly different. Without gelatin, the mousse filling will be denser and less ethereal. If you absolutely cannot use gelatin (due to dietary restrictions), you can substitute with agar-agar powder at a 1:1 ratio, which is vegan-friendly and creates a similar result. However, agar-agar requires heating to exactly 90°C for proper gelling, making the process more technical. I’d recommend increasing the whipped cream to 1 full cup and simply whipping and folding it into the cream cheese mixture without gelatin—the result will be more like a traditional mousse, which children often actually prefer.
My Child Is Allergic to Dairy—Can I Adapt This Recipe?
Yes, though the texture will change. Use dairy-free cream cheese (brands like Kite Hill and Tofutti work well), dairy-free heavy whipping cream (coconut cream or oat-based work best), and dairy-free butter for the crust. The process remains identical. Keep in mind that dairy-free versions sometimes separate slightly differently, so whip the dairy-free cream to stiff peaks slightly more carefully. The result will be slightly less stable than the traditional version but still delicious. Some families find that adding 1 additional teaspoon of gelatin helps stabilize the dairy-free filling.
What If My Child Absolutely Refuses Cherries?
Build a customizable version where you leave the cherry layer off their portion and offer an alternative topping they’ll actually eat. Raspberry compote, blackberry compote, straw