This post contains affiliate links. As an Amazon Associate I earn from qualifying purchases.
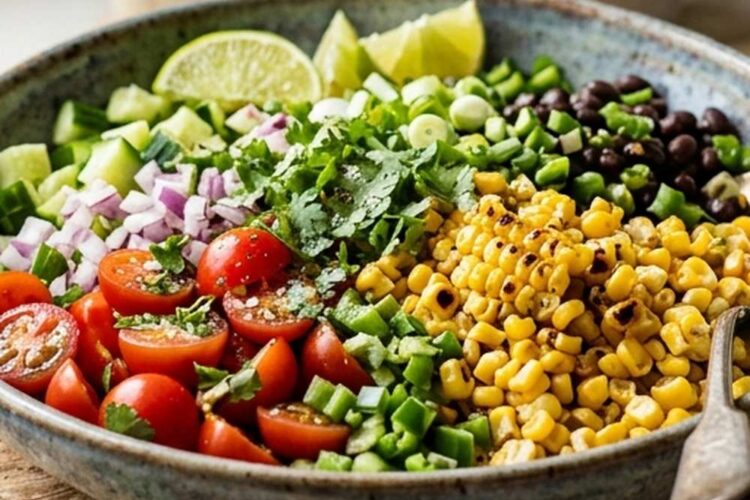
This Corn Salad No Mayo Recipe doesn’t just taste incredible—it stops people in their tracks. When we serve this at summer gatherings, the visual impact hits first: golden charred kernels studded with bright green cilantro, creamy white cotija cheese, and jewel-like flecks of jalapeño scattered across the bowl like edible confetti. The magic is that it’s equally easy to make as it is beautiful to behold, and it pairs perfectly with dishes like Barbecue Chicken On Stove Recipe for a complete summer spread.
The Most Beautiful Corn Salad No Mayo Recipe You’ll Ever Make (And It’s Easier Than It Looks)
I remember the first time I charred corn properly for a salad. I was developing recipes in my test kitchen on a humid July afternoon, and my mentor—a chef from Mexico City who’d taught me so much about layering flavors—challenged me: “Don’t boil it. Char it. Let it sing.” That moment changed everything about how I approach corn dishes.
When you char corn in a hot skillet, something chemical and beautiful happens. The natural sugars caramelize, creating deep golden-brown spots that taste almost nutty. The kernels pop slightly from the heat, and suddenly you have textural contrast that makes every bite interesting. Add the bright acid of lime juice, the herbaceous kick of cilantro, the salty crumble of cotija, and the subtle heat from jalapeño—and what you’re really making isn’t just a salad, it’s a flavor experience that looks like it came from a restaurant kitchen.
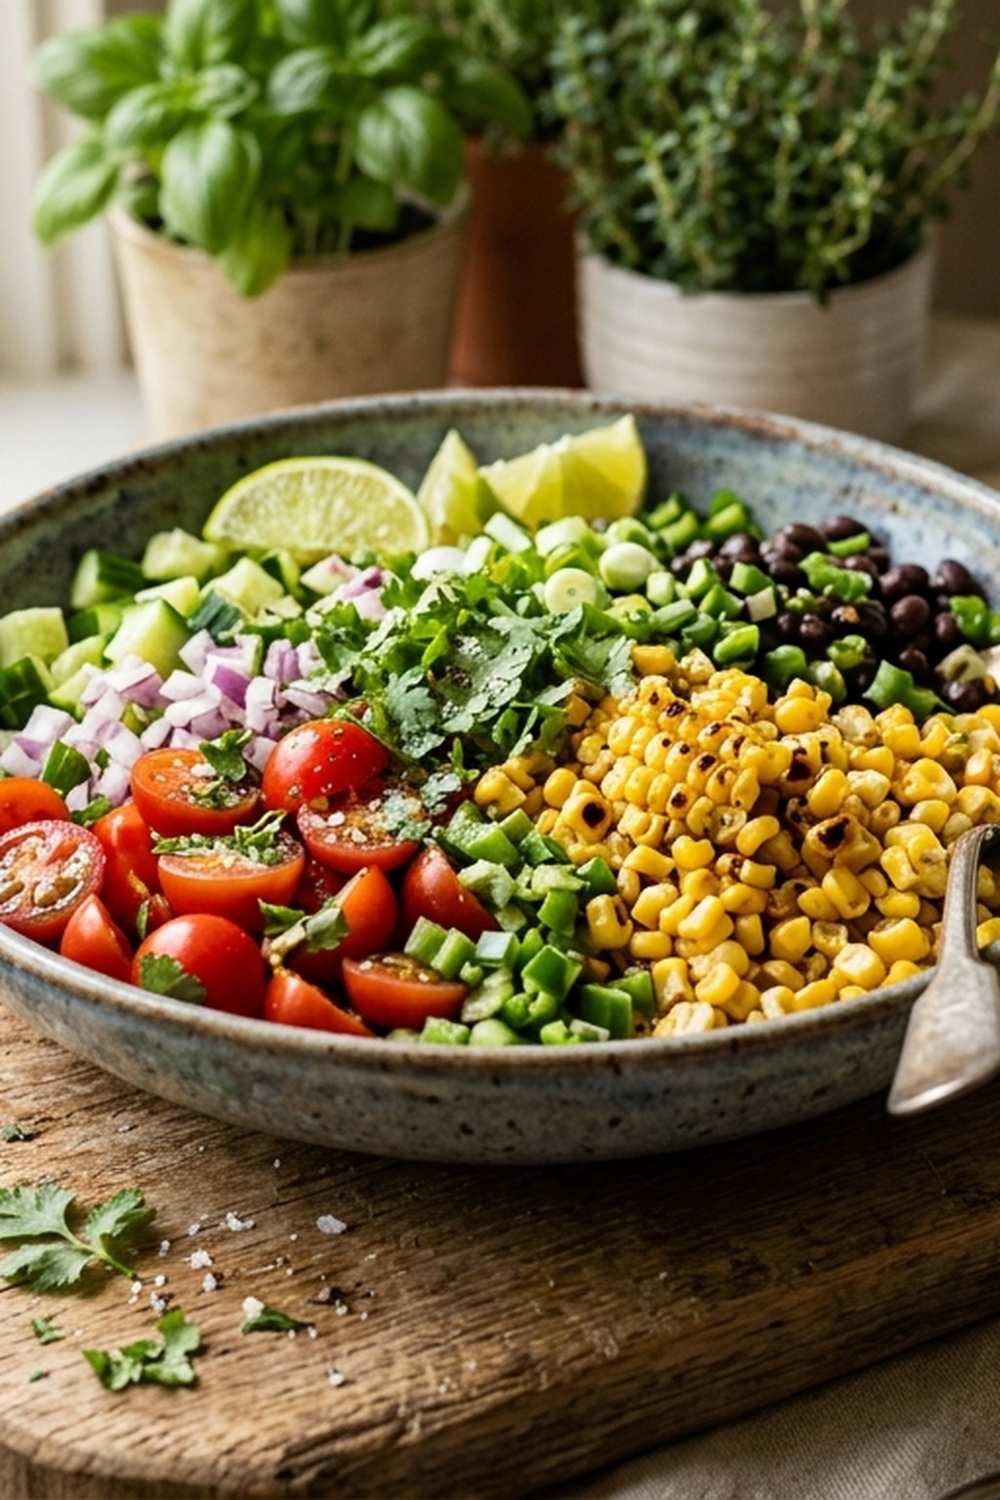
The Visual Elements That Make This Dish Stunning
When we talk about making food that photograph-worthy, we’re really talking about understanding color theory, texture contrast, and composition. This particular salad teaches us all three beautifully. The charm lives in its simplicity and the way each component contributes to the overall visual narrative.
- The Golden-Brown Char – Those deep caramelized spots on the corn kernels create visual depth and warmth. The contrast between the bright yellow and the dark brown edges signals to our brains that this is something special. This is where the magic of high-heat cooking shows itself visually.
- The Green-on-Green Texture Play – Scattered cilantro and sliced scallion greens create layers of different green tones. The feathery cilantro reads softer than the crisp scallion slices, creating visual interest even though they’re the same color family.
- The White Crumble – Cotija cheese provides crucial visual anchors across the dish. These white flecks break up the warm tones and create stopping points for the eye, making the entire composition feel balanced and intentional.
Choosing Ingredients for Maximum Visual Impact
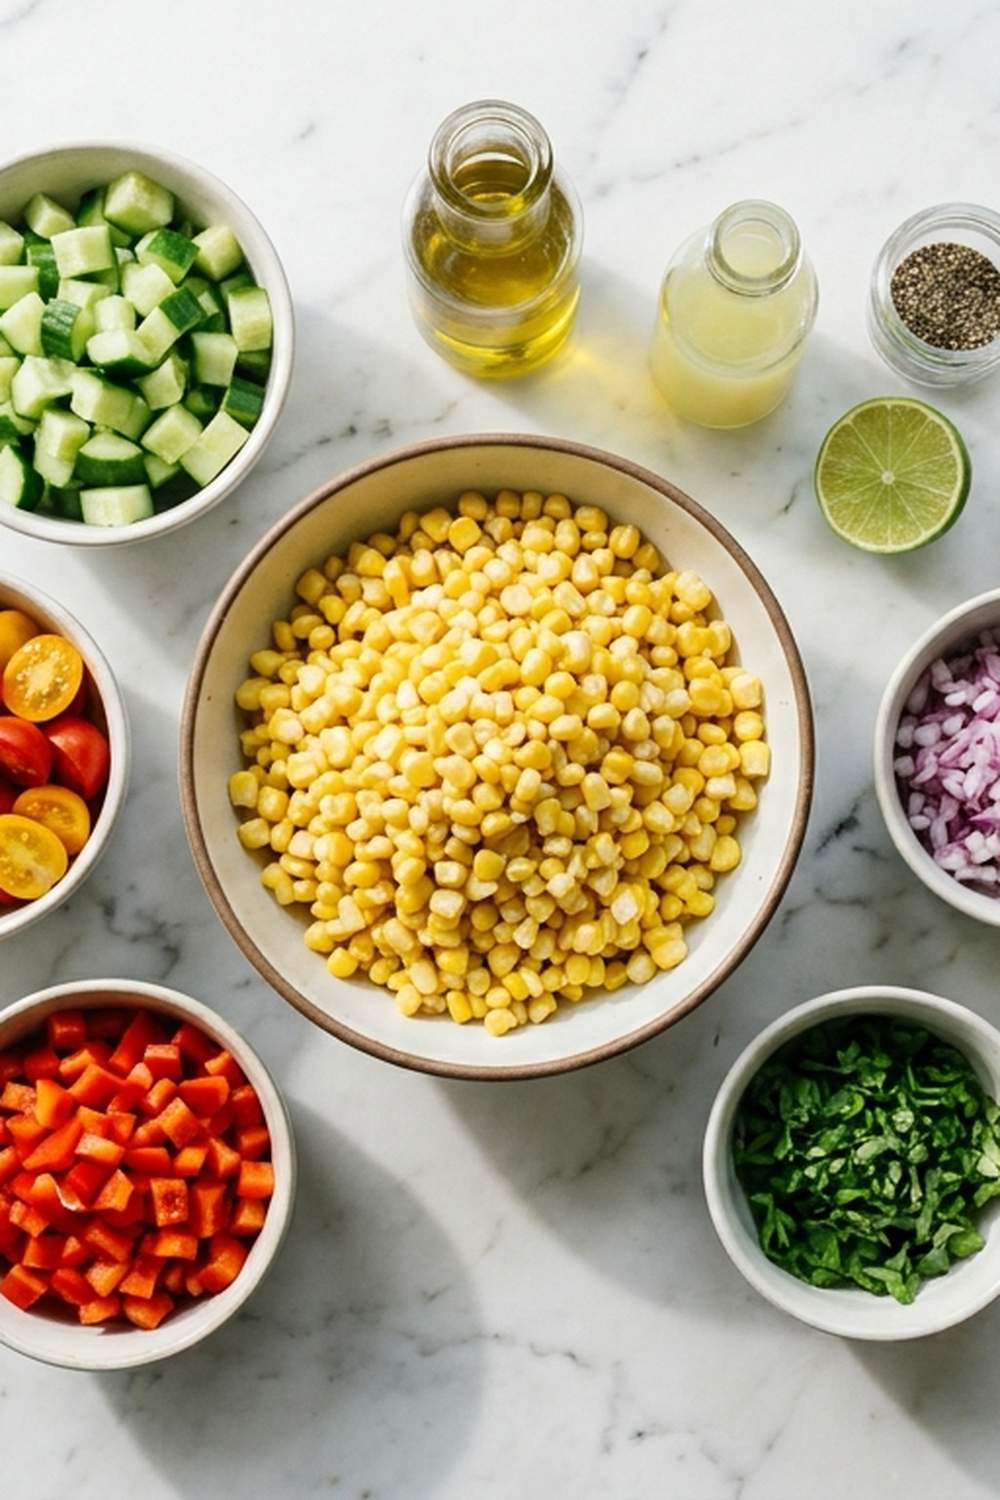
I approach ingredient selection from two angles: flavor first, presentation always in mind. Every component here does double duty—it tastes remarkable and looks intentional on the plate. The beauty of this salad is that nothing feels forced; each ingredient naturally contributes to the visual story we’re telling.
- ½ teaspoon chili powder (the warm rust-colored spice adds depth to the color palette without overwhelming it)
- 2 tablespoons avocado oil (high smoke point creates better sear and more pronounced charring; choose oil for visual clarity in the finished dish)
- ½ cup scallions (thinly sliced, both white and green parts—the white adds subtle color variation and the green provides that fresh herb aesthetic)
- 1 jalapeño pepper (seeded and finely chopped—the vibrant green speckles create visual interest and signal heat)
- 20 ounces frozen corn kernels (thawed and patted completely dry—moisture prevents proper charring and creates steam instead of those gorgeous caramelized spots)
- ¼ cup crème fraîche or Greek yogurt (optional drizzle—creates visual richness and adds creamy contrast)
- 1 lime (juiced fresh, never bottled—the bright acid balances richness and adds a subtle glossy appearance to the finished dish)
- 1 garlic clove (minced very finely—disappears visually but deepens savory notes that make other flavors pop)
- ¼ cup fresh cilantro (roughly chopped, plus additional for topping—the fine feathery texture creates visual softness against the firm corn kernels)
- ¼ cup cotija cheese (crumbled by hand, never pre-shredded—the irregular pieces scatter more naturally and catch light beautifully)
- 2 tablespoons fresh lime zest (for garnish—adds brightness and signals citrus flavor at first glance)
- ½ teaspoon kosher salt (fleur de sel or finishing salt for topping adds textural interest)
How to Make Picture-Perfect Corn Salad No Mayo Recipe
We’re going to approach this recipe as edible art. Each step builds on the last, and the presentation choices we make during cooking directly impact how stunning the final dish looks. Pay attention not just to technique, but to the visual transformation happening at each stage.
Step 1: Prepare Your Corn for Maximum Charring Success
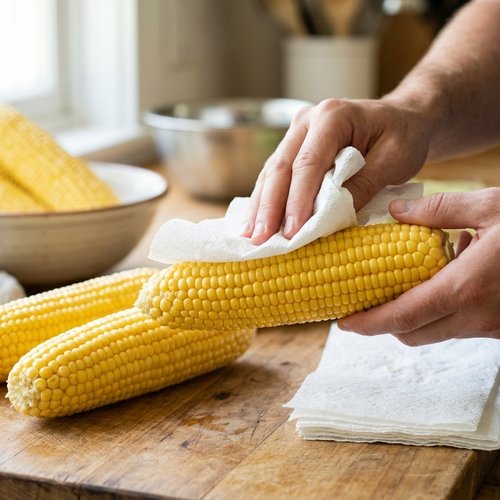
Start with frozen corn that’s completely thawed. I recommend placing it in a colander and letting it sit for 5 minutes, then pat it absolutely dry with paper towels. This step is crucial—any surface moisture will create steam instead of that beautiful char we’re after. The drier your corn, the darker and more visually striking those caramelized spots will be. You want the kernels to feel almost papery to the touch before they hit the pan.
Step 2: Heat Your Skillet Until It’s Properly Hot
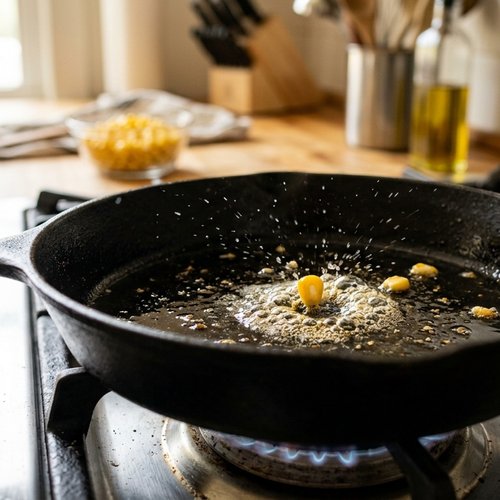
Pour your avocado oil into a large cast-iron skillet or heavy-bottomed pan. Medium-high heat is our target. Wait—and this is important—until the oil shimmers and moves fluidly across the pan. You’ll know it’s ready when a single kernel of corn dropped into the oil immediately sizzles and pops. This is the moment that determines whether you’ll get beautiful char or just warm corn. Don’t skip this waiting period; rushing it changes everything about the texture and appearance of the final dish.
Step 3: Add the Corn and Let It Work Its Magic
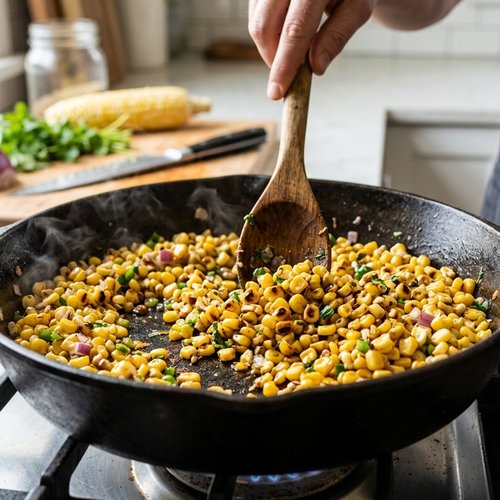
Once your oil is ready, add all the thawed corn at once. You’ll hear a satisfying sizzle—that’s the sound of the Maillard reaction beginning, the chemical process that creates those gorgeous brown spots and complex nutty flavors. Let it sit undisturbed for 90 seconds. This creates a crust on the bottom kernels. Then begin tossing frequently—every 30 seconds or so—using a wooden spoon or heatproof spatula. We’re cooking for 5-6 minutes total, until about 30-40% of the kernels have developed deep golden-brown charred spots. Some kernels will pop slightly and jump out of the pan—that’s exactly what we want. It signals proper caramelization.
Step 4: Transfer and Cool Slightly
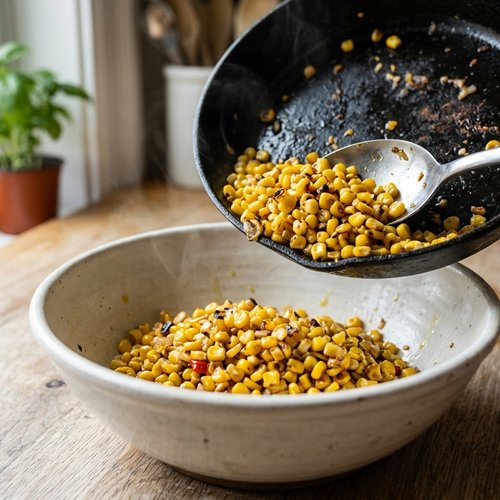
Pour the charred corn into a large bowl. Don’t worry about the individual kernels that stick to the pan—they’re too dark. What we want is the majority of corn with beautiful color variation. Let it cool for 2-3 minutes. This brief cooling period prevents the cilantro and other fresh ingredients from wilting when we add them, which preserves their vibrant green color and fresh appearance.
Step 5: Build the Flavor and Visual Layers
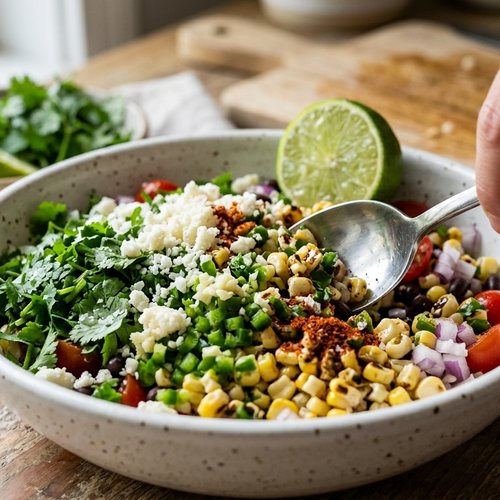
Now comes the assembly. To the cooled corn, add your sliced scallions (separating white and green parts helps with visual presentation—the white goes in first, then greens get scattered on top later). Add the roughly chopped cilantro, crumbled cotija cheese, fresh lime juice, minced jalapeño, minced garlic, salt, and chili powder. Toss everything gently but thoroughly, being careful not to crush the corn kernels. We want to maintain that textural contrast between the firm corn and the crumbly cheese.
Step 6: Taste and Adjust Seasoning
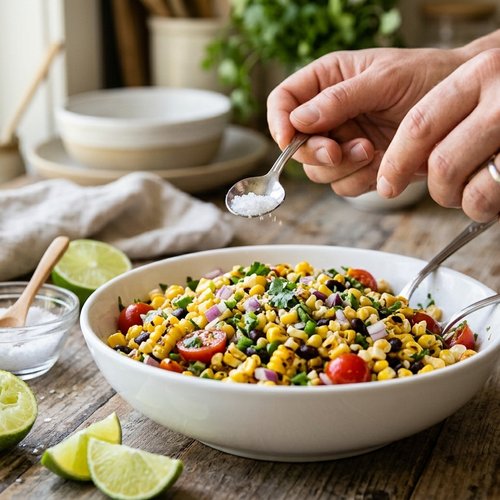
Take a bite—actually taste it before serving. The salt and lime juice are your primary seasoning tools. Add a pinch more salt if it needs it, or more lime juice if you want additional brightness. Proper seasoning makes colors visually pop because salt and acid enhance our perception of flavor, which makes the dish feel more vibrant overall.
The Plating Masterclass
How we present this salad determines whether it looks like something we threw together or something we crafted intentionally. Professional plating isn’t about complexity—it’s about thoughtful placement and creating visual balance. Let me walk you through my approach.
- The Base Layer – Transfer your corn mixture to a serving bowl or individual plates. If plating individually, use a gentle hand to create height without compression. Scoop the corn so it mounds slightly rather than spreading flat. This creates shadow and dimension on the plate, making the dish feel more intentional.
- The Scattered Garnish – Reserve some of your brightest cilantro leaves and the scallion greens. Scatter these across the top and around the edges of the corn, letting some pieces fall naturally. This creates visual movement and signals freshness. Add a final sprinkle of crumbled cotija cheese, focusing the white pieces on top where light will catch them.
- The Finishing Touch – Just before serving, grate a small amount of lime zest directly over the salad. The bright yellow-green color reads as freshness and adds a professional touch. If using, a small drizzle of crème fraîche or Greek yogurt creates visual richness and provides cooling contrast to the spiced warmth of the corn.
Photography Tips for This Dish
This salad photographs beautifully because of its natural color palette and textural contrast. I’ve learned a few specific techniques that make it shine for social media or food blogging.
- Golden Hour Is Your Friend – Photograph this dish in late afternoon natural light, ideally near a window with indirect light. The warm golden tones of the charred corn absolutely glow under these conditions. Harsh midday sun can wash out colors, while golden hour light brings out the caramelization beautifully.
- Shoot from a 45-Degree Angle – This angle captures the height and texture of the corn while still showing the scattering of garnishes on top. If you shoot straight down (flat lay), you lose the visual interest of the charred texture. If you shoot too straight-on, the salad can look flat and uninviting.
- Include Your Props Intentionally – Fresh lime halves, cilantro sprigs, and a rustic wooden spoon tell the story of fresh, summery food. These elements should frame the salad but never overwhelm it. A small bowl of extra cotija cheese or chili powder in the background creates visual context without distraction.
Seasonal Color Variations
This recipe is inherently summery, but I’ve learned to adapt it throughout the year by shifting garnishes and complementary ingredients slightly. The core technique stays the same—what changes is our visual palette.
Summer Version (June-August): Keep it as written. The bright greens and golden corn feel natural in summer heat. Add fresh corn if it’s in season where you are—the flavor is even more special, and the appearance slightly creamier.
Fall Adaptation (September-November): Add toasted pumpkin seeds for textural interest and warm tones. Substitute a small amount of pomegranate seeds for some of the cilantro—they add jewel-like pops of deep red. Keep the lime and cilantro, but add 1 teaspoon of ground cumin to deepen the warmth. The color palette shifts to golds, deep reds, and warm browns—perfect for autumn entertaining.
Winter Variation (December-February): This works less well in winter, honestly. If making it indoors, add crispier elements like toasted tortilla strips and pomegranate seeds for visual interest. A drizzle of pomegranate molasses adds both flavor depth and glossy visual richness. Consider serving at room temperature rather than chilled—it feels warmer and more approachable in colder months.
Spring Version (March-May): Increase cilantro slightly and add fresh mint—the lighter greens feel fresh and new. Add thin radish slices for peppery crunch and pale pink accents. Use the brightest lime available; the color should feel almost neon-green for maximum spring vibrancy.
Can I Store Corn Salad No Mayo Recipe?
Yes, absolutely—though timing matters for presentation preservation. Here’s my professional approach to storage.
Immediate Serving (Best Option): Make this salad no more than 2 hours before serving. At this timeframe, the corn stays warm or reaches perfect room temperature, the cilantro remains crisp and bright green, and the cotija cheese hasn’t absorbed excess moisture. This is when it looks most stunning.
Short-Term Storage (3-4 Hours): Store in an airtight container at room temperature. Don’t add garnishes yet—keep cilantro, scallion greens, and cheese separate. When ready to serve, add these fresh elements. This prevents wilting and maintains color vibrancy. The corn actually tastes better at room temperature than chilled, from a flavor perspective.
Refrigerated Storage (Up to 2 Days): You can refrigerate this salad, but understand that chilling mutes flavors slightly and the cilantro will lose some of its vibrant appearance. Store the corn mixture in an airtight container separately from fresh garnishes. Before serving, let it come to room temperature for 20 minutes—this brings flavors back to life. Add fresh cilantro and lime zest right before serving to restore visual brightness.
Make-Ahead Strategy: If meal prepping, I recommend charring the corn up to 3 days ahead and storing it separately. On serving day, combine with lime juice, salt, and chili powder, then add fresh cilantro, scallions, jalapeño, and cotija just before serving. This gives you 80% of the work done while maintaining maximum visual appeal and flavor freshness.
Expert’s Nutritional Insight: Why This Salad Glows with Wellness
Here’s what I’ve learned developing recipes across cultures: when a dish is this visually vibrant, it’s almost always nutritionally dense. The color variety directly signals nutritional diversity—something my multicultural upbringing taught me early on.
Corn provides lutein and zeaxanthin, carotenoids that support eye health. When you char corn, you’re not reducing these nutrients significantly—you’re actually making them more bioavailable through the Maillard reaction. The cilantro isn’t just a pretty green herb; it contains quercetin, a powerful antioxidant. Jalapeño provides capsaicin, which boosts metabolism slightly and has anti-inflammatory properties. Lime juice—often overlooked as merely acidic—actually enhances iron absorption from the corn and other ingredients through its vitamin C content.
This is why proper technique matters so much: the visual appeal and the nutritional profile grow together. A properly charred, vibrant-looking corn salad is literally more nutritious than one that’s pale and undercooked.
Common Mistakes to Avoid
After developing countless salad recipes, I’ve seen patterns in what trips people up. Here are the mistakes that compromise both flavor and appearance.
Mistake 1: Wet Corn. The single biggest error is adding wet corn to the hot skillet. Steam cooking instead of searing won’t give you that gorgeous char. Pat your corn dry—I mean thoroughly dry. This single step determines success.
Mistake 2: Oil That Isn’t Hot Enough. If your oil doesn’t shimmer and isn’t almost smoking slightly, the corn won’t sear properly. Low heat creates gray, steamed corn. High heat creates those beautiful brown spots that taste incredible and look intentional. Trust the heat.
Mistake 3: Over-stirring. Once corn hits the hot pan, resist the urge to constantly stir. Let it sit for 90 seconds to develop that caramelized crust. Then toss every 30 seconds. Constant stirring prevents proper browning.
Mistake 4: Skipping the Lime Zest Garnish. This small touch changes everything visually and flavor-wise. The bright citrus notes wake up your palate and the visual contrast of the yellow-green zest against the golden corn is stunning. Never skip it.
What to Serve Alongside for a Complete Visual Spread
This salad is naturally a warm-weather side dish, and it pairs gorgeously with grilled proteins and complementary sides. I think about color, texture, and flavor balance when building a complete spread.
The obvious partner is Barbecue Chicken On Stove Recipe—the smoky, slightly sweet barbecue sauce creates beautiful color contrast against the bright corn. The charred edges on the chicken echo the charred corn, creating visual harmony.
For vegetarian spreads, consider Bruschetta With Mozzarella Recipe as an appetizer. The toasted bread and fresh mozzarella provide textural variety while keeping the palette bright and fresh.
- Grilled White Fish or Shrimp – The pale color provides visual contrast to the golden corn, and the delicate flavor lets the salad shine without competing for attention.
- Black Bean Salad – Deep purple-black beans against the golden corn create striking color contrast. The earthiness of beans complements the corn’s sweetness perfectly.
- Grilled Vegetable Medley – Charred zucchini, eggplant, and bell peppers echo the charred corn technique while adding textural variety to the plate.
- Cilantro-Lime Rice – Keeps the cilantro and lime flavor profile consistent while adding a neutral base that lets other dishes stand out.
Nutrition Information
Based on USDA data, here’s the approximate nutrition for one serving (yields 4 servings):
Per Serving: 180 calories | 8g fat | 22g carbohydrates | 4g fiber | 5g protein | 340mg sodium
The colorful array of ingredients in this salad provides diverse micronutrients. The corn supplies B vitamins essential for energy metabolism. Cilantro and jalapeño provide antioxidants and anti-inflammatory compounds. Lime juice contributes vitamin C, which enhances mineral absorption. Cotija cheese adds calcium and protein, making this more than just a vegetable side—it’s a nutritionally complete dish.

Corn Salad No Mayo Recipe
Ingredients
Method
- Start with frozen corn that's completely thawed. I recommend placing it in a colander and letting it sit for 5 minutes, then pat it absolutely dry with paper towels. This step is crucial—any surface moisture will create steam instead of that beautiful char we're after. The drier your corn, the darker and more visually striking those caramelized spots will be. You want the kernels to feel almost papery to the touch before they hit the pan.
- Pour your avocado oil into a large cast-iron skillet or heavy-bottomed pan. Medium-high heat is our target. Wait—and this is important—until the oil shimmers and moves fluidly across the pan. You'll know it's ready when a single kernel of corn dropped into the oil immediately sizzles and pops. This is the moment that determines whether you'll get beautiful char or just warm corn. Don't skip this waiting period; rushing it changes everything about the texture and appearance of the final dish.
- Once your oil is ready, add all the thawed corn at once. You'll hear a satisfying sizzle—that's the sound of the Maillard reaction beginning, the chemical process that creates those gorgeous brown spots and complex nutty flavors. Let it sit undisturbed for 90 seconds. This creates a crust on the bottom kernels. Then begin tossing frequently—every 30 seconds or so—using a wooden spoon or heatproof spatula. We're cooking for 5-6 minutes total, until about 30-40% of the kernels have developed deep golden-brown charred spots. Some kernels will pop slightly and jump out of the pan—that's exactly what we want. It signals proper caramelization.
- Pour the charred corn into a large bowl. Don't worry about the individual kernels that stick to the pan—they're too dark. What we want is the majority of corn with beautiful color variation. Let it cool for 2-3 minutes. This brief cooling period prevents the cilantro and other fresh ingredients from wilting when we add them, which preserves their vibrant green color and fresh appearance.
- Now comes the assembly. To the cooled corn, add your sliced scallions (separating white and green parts helps with visual presentation—the white goes in first, then greens get scattered on top later). Add the roughly chopped cilantro, crumbled cotija cheese, fresh lime juice, minced jalapeño, minced garlic, salt, and chili powder. Toss everything gently but thoroughly, being careful not to crush the corn kernels. We want to maintain that textural contrast between the firm corn and the crumbly cheese.
- Take a bite—actually taste it before serving. The salt and lime juice are your primary seasoning tools. Add a pinch more salt if it needs it, or more lime juice if you want additional brightness. Proper seasoning makes colors visually pop because salt and acid enhance our perception of flavor, which makes the dish feel more vibrant overall.
Nutrition
Notes
Tried this recipe?
Let us know how it was!FAQs
Can I Make This Salad Ahead for a Gathering?
Absolutely! Char the corn up to 3 days ahead and store it in an airtight container. On the day of your gathering, combine the corn with lime juice, salt, and chili powder up to 4 hours before serving. Add the fresh garnishes—cilantro, scallions, jalapeño, and cotija—just 30 minutes before serving to maintain their vibrant appearance. This approach gives you a stunning-looking dish that’s 80% prepared without any stress.
What If I Don’t Have Cotija Cheese?
Cotija has a salty, crumbly texture that’s fairly unique, but feta cheese works as a visual and flavor substitute in about 60% the amount (use 2-3 tablespoons instead of ¼ cup, as feta is slightly more pungent). For a different visual approach, try queso fresco or even a sharp aged cheddar. The color changes—queso fresco is whiter, aged cheddar is deeper yellow—so your overall composition shifts, but the flavor profile remains solid.
Can I Grill the Corn Instead of Charring It in a Skillet?
Absolutely. Fresh corn on the cob can be grilled whole—about 8 minutes total, rotating for even charring. Then cut the kernels off. Frozen corn in a grill basket over high heat works too—about 6-8 minutes with frequent tossing. The char marks will be even more dramatic and beautiful from grilling. The cooking time might extend slightly, but the visual result is equally stunning.
How Do I Make This Salad Look Good in Photos?
Shoot in natural window light near golden hour (late afternoon) for best color representation. Angle your camera 45 degrees to capture texture and height. Include lime halves and fresh cilantro sprigs as props to frame—not overwhelm—your subject. Keep backgrounds clean and neutral so the food is the star. The contrast between the golden corn, white cheese, and green herbs photographs beautifully without any special tricks.
Is This Salad Good Chilled, Room Temperature, or Warm?
Room temperature is honestly the sweet spot. The flavors are most vibrant and complex when the salad sits at room temperature for 30 minutes after making. Warm (served within 20 minutes of charring) is delicious but the cilantro can wilt slightly. Chilled salad tastes good but flavors feel muted—the lime and spices aren’t as bright. My recommendation? Make it 30-45 minutes before serving and keep it at room temperature until the moment you plate it.
More Visually Stunning Recipes
- my favorite salad – Another vibrant green salad that’s visually striking and equally simple
- my favorite salad – Creamy comfort food that photographs beautifully with vibrant garnishes
- Bruschetta With Mozzarella Recipe – The perfect bright appetizer to pair with this corn salad at summer gatherings
Conclusion: Feeding Eyes and Souls
I’ve spent years developing recipes across different cultures and techniques, and one truth keeps emerging: the most beautiful dishes are often the simplest. There’s something deeply satisfying about taking a humble ingredient like frozen corn and transforming it through technique into something that stops people in their tracks.
This salad teaches us that we don’t need fancy equipment or complicated methods to create restaurant-quality food at home. We just need to understand our ingredients, respect the process, and pay attention to the small moments—like waiting for the oil to shimmer, or patting the corn dry, or saving the brightest cilantro for the top.
When you make this for the people you love, you’re not just feeding them delicious food. You’re showing them that you cared enough to char the corn properly, to balance flavors thoughtfully, and to present it beautifully. That matters. Food made with intention and technique tastes different than food made in a rush. And it looks different too.
Make this salad. Watch your guests’ faces when they see it. Taste their reactions when they bite into it. That’s the real magic here—not the recipe, but the moments it creates. Enjoy!
- Lunch And Dinner Recipes