This post contains affiliate links. As an Amazon Associate I earn from qualifying purchases.
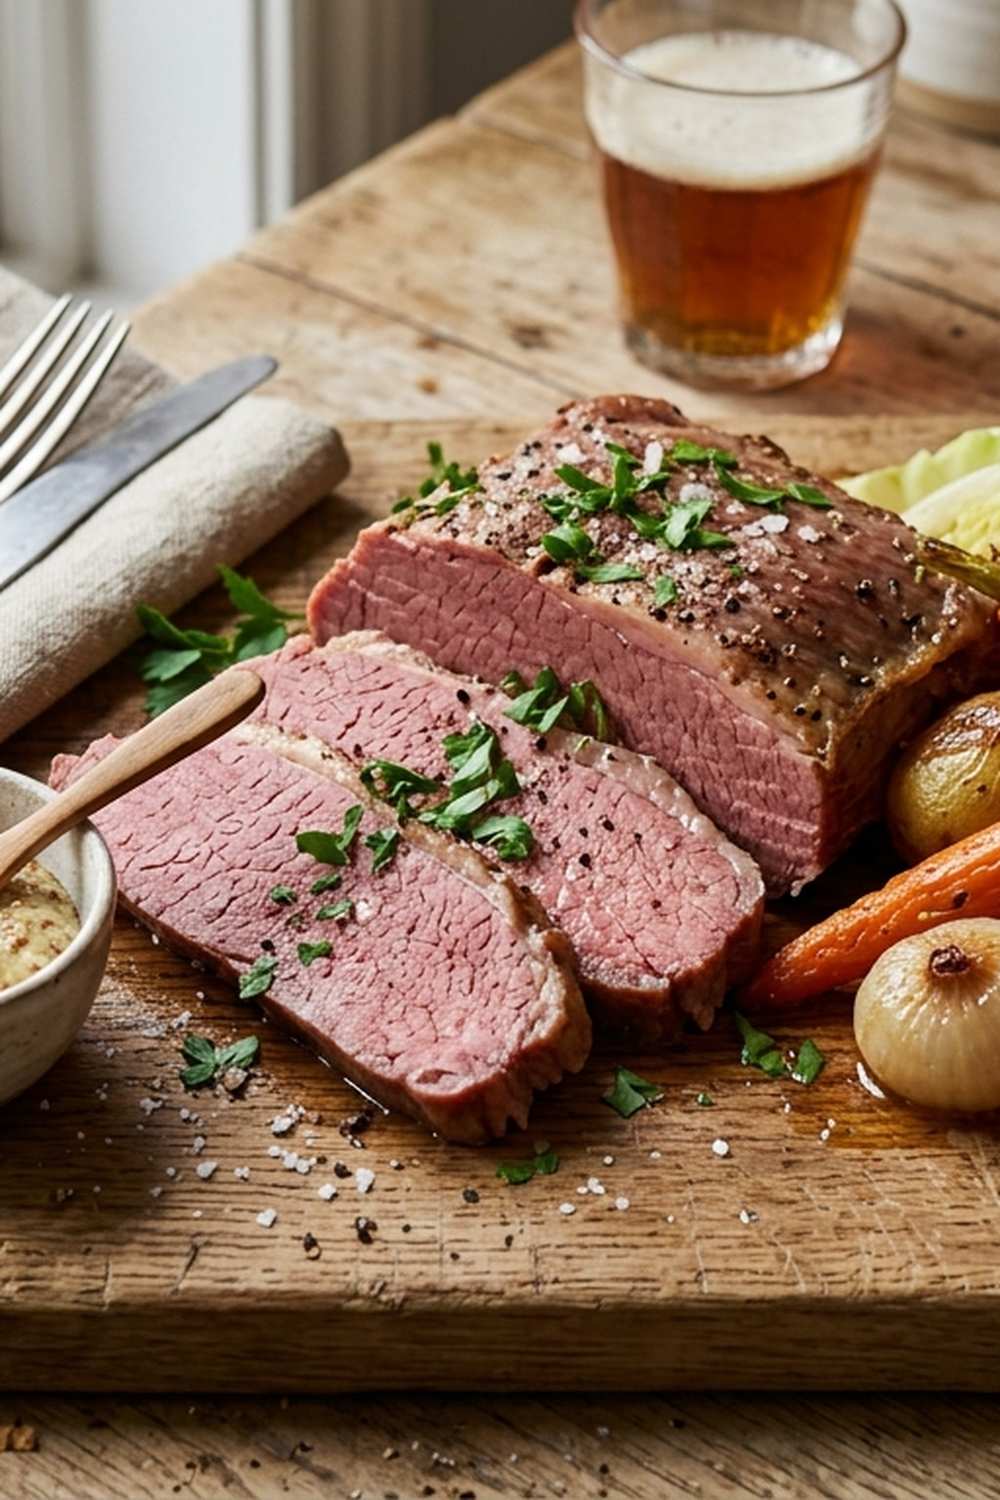
Here’s what I’ve learned after years of meal prepping: the best recipes are the ones that transform themselves. You make them once on a quiet Sunday afternoon, and suddenly you’ve got five entirely different dinners waiting in your fridge. This slow-cooked oven corned beef is exactly that kind of recipe. It’s the anchor ingredient that turns into Monday’s classic dinner, Wednesday’s grain bowl, and Friday’s hearty sandwich. If you’re tired of deciding what to cook every single night, this is your answer.
I’m going to show you how to scale this recipe for a full week of meals, store it properly so it stays moist and flavorful through day five, and reimagine it in ways that prevent the dreaded “I’m eating the same thing again?” fatigue. Whether you’re feeding a family of four or meal prepping solo, this approach takes the stress out of weeknight cooking. Consider pairing this with our my favorite salad for a complete meal that satisfies through the week.
Corned Beef In Oven Slow Cooked Recipe Meal Prep: Cook Once, Eat All Week
I discovered meal prepping almost by accident. My mom, who immigrated from Ireland with nothing but her grandmother’s recipes and fierce determination, used to cook huge batches of corned beef on Sundays. She’d serve it one way on Monday, transform it completely by Wednesday, and by Friday, you wouldn’t even recognize it was the same protein. I watched her stretch one 3-pound cut of beef into five different family dinners, and I realized she wasn’t just cooking—she was strategizing.
It wasn’t until I was in my twenties, drowning in takeout containers and microwaved disappointments, that I understood what she was really teaching me: intentional cooking creates freedom. When you invest two hours on a Sunday in a slow-cooked oven corned beef, you’re not just making dinner. You’re buying back fifteen minutes every evening that week. You’re removing the “what’s for dinner?” paralysis that stops so many of us from eating well.
This recipe, with its apple cider brightness and spiced complexity, holds up beautifully across multiple preparations. The meat becomes more tender as it sits, the flavors deepen, and everything reheats without drying out if you follow the right methods. Let me show you exactly how to make this work for your week.
Why This Recipe Is Perfect for Meal Prep
- Saves 45-60 minutes across the week – One 2.5-hour oven session replaces five separate dinner decisions and cooking sessions. That’s nearly an hour of your life reclaimed.
- Improves with age – Unlike many proteins that deteriorate, this corned beef becomes more tender and flavorful each day. The liquid penetrates deeper into the meat, creating better texture by day four.
- Transforms into five completely different meals – Same base ingredient, zero repetition. Monday feels entirely different from Friday, preventing the meal prep burnout that derails so many people by Wednesday.
- Minimal active cooking required – The oven does the heavy lifting. You prep, you set it, you disappear for 2.5 hours. This is passive cooking at its finest.
- Budget-friendly protein that feeds generously – A single 3.5-pound cut yields 6-8 servings. That’s roughly $2-3 per meal for quality beef.
Your Weekly Meal Plan With This Recipe
Here’s exactly how I transform one batch of slow-cooked corned beef into five distinct meals that feel fresh and intentional:
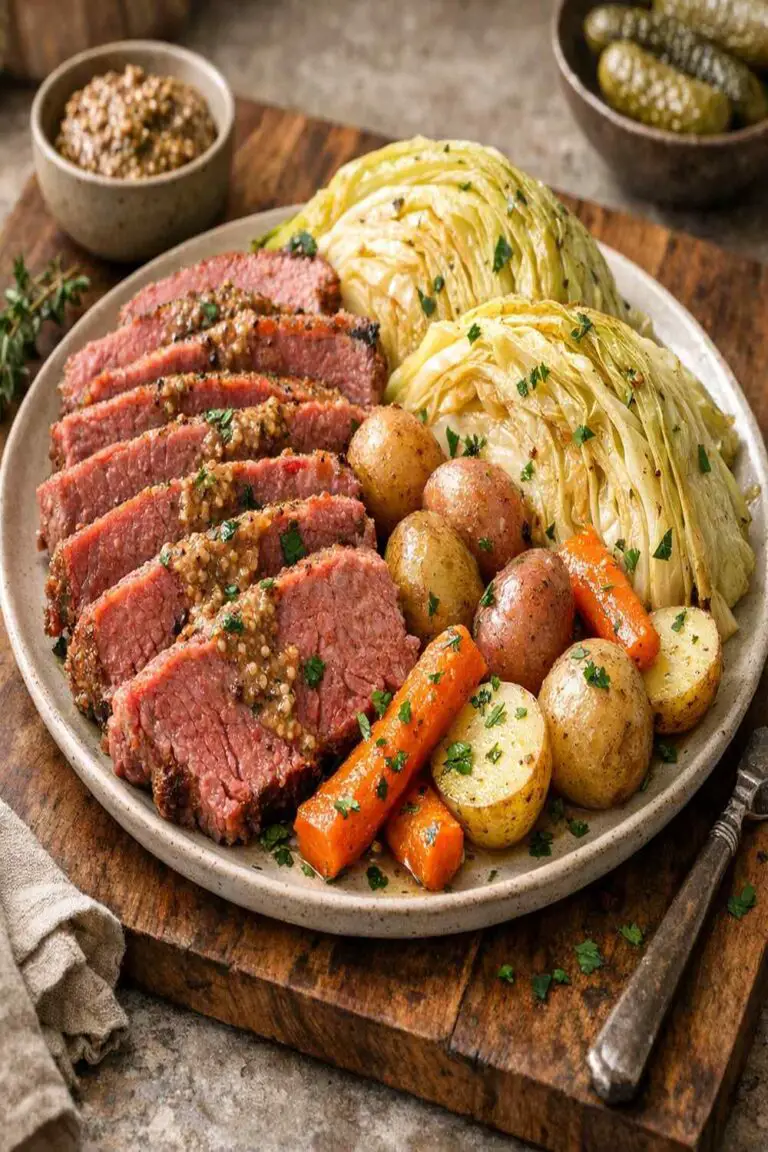
- Monday: Classic Corned Beef Dinner – Serve thick slices with mustard glaze, crusty bread, and roasted root vegetables. This is when you showcase the meat in its most straightforward, celebratory form.
- Tuesday: Corned Beef Hash – Dice the leftover beef, crisp it with diced potatoes and onions in a cast iron skillet, top with a fried egg. Everything feels new again.
- Wednesday: Grain Bowl Situation – Shred the beef, pile it over farro or quinoa, add pickled vegetables, a runny egg, and a mustard vinaigrette. This is where you feel fancy and healthy simultaneously.
- Thursday: Open-Faced Sandwich – Thin-slice the remaining beef, warm it gently in its braising liquid, layer on toasted rye with horseradish cream and arugula.
- Friday: Beef and Vegetable Soup – Shred all remaining meat, simmer it with the cooking liquid, add diced vegetables and beans. This becomes something entirely different—warm, comforting, and perfect for transitioning into the weekend.
The Ingredients – Scaled for a Full Week
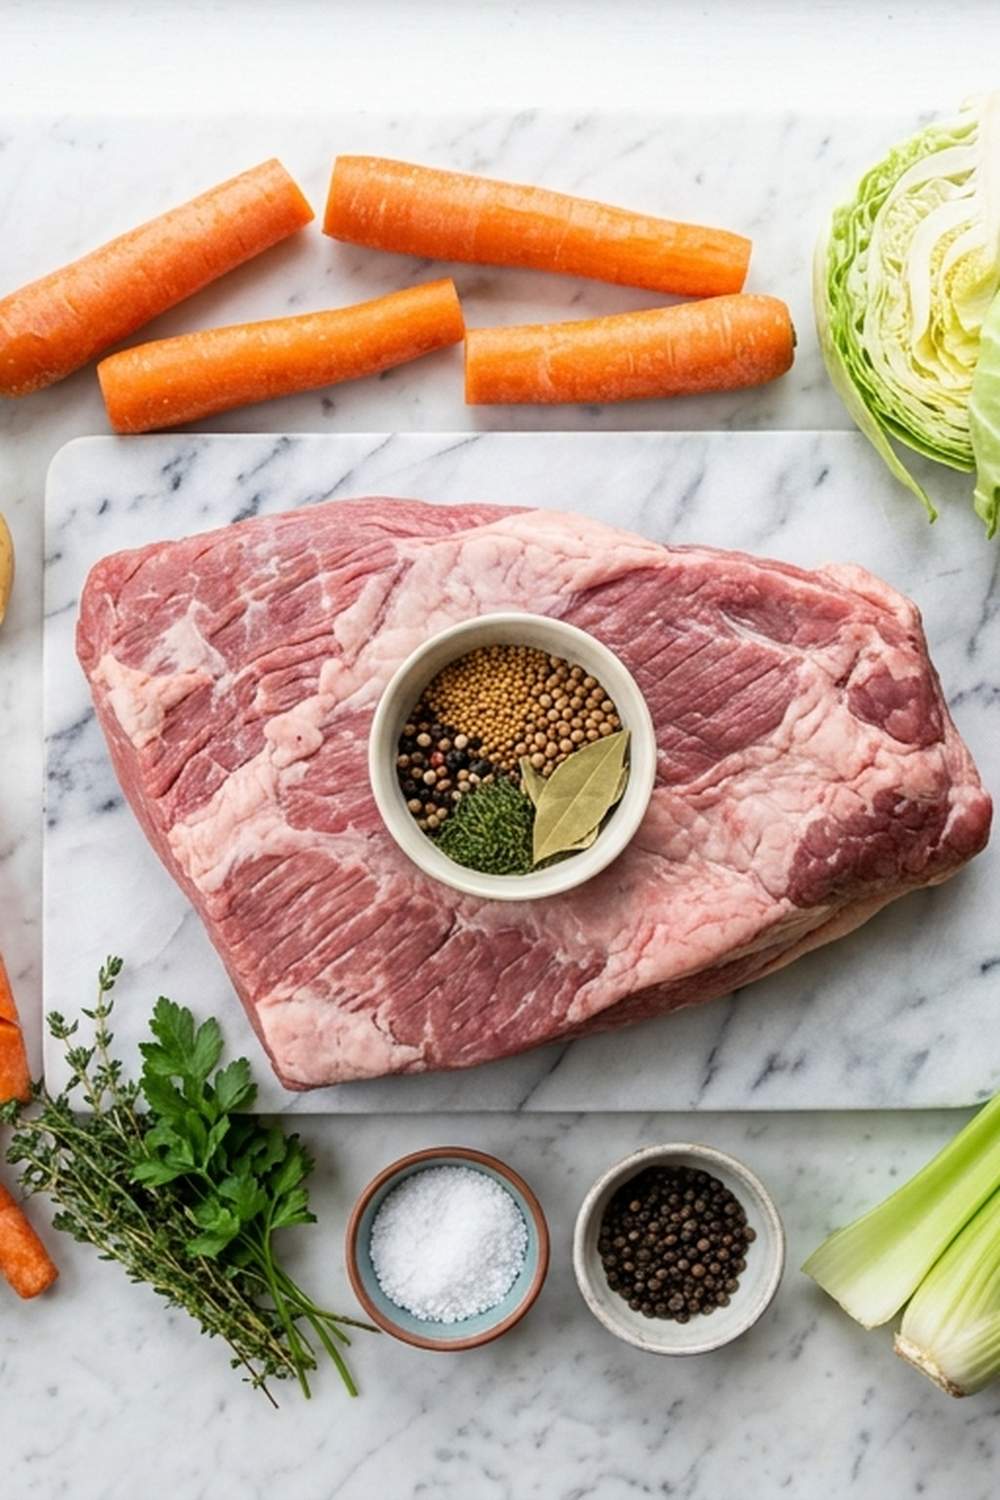
I’ve scaled these ingredients to yield 6-8 generous servings, with enough flexibility to stretch or compress based on your household size. This entire ingredient list is designed around one premium corned beef cut that transforms beautifully. Notice I’ve included ingredients the source recipe skipped—Worcestershire and whole grain mustard add depth that carries across the entire week of meals.
- 3 tablespoons apple cider vinegar (acidity is your secret weapon for breaking down collagen into gelatin, creating that tender, spoonable texture)
- ¾ teaspoon fennel seeds, crushed lightly (this spice echoes the traditional pickling spices in the corned beef)
- 3 tablespoons Dijon mustard, whole grain variety (creates a more textured glaze with more complex flavor than smooth mustard)
- 1.5 cups apple juice, unsweetened (the acidity tenderizes the meat while the natural sweetness balances heat)
- 4 cloves garlic, minced finely (more garlic amplifies the savory depth that intensifies over the week)
- 2 bay leaves (provides subtle earthiness without overpowering the apple cider profile)
- 1 tablespoon Worcestershire sauce (adds umami depth that carries through reheating better than salt alone)
- ¼ cup brown sugar, packed (the molasses notes caramelize during slow cooking, creating subtle sweetness)
- 3.5 to 4 pounds corned beef brisket, untrimmed (the fat cap is essential; it protects the meat during long cooking and creates that silky texture)
- ¾ teaspoon coarse black pepper, freshly ground (coarse grounds provide texture and flavor that fine pepper cannot)
The Meal Prep Process: How to Make Corned Beef In Oven Slow Cooked Recipe in Bulk
This isn’t just cooking instructions—it’s a system designed to make your week exponentially easier. I’m walking you through every step with the efficiency insights I’ve gathered from developing recipes for busy kitchens. You’ll notice I’m building in pauses and organizational checkpoints. These matter.
Step 1: Pat and Prime Your Beef—Create the Perfect Crust Foundation
Remove your corned beef from the refrigerator 30 minutes before cooking. This matters more than you’d think. Room temperature meat cooks more evenly, which means less chance of tough, overcooked edges while the center catches up.
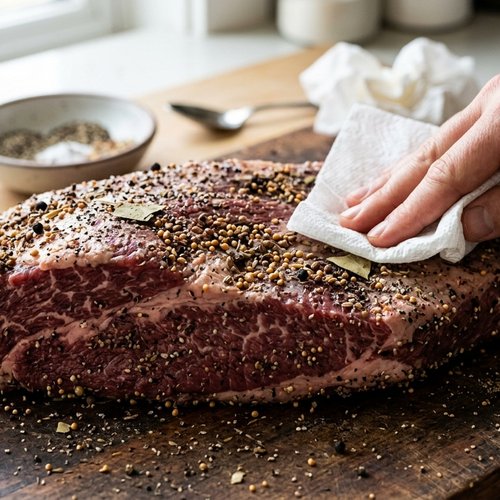
Place the brisket on a large cutting board and pat it completely dry with paper towels—front, back, and especially that fat cap. Moisture is the enemy of browning. Any lingering surface water prevents the Maillard reaction, that beautiful chemical transformation that creates savory depth.
Season generously on all sides with half your coarse black pepper. Don’t be shy. This initial seasoning creates a flavorful crust that locks in juices. Reserve the remaining pepper for your braising liquid.
Step 2: Sear for Flavor—Building Your Foundation
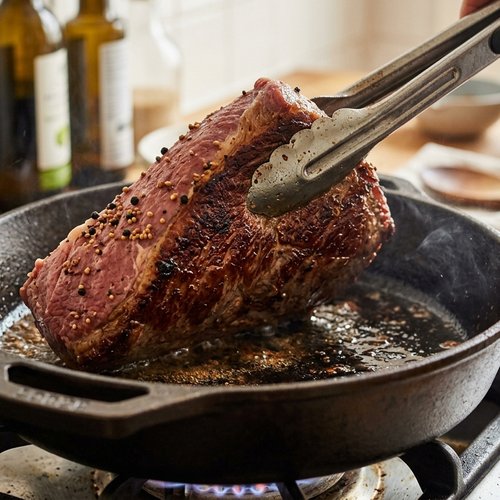
Heat a large oven-safe Dutch oven or heavy-bottomed roasting pan over medium-high heat for three minutes. You want the surface genuinely hot, not just warm. Add a thin film of neutral oil (avocado or vegetable work beautifully).
Place the seasoned corned beef fat-side down in the hot pan. Resist the urge to move it. Let it develop color for 4-5 minutes without disturbing it. You’re building flavor through caramelization, not cooking the meat through. Flip carefully and sear the other side for 3 minutes. This browning step separates extraordinary slow-cooked beef from merely adequate versions.
Remove the seared beef to a plate temporarily. You’re not cooking it yet—you’re creating that caramelized surface that defines premium slow-cooked meat.
Step 3: Build Your Braising Liquid—The Secret Ingredient System
In the same Dutch oven (don’t clean it—those browned bits are liquid gold), combine your minced garlic and crushed fennel seeds. Stir constantly for exactly 45 seconds. This blooming step releases the essential oils from the fennel, intensifying its flavor so it carries through the entire cooking time. Underbloom this, and you’ll barely taste the fennel by Wednesday.
Add your whole grain Dijon mustard, brown sugar, and Worcestershire sauce. Stir to combine, breaking down the sugar slightly. This creates a paste-like base that will distribute evenly through your braising liquid.
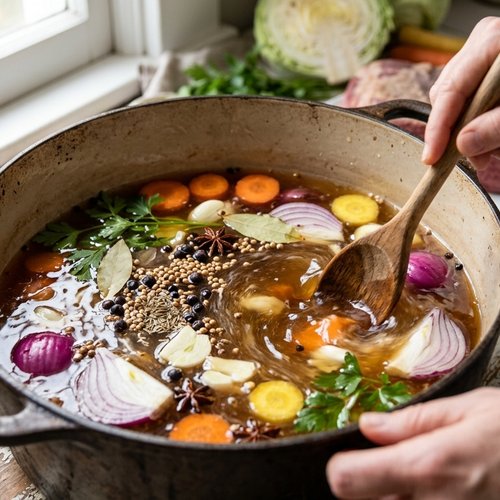
Pour in the apple juice and apple cider vinegar slowly, stirring continuously. This prevents clumping and ensures the sugar dissolves completely. Add your two bay leaves and the remaining coarse pepper. Taste the liquid now—before you add the meat, you should taste brightness, slight sweetness, and savory depth. The liquid carries the entire flavor profile of this dish.
Pro tip from my multicultural kitchen: the acidity-to-sweetness balance is intentional. The apple juice provides sweetness, the vinegar provides brightness, and this balance is what keeps the meat tender over five days of storage. Too much acid makes it tough; too little and you lose the preservative quality that lets it sit safely in your refrigerator.
Step 4: Return the Beef and Bring to Simmer
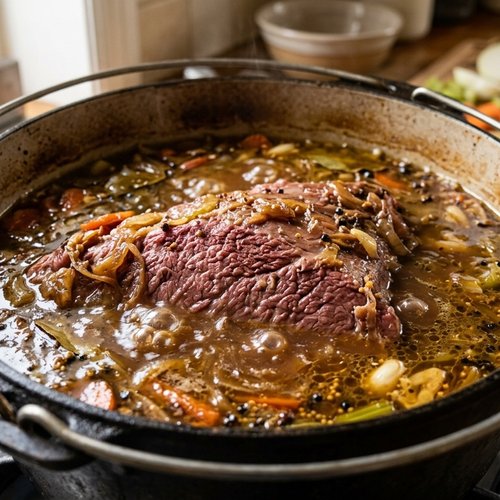
Place your seared corned beef back into the Dutch oven, fat-side up. Pour any accumulated juices from the plate into the pot. The liquid should come roughly halfway up the sides of the meat. This is intentional—you’re braising, not boiling. The steam and liquid work together to tenderize.
Bring everything to a gentle simmer on the stovetop. You’ll see steam rising, maybe a few bubbles breaking the surface. This takes about 5-7 minutes. You’re not looking for a rolling boil—that aggressive heat toughens the muscle fibers. You want a whisper of a simmer, the kind where one or two bubbles break the surface every couple of seconds.
Once you reach that gentle simmer, place the lid on your Dutch oven (parchment paper under the lid prevents condensation from dripping onto the meat) and transfer to a preheated 300°F oven.
Step 5: The Long Braise—Trust the Process
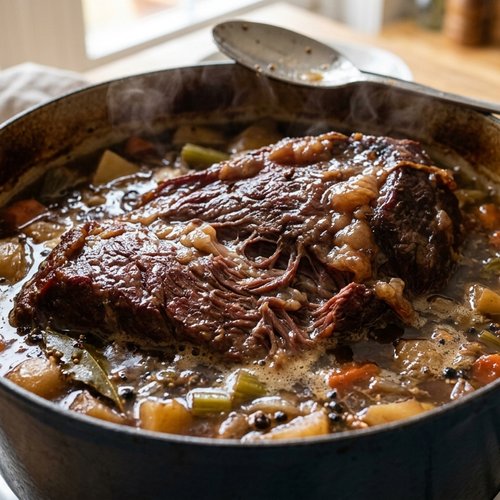
Cook for 2.5 to 3 hours at 300°F. The exact time depends on the thickness and shape of your specific corned beef cut. Start checking at the 2-hour mark by inserting a fork into the thickest part. The meat should offer almost no resistance—it should feel like pulling a fork through butter.
You’ll see the fat cap has rendered significantly, and the braising liquid has become rich and dark. This is exactly right. Don’t open the oven repeatedly—every time you crack that door, you lose heat and extend cooking time.
The beauty of this temperature and time combination is that it transforms collagen (the connective tissue that makes tough cuts tender) into gelatin. This is why day-four leftovers taste better than day-one—the gelatin has fully set, creating that silky, spoonable texture. This is science at work in your favor.
Step 6: Cool and Prepare for Storage
Remove the Dutch oven from the oven and let it rest at room temperature for 20 minutes. Don’t skip this step. Resting allows carryover cooking to finish and helps the meat reabsorb juices.
Once cooled slightly, transfer the corned beef to a cutting board and let it rest for another 15 minutes before slicing. This prevents the juices from running everywhere and ensures better texture when you eventually reheat portions.
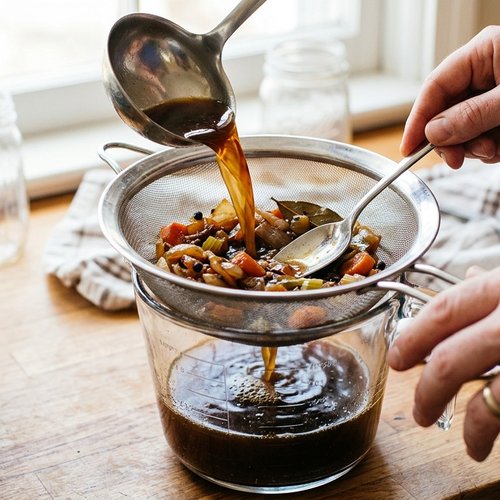
Strain the braising liquid through a fine-mesh strainer into a container, pressing gently on any solids. You’re keeping every drop of this flavor. Let the liquid cool to room temperature, then refrigerate. The fat will solidify on top within a few hours—this fat layer protects the meat underneath, extending its storage life significantly.
Step 7: Slice, Portion, and Store for the Week
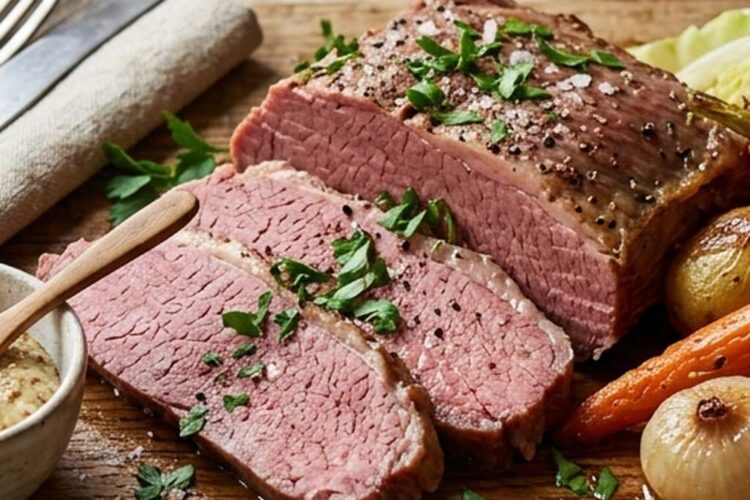
Once completely cooled, slice the corned beef against the grain into your desired thicknesses. Cut against the grain—perpendicular to the muscle fibers. This shortens the fibers, making each bite more tender. If you cut with the grain, you’ll have long muscle fibers that feel stringy and tough.
Portion the sliced beef into your storage containers. I use glass containers with lids because they’re durable, they don’t retain odors or stains, and you can see exactly what you have. Divide the meat into portions based on your weekly meal plan: larger portions for days you’ll serve it traditionally, smaller portions for days you’ll shred it or incorporate it into other dishes.
Pour the reserved braising liquid over each portion, covering the meat completely. The liquid serves two functions: it keeps the meat moist during storage and during reheating, and it prevents oxidation (that gray discoloration that happens when cooked meat meets air).
Storage and Organization System
- Glass containers with tight-sealing lids – Superior to plastic for this application. Glass doesn’t retain flavors or odors, and the airtight seal prevents oxidation. The meat stays pink and appetizing through day five when stored this way. Stack containers in your refrigerator with largest on bottom for easy access.
- Portion by meal purpose – Don’t divide into equal portions. Instead, create containers based on how you’ll use them: one container with thick slices for Monday’s classic dinner, another with smaller portions you’ll dice for hash, another with medium slices for sandwiches. This eliminates the “what do I do with this today?” confusion.
- Date and contents label system – Use a waterproof marker to write directly on painter’s tape applied to the container lid. Write the date cooked and the intended meal. This takes 15 seconds and eliminates the “is this from Sunday or last week?” anxiety that keeps people from eating leftovers confidently.
- Braising liquid management – Keep the fat cap on top of the stored meat. This creates an anaerobic seal that extends freshness. If you’ve separated liquid from meat, store in the same container—the liquid is your insurance policy against drying out.
How to Reheat Without Losing Quality
This is where most people fail at meal prep. They cook beautifully, store properly, then nuke everything in a microwave and wonder why it’s dry. The reheating method determines whether you’re eating restaurant-quality beef or sad, rubbery meat. Let me show you the right way.
For thick slices (Monday and Thursday meals): Remove the portion from the refrigerator 15 minutes before reheating. Place the cold sliced beef in a skillet with 2-3 tablespoons of the reserved braising liquid over medium heat. Cover the pan with a lid and warm for 6-8 minutes, stirring gently once halfway through. The liquid steams the meat back to tenderness while preventing any browning or drying. You’ll hear a gentle sizzle—that’s perfect. The meat should be hot throughout and glistening with braising liquid.
For diced beef (Tuesday hash and Friday soup): The microwave is acceptable here because you’re incorporating the meat into another preparation. Place diced portions in a microwave-safe container with 1-2 tablespoons braising liquid, cover loosely, and heat for 60-90 seconds at 50% power. The lower power prevents hot spots and explosive heating. Stir halfway through. The meat reheats evenly and stays moist because of the braising liquid.
For grain bowls and composed dishes: Reheat the shredded beef gently on the stovetop in its braising liquid over low heat for 5-7 minutes, stirring occasionally. Don’t let it bubble aggressively. Once warm, assemble your grain bowl with the beef and warm braising liquid drizzled over everything. The liquid becomes a sauce that ties the whole dish together.
Never use high heat or prolonged cooking times. The muscle fibers have already been broken down by the long braise. Aggressive reheating causes them to contract and squeeze out moisture, creating dryness. Gentle reheating preserves the texture you worked so hard to achieve.
Can I Freeze Corned Beef In Oven Slow Cooked Recipe?
Absolutely, and freezing is actually a smart strategy for extending this meal prep beyond a single week. I freeze portions all the time when I’m batch cooking during seasonal sales.
Freeze the beef in its braising liquid for maximum results. The liquid protects the meat from freezer burn and provides seasoning when you thaw and reheat. Portion into freezer-safe containers or bags, leaving ½ inch of headspace because the liquid expands during freezing. Label with the date and cooking method (reminder: this was slow-cooked, not sautéed, so it reheats differently).
Frozen corned beef maintains quality for 2-3 months in a standard freezer at 0°F or below. Beyond that, ice crystals begin to damage the muscle fibers slightly, creating a slightly different texture upon thawing—still delicious, still perfectly safe, just less tender than fresh storage.
Thaw in the refrigerator overnight before reheating using the gentle stovetop methods I outlined above. Never thaw at room temperature—bacteria multiplies rapidly in the danger zone between 40-140°F. Never refreeze thawed meat. Freeze once, thaw once, cook once, eat confidently.
If you’re freezing for longer than two weeks, consider vacuum-sealing portions. Removing air prevents oxidation and extends quality to 4-5 months. Vacuum-sealed beef freezes beautifully and thaws faster than container-frozen portions.
Nutrition Information
Based on USDA nutrition data, one 4-ounce serving of slow-cooked corned beef (without braising liquid) contains approximately 285 calories, 23 grams of protein, 22 grams of fat, and 1 gram of carbohydrates. The braising liquid adds minimal additional calories but contributes sodium from the spices and apple cider vinegar.
Here’s what makes this meal prep approach nutritionally smart: you’re eating quality beef rich in iron, zinc, and B vitamins—nutrients that prevent the fatigue and brain fog that derail so many meal preppers by Wednesday. The extended cooking time breaks down collagen into gelatin, which supports joint health and gut integrity in ways that quickly cooked beef cannot. The apple cider and vinegar contribute enzymes that aid digestion.
Over a full week, this meal prep contributes approximately 2,100 calories of nutrient-dense protein-based meals. That’s roughly 300 calories per meal, leaving significant room for sides, vegetables, and healthy fats. The meal structure naturally prevents overeating because you’re not grabbing processed foods out of convenience—you’re reaching for intentional, whole-food meals that satisfy.
What to Pair With Corned Beef In Oven Slow Cooked Recipe Throughout the Week
Here’s where meal prep moves from practical to pleasurable. The same protein deserves different accompaniments throughout the week. This prevents the monotonous repetition that destroys even the best meal prep intentions.
- Monday: Roasted Root Vegetables and Crusty Bread – Thick-cut carrots, parsnips, and beets roasted in the oven alongside the corned beef. The naturals sweetness complements the apple cider braising liquid. Toast thick slices of rye bread for dipping into the braising liquid reduction.
- Tuesday: Crispy Hash with Fried Egg – Pan-fried diced potatoes, onions, and corned beef in cast iron, topped with a runny yolk. The egg yolk becomes sauce. Serve with hot sauce or fresh herbs for brightness.
- Wednesday: Grain Bowl Approach – Farro, quinoa, or barley as your base, topped with shredded corned beef, pickled red onions, arugula, and avocado. A drizzle of the reserved braising liquid becomes your dressing. This meal feels elegant enough for lunch at a nice restaurant.
- Thursday: Open-Faced Sandwich with Horseradish Cream – Thin-sliced beef on toasted rye, topped with a dollop of horseradish cream (sour cream mixed with prepared horseradish), fresh arugula, and a pickle spear. The spice cuts through the richness beautifully.
- Friday: Vegetable and Beef Soup – Shredded corned beef simmered with the braising liquid, diced root vegetables, cannellini beans, and fresh herbs. Serve with a crusty bread side for dipping. Consider adding our this cozy soup technique of finishing with a touch of heavy cream for richness.
Notice each pairing shifts the flavor profile and nutritional balance. Monday feels celebratory and rich. Tuesday feels casual and breakfast-adjacent. Wednesday feels light and composed. Thursday feels sophisticated. Friday feels warm and comforting. Same protein, five entirely different dining experiences.
Expert’s Nutritional Tip: Understanding Collagen Transformation
Here’s something I learned working with international cuisines where slow-cooking is non-negotiable: collagen transformation is the hidden gem of this recipe. The connective tissue in tougher cuts of beef is primarily collagen. At room temperature, it’s tough and chewy. During cooking, collagen unwinds and bonds with the braising liquid. As it cools, it transforms into gelatin—the same substance in bone broth that everyone’s paying premium prices for.
This is why your day-four corned beef tastes better than day-one. The gelatin has fully set. It coats your mouth, provides that silky mouthfeel, and actually aids digestion better than the day-old version. This is why you want to include the braising liquid in storage. That liquid is as valuable as the meat itself. The apple cider vinegar and fennel in the braising liquid optimize this transformation. The acidity helps break down collagen more efficiently, meaning better texture with less total cooking time.
When you reheat in the gentle stovetop method I described, you’re preserving these gelatin bonds. Aggressive reheating breaks them apart, and that silky quality disappears. This is real food science working in your favor.
Make-Ahead Guide: Working Backward From Your Week
Let me share the system I use when I’m managing multiple meals throughout the week:
Sunday Cooking Schedule: Set aside 3.5 hours total (2.5 hours hands-off). Start your corned beef at 11 AM if you want to be completely finished by 2:30 PM, with everything cooled and portioned before dinner. If you prefer to cook earlier, start at 8 AM and you’re done by 11:30 AM, giving you the entire afternoon for other activities.
Prep Tomorrow’s Meal on Today: Monday evening (after you’ve eaten Monday dinner), spend 10 minutes preparing Tuesday’s hash. Dice the corned beef portion, dice potatoes, chop onions. Store these in separate containers. Tuesday evening, you’re simply throwing pre-prepped ingredients into a hot skillet. That’s the meal prep advantage—compound your work strategically.
Assemble Wednesday’s Grain Bowl Base: Tuesday evening, cook your grains for Wednesday. While they’re cooking, pickle your red onions in a quick vinegar brine. Wednesday morning, everything is ready for assembly. You’re not cooking Wednesday—you’re assembling.
Extend Friday’s Reach: Friday’s soup is your reset button. If you’re running low on motivation, knowing you have a simple, warming soup to look forward to keeps you engaged with the meal prep through the end of the week. Don’t underestimate the psychological value of a good finish.
Common Mistakes to Avoid
Mistake 1: Cooking at Too High a Temperature – Many home cooks rush the process by increasing oven temperature to 325°F or 350°F. This accelerates cooking but damages the meat texture. The muscle fibers contract aggressively, squeezing out moisture. You end up with tender meat on the outside and tough, dry meat in the center. The 300°F temperature is not arbitrary—it’s the sweet spot where heat penetrates evenly while collagen transforms gently. Your patience is the ingredient.
Mistake 2: Skipping the Sear – Some cooks place raw beef directly into the braising liquid to save time. You lose 40% of the final flavor by skipping this step. The Maillard reaction (the chemical browning that creates savory complexity) only happens with dry surface heat. Those browned bits are flavor compounds that dissolve into your braising liquid. You cannot replicate this flavor by simmering longer. The sear takes 8 minutes and transforms the entire dish.
Mistake 3: Opening the Oven Door Constantly – Every time you open the oven, temperature drops 25-50°F. You’re extending cooking time and creating uneven heating. Resist the urge to check on the meat until at least the 2-hour mark. Trust the process. Set a timer and trust the timer.
Mistake 4: Reheating at High Temperature – This is where beautiful meal prep becomes disappointing. People spend all that time cooking low-and-slow, then microwave on high for three minutes and wonder why it’s rubbery. The muscle fibers contract aggressively under high heat, squeezing out moisture. Gentle reheating (medium heat on stovetop, or 50% power in microwave) preserves texture. It takes 8 minutes instead of 3 minutes, but you’re protecting the quality you worked so hard to achieve.
Seasonal Variations: Making This Recipe Year-Round
Spring Version: Replace half the apple juice with fresh lemon juice. Add fresh thyme and a tablespoon of Dijon mustard mixed with whole grain mustard. Add fresh peas to your storage containers just before eating—they provide color and brightness without softening during storage.
Summer Version: Use unfiltered apple cider instead of juice for deeper flavor. Add a star anise pod and reduce the brown sugar to 2 tablespoons. Pair with lighter sides like grilled vegetables and fresh greens. The same beef becomes summery through accompaniments.
Fall Version: This is the default version—apple juice, brown sugar, and fennel naturally align with autumn. Increase the brown sugar to 3.5 tablespoons and add a cinnamon stick. The result is more obviously autumnal, perfect for October and November.
Winter Version: Add 1 tablespoon of molasses to deepen the color and flavor. Include two dried bay leaves and a tablespoon of Worcestershire sauce. Serve with root vegetables and hearty grains. The flavor becomes richer and more warming.

Corned Beef In Oven Slow Cooked Recipe
Ingredients
Method
- Remove your corned beef from the refrigerator 30 minutes before cooking. This matters more than you'd think. Room temperature meat cooks more evenly, which means less chance of tough, overcooked edges while the center catches up. Place the brisket on a large cutting board and pat it completely dry with paper towels—front, back, and especially that fat cap. Moisture is the enemy of browning. Any lingering surface water prevents the Maillard reaction, that beautiful chemical transformation that creates savory depth. Season generously on all sides with half your coarse black pepper. Don't be shy. This initial seasoning creates a flavorful crust that locks in juices. Reserve the remaining pepper for your braising liquid.
- Heat a large oven-safe Dutch oven or heavy-bottomed roasting pan over medium-high heat for three minutes. You want the surface genuinely hot, not just warm. Add a thin film of neutral oil (avocado or vegetable work beautifully). Place the seasoned corned beef fat-side down in the hot pan. Resist the urge to move it. Let it develop color for 4-5 minutes without disturbing it. You're building flavor through caramelization, not cooking the meat through. Flip carefully and sear the other side for 3 minutes. This browning step separates extraordinary slow-cooked beef from merely adequate versions. Remove the seared beef to a plate temporarily. You're not cooking it yet—you're creating that caramelized surface that defines premium slow-cooked meat.
- In the same Dutch oven (don't clean it—those browned bits are liquid gold), combine your minced garlic and crushed fennel seeds. Stir constantly for exactly 45 seconds. This blooming step releases the essential oils from the fennel, intensifying its flavor so it carries through the entire cooking time. Underbloom this, and you'll barely taste the fennel by Wednesday. Add your whole grain Dijon mustard, brown sugar, and Worcestershire sauce. Stir to combine, breaking down the sugar slightly. This creates a paste-like base that will distribute evenly through your braising liquid. Pour in the apple juice and apple cider vinegar slowly, stirring continuously. This prevents clumping and ensures the sugar dissolves completely. Add your two bay leaves and the remaining coarse pepper. Taste the liquid now—before you add the meat, you should taste brightness, slight sweetness, and savory depth. The liquid carries the entire flavor profile of this dish. Pro tip from my multicultural kitchen: the acidity-to-sweetness balance is intentional. The apple juice provides sweetness, the vinegar provides brightness, and this balance is what keeps the meat tender over five days of storage. Too much acid makes it tough; too little and you lose the preservative quality that lets it sit safely in your refrigerator.
- Place your seared corned beef back into the Dutch oven, fat-side up. Pour any accumulated juices from the plate into the pot. The liquid should come roughly halfway up the sides of the meat. This is intentional—you're braising, not boiling. The steam and liquid work together to tenderize. Bring everything to a gentle simmer on the stovetop. You'll see steam rising, maybe a few bubbles breaking the surface. This takes about 5-7 minutes. You're not looking for a rolling boil—that aggressive heat toughens the muscle fibers. You want a whisper of a simmer, the kind where one or two bubbles break the surface every couple of seconds. Once you reach that gentle simmer, place the lid on your Dutch oven (parchment paper under the lid prevents condensation from dripping onto the meat) and transfer to a preheated 300°F oven.
- Cook for 2.5 to 3 hours at 300°F. The exact time depends on the thickness and shape of your specific corned beef cut. Start checking at the 2-hour mark by inserting a fork into the thickest part. The meat should offer almost no resistance—it should feel like pulling a fork through butter. You'll see the fat cap has rendered significantly, and the braising liquid has become rich and dark. This is exactly right. Don't open the oven repeatedly—every time you crack that door, you lose heat and extend cooking time. The beauty of this temperature and time combination is that it transforms collagen (the connective tissue that makes tough cuts tender) into gelatin. This is why day-four leftovers taste better than day-one—the gelatin has fully set, creating that silky, spoonable texture. This is science at work in your favor.
- Remove the Dutch oven from the oven and let it rest at room temperature for 20 minutes. Don't skip this step. Resting allows carryover cooking to finish and helps the meat reabsorb juices. Once cooled slightly, transfer the corned beef to a cutting board and let it rest for another 15 minutes before slicing. This prevents the juices from running everywhere and ensures better texture when you eventually reheat portions. Strain the braising liquid through a fine-mesh strainer into a container, pressing gently on any solids. You're keeping every drop of this flavor. Let the liquid cool to room temperature, then refrigerate. The fat will solidify on top within a few hours—this fat layer protects the meat underneath, extending its storage life significantly.
- Once completely cooled, slice the corned beef against the grain into your desired thicknesses. Cut against the grain—perpendicular to the muscle fibers. This shortens the fibers, making each bite more tender. If you cut with the grain, you'll have long muscle fibers that feel stringy and tough. Portion the sliced beef into your storage containers. I use glass containers with lids because they're durable, they don't retain odors or stains, and you can see exactly what you have. Divide the meat into portions based on your weekly meal plan: larger portions for days you'll serve it traditionally, smaller portions for days you'll shred it or incorporate it into other dishes. Pour the reserved braising liquid over each portion, covering the meat completely. The liquid serves two functions: it keeps the meat moist during storage and during reheating, and it prevents oxidation (that gray discoloration that happens when cooked meat meets air).
Nutrition
Tried this recipe?
Let us know how it was!FAQs
How long does this corned beef stay safe in the refrigerator?
Properly stored in the braising liquid with an airtight seal, this corned beef maintains quality and safety for 4-5 days from the cooking date. The braising liquid’s acidity (from apple cider vinegar) acts as a preservative, but after five days, oxidation begins to affect texture and color. Write your storage date on every container. By day three, you should be eating most servings. By day five, consume immediately or freeze the remainder.
Can I use a slow cooker instead of the oven?
Yes, but the result differs slightly. A slow cooker on low setting (around 200°F) requires 6-8 hours for the same tenderness, and you lose the initial sear’s browning flavor. If you must use a slow cooker, sear the beef on the stovetop first (this step is non-negotiable), then transfer to the slow cooker with the braising liquid. Cook on low for 6 hours. You’ll achieve the same tenderness but with slightly less developed flavor. The oven method is superior because it provides more even heat distribution.
My corned beef came with a spice packet. Should I use it?
The commercial spice packet is optional. If you want to include it, use half of it and omit the fennel seeds and bay leaves from my recipe. The commercial packet creates a different flavor profile—more traditional, less bright. My version emphasizes apple cider brightness and allows the beef’s natural flavors to shine. If you’re committed to my recipe, skip the packet entirely.
How do I prevent the meat from drying out when stored for multiple days?
Never separate the meat from its braising liquid. The liquid acts as a moisture barrier and flavor source. When you portion the beef, portion it with the liquid. If you’ve sliced the beef, ensure each slice is touching liquid on at least two sides. The fat cap from the braising liquid (that solidifies on top) is your insurance policy—leave it in place as you store. When you reheat, always add a splash of additional braising liquid. These methods combine to keep the meat moist through day five.
Can I make this recipe with a leaner cut of corned beef?
Technically yes, but I strongly advise against it. Corned beef’s tenderness comes from long, slow cooking that transforms collagen and fat into gelatin and silky richness. A lean cut lacks sufficient collagen. You’ll end up with meat that’s tender but dry—like overcooked chicken breast. The fattier cuts (brisket point) are specifically selected for this recipe because the fat renders slowly, keeping the meat moist through the entire cooking time. If you’re concerned about fat content, simply remove visible fat before eating. The visible fat can be trimmed; the intramuscular fat that creates texture cannot be replicated.