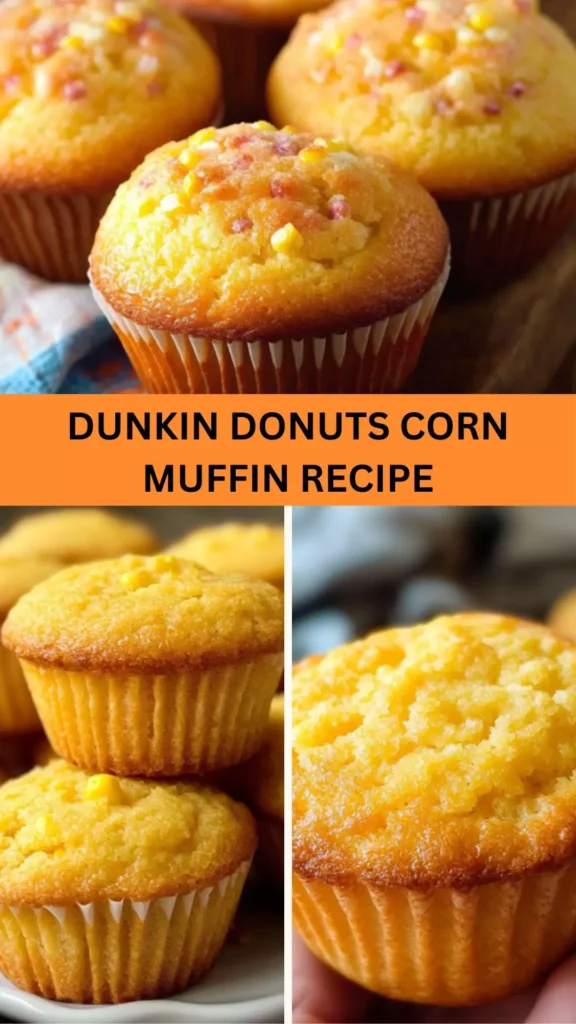
You’ve just unwrapped a warm Dunkin’ Donuts corn muffin, the sweet scent filling the air, and you’re pondering how to elevate your experience even further. Corn muffins are versatile and pair beautifully with various toppings and beverages.
You might enjoy it with a dollop of butter or a spicy jalapeño jam. Pairing this muffin with a hot cup of coffee or a refreshing iced tea can transform your snack into a delightful treat.
You can also savor it with scrambled eggs, adding protein and texture. A side of fruit salad brings a refreshing zest that balances the sweet richness of the muffin.
Each pairing enhances the enjoyment of the corn muffin, turning a simple snack into a memorable meal. Now, let’s dive into the wonderful world of Dunkin’ Donuts’ corn muffin.

As a food enthusiast and a registered dietitian, I have a passion for exploring all things delicious. I can’t help but remember the first time I bit into a Dunkin’ Donuts corn muffin. The sweet, slightly crumbly texture made it an instant favorite.
However, I noticed that many people wondered how to recreate this treat at home. Today, I want to share my take on this beloved muffin and guide you through making your version. Let’s embark on this culinary journey together!
You will also like the following Dessert recipes!
- Best Chocolate Chip Cookie Recipe Without Brown Sugar
- How to make Mary Berry Strawberry Pavlova
- Easy Grandma’s fruit cake
What is Dunkin’ Donuts Corn Muffin?
The Dunkin’ Donuts corn muffin is a delightful baked good made primarily from cornmeal, sugar, and butter. With its golden hue and fluffy texture, this muffin is a perfect blend of sweetness and moisture. The muffin is not just a quick breakfast option; it’s ideal for snacking or pairing with your favorite beverages. As you take your first bite, you’ll taste the subtle sweetness paired with a slightly crumbly texture that makes it irresistible.
This muffin embodies comfort food in its simplest form. It’s versatile enough to suit various occasions, providing satisfaction with every bite. When you consider how heartfelt recipes like this one become part of our mornings, they really shine in their importance.
Why This Recipe Works
Creating a homemade version of Dunkin’ Donuts’ corn muffin works for several reasons. First, it combines simple, easily accessible ingredients that result in a spice-laden yet comforting treat. The balance of sugar and cornmeal delivers that classic sweetness while retaining a slightly savory finish. The eggs and melted butter provide a richness that enhances texture without being overwhelming.
Moreover, experimentation is encouraged! You can adjust the ingredient proportions to suit your taste, whether you prefer a touch more sweetness or a denser texture. It turns out that the trick to achieving a muffin worthy of Dunkin’ is understanding how the ingredients interact while feeling free to customize them.
What You’ll Need to Make This Dish
To create a Dunkin’ Donuts corn muffin that delights your taste buds, gather the following ingredients:
Wet Ingredients
- 2 large eggs
- 3/4 cup / 185 ml milk (your choice of fat percentage)
- 1/2 cup / 125 ml / 115 g unsalted melted butter
- 1 cup canned creamed corn
Dry Ingredients
- 1/2 cup (110 g) granulated sugar (optional to reduce to 1/4 cup)
- 3/4 cup yellow cornmeal (often labeled “polenta” in Australia)
- 1 1/2 cups (225 g) all-purpose flour
- 1 tbsp baking powder
- 1/4 tsp sea salt
- 1 tsp vanilla extract
- 1/2 tsp cinnamon
Baking
- Extra melted butter for greasing and brushing

How to Make Dunkin’ Donuts Corn Muffin
Before we dig into the specifics, let me say that preparing this muffin is straightforward and involves just a handful of steps. Trust me; you won’t need a culinary school degree for this one. Let’s break it down.
Step-By-Step Instructions
Step 1: Preheat the Oven
First, preheat your oven to 375°F (190°C). Preheating ensures even baking throughout the muffins. An adequately heated oven guarantees that the muffins rise well and have that golden color.
Step 2: Prepare the Muffin Tin
Grease a muffin tin with melted butter or line the cups with paper liners. This step prevents sticking and makes cleanup easier.
Step 3: Combine Wet Ingredients
In a mixing bowl, whisk together the eggs, milk, melted butter, and creamed corn. Make sure everything is well mixed; this base will provide moisture and flavor to your muffins.
Step 4: Mix the Dry Ingredients
In a separate bowl, combine the granulated sugar, cornmeal, flour, baking powder, sea salt, vanilla extract, and cinnamon. Stir well to ensure even distribution of the dry ingredients.
Step 5: Combine Wet and Dry Ingredients
Gradually pour the wet mixture into the dry ingredients. Fold the mixture gently using a spatula. Watch out for overmixing; a lumpy batter means fluffy muffins.
Step 6: Fill Muffin Cups
Using a spoon or ice cream scoop, fill each muffin cup about 2/3 full. This gives the muffins room to rise without overflowing. Simply fill each cup to about halfway if you prefer a smaller muffin.
Step 7: Bake
Place the muffin tin in the oven and bake for 18-20 minutes. The muffins should be golden brown on top, and a toothpick inserted in the center will come out clean.
Step 8: Cool and Enjoy
Let the muffins cool in the tin for about 5 minutes. Then transfer them to a wire rack. Savory or sweet, each bite is sure to bring a smile.
Tips for Perfect Muffins
Here are five tips to elevate your muffin game:
- Use Room Temperature Ingredients: This helps everything blend smoothly and creates a better texture.
- Avoid Overmixing: Folding just until combined preserves the muffins’ fluffiness.
- Experiment with Add-Ins: Consider adding jalapeños for a kick, or blueberries for freshness. Mix and match according to your craving.
- Store Properly: To maintain freshness, store in an airtight container at room temperature.
- Don’t Skip the Cooling: Giving them a few minutes to cool down enhances the muffin texture and flavor.

How to Store Leftovers
If you’ve managed to save any muffins, don’t worry! You can store the leftovers in an airtight container at room temperature for up to 3 days. If you want them to last longer, consider freezing them. Just wrap them tightly in plastic wrap and then in aluminum foil. They can stay in the freezer for up to three months. Thaw at room temperature or pop them in the microwave for a quick reheat.
Nutrition Information
dunkin donuts corn muffin recipe nutrition facts
How Would I Recommend Serving Dunkin’ Donuts Corn Muffin?
Here are some delightful suggestions to enhance your muffin experience:
- With Cream Cheese Spread: Spread soft cream cheese over a warm muffin for a rich touch. The creaminess complements the sweet corn flavor wonderfully.
- Alongside a Fruit Salad: The brightness of fresh fruits balances the muffin’s sweetness. A mix of berries and melon offers a refreshing contrast.
- As a Sandwich Base: Slice the muffin in half and fill it with layers of turkey, avocado, and a slice of cheddar cheese. This combination transforms it into a mouthwatering savory treat.
- With a Hot Beverage: We all know coffee, but have you thought about pairing it with flavored teas like chai or fruit-infused iced teas? Both can amplify the muffin’s flavors, creating a delightful pairing.
What Alternatives Can You Use for the Ingredients if Not Available?
If you find yourself lacking some ingredients, fear not! Here are some easy substitutes:
- Greek Yogurt for Milk: If you’re out of milk, unsweetened Greek yogurt provides protein and creaminess. Just thin it out with water to match the liquid consistency.
- Applesauce for Butter: Using unsweetened applesauce as a butter substitute lightens the muffins while adding natural sweetness.
- Cornmeal Alternative: If you can’t find cornmeal, try using polenta or masa harina. Both can deliver a similar texture while providing that corn flavor.
- Honey Instead of Sugar: For a healthier touch, replace granulated sugar with honey or maple syrup. Just remember to adjust the liquid content accordingly.

Dunkin Donuts Corn Muffin Recipe
Ingredients
Equipment
Method
- First, preheat your oven to 375°F (190°C). Preheating ensures even baking throughout the muffins. An adequately heated oven guarantees that the muffins rise well and have that golden color.
- Grease a muffin tin with melted butter or line the cups with paper liners. This step prevents sticking and makes cleanup easier.
- In a mixing bowl, whisk together the eggs, milk, melted butter, and creamed corn. Make sure everything is well mixed; this base will provide moisture and flavor to your muffins.
- In a separate bowl, combine the granulated sugar, cornmeal, flour, baking powder, sea salt, vanilla extract, and cinnamon. Stir well to ensure even distribution of the dry ingredients.
- Gradually pour the wet mixture into the dry ingredients. Fold the mixture gently using a spatula. Watch out for overmixing; a lumpy batter means fluffy muffins.
- Using a spoon or ice cream scoop, fill each muffin cup about 2/3 full. This gives the muffins room to rise without overflowing. Simply fill each cup to about halfway if you prefer a smaller muffin.
- Place the muffin tin in the oven and bake for 18-20 minutes. The muffins should be golden brown on top, and a toothpick inserted in the center will come out clean.
- Let the muffins cool in the tin for about 5 minutes. Then transfer them to a wire rack. Savory or sweet, each bite is sure to bring a smile.
Nutrition
Notes
- Use Room Temperature Ingredients: This helps everything blend smoothly and creates a better texture.
- Avoid Overmixing: Folding just until combined preserves the muffins’ fluffiness.
- Experiment with Add-Ins: Consider adding jalapeños for a kick, or blueberries for freshness. Mix and match according to your craving.
- Store Properly: To maintain freshness, store in an airtight container at room temperature.
- Don’t Skip the Cooling: Giving them a few minutes to cool down enhances the muffin texture and flavor.
Tried this recipe?
Let us know how it was!Frequently Asked Questions
Can I make these muffins gluten-free?
Absolutely! Use a 1:1 gluten-free baking flour in place of all-purpose flour. Just ensure the other ingredients are gluten-free.
What can I add for extra flavor?
Consider adding chopped fresh herbs like chives or parsley for a savory version. Alternatively, spices like nutmeg or cardamom can offer a unique twist.
How do I know when muffins are done baking?
Insert a toothpick into the center of a muffin. If it comes out clean or with just a few moist crumbs, they’re ready to come out of the oven.
Can I store the batter for later use?
While you can store it, it’s best to bake the muffins as soon as possible for the best texture. If you must, refrigerate the batter for up to 2 hours.
How long do the muffins last?
Stored correctly, muffins can last for 3 days at room temperature and up to 3 months in the freezer.
Can I duplicate this recipe for mini muffins?
Yes, just fill the mini muffin tins about halfway full and reduce the baking time to 10-12 minutes for smaller, bite-sized treats.
Conclusion
As we’ve walked through the tempting journey of recreating Dunkin’ Donuts corn muffins, I hope you’ve felt inspired to grab your apron and get baking. The warmth from the oven, the sweet aroma filling your home, and that first delightful bite—nothing quite compares.
This recipe brings the beloved muffin to your kitchen, allowing you to tailor it to your liking while sharing it with family and friends. The corn muffin is more than a simple snack; it’s a connection to memories and flavors that can brighten anyone’s day. So go ahead, gather your ingredients, and join me in celebrating these delightful bites. Happy baking!


