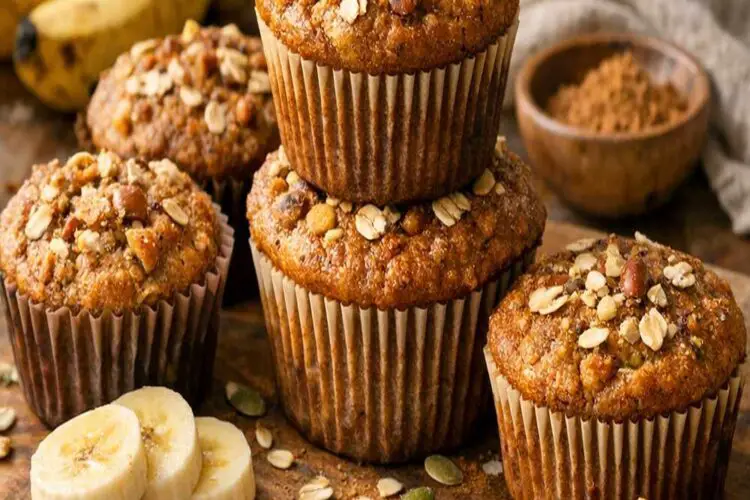
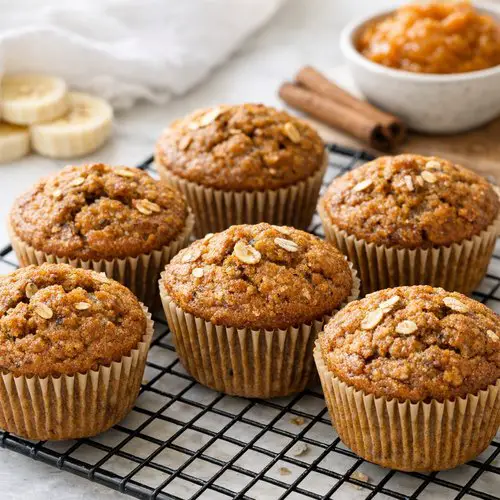
There’s something magical about combining two of autumn’s greatest gifts into one fluffy, golden muffin. These banana pumpkin muffins are the ultimate comfort breakfast or homemade protein bars alternative for those mornings when you need something wholesome and deeply satisfying. They pair beautifully with your morning coffee or as a grab-and-go option alongside fruit on the bottom overnight oats for a complete breakfast spread.
The Memory That Started It All
I’ll never forget the autumn morning my grandmother pulled a tray of these muffins from her vintage avocado oven while I sat at her kitchen table, homework forgotten. She was third-generation Mexican-American, and while pumpkin muffins aren’t traditionally part of our family’s culinary heritage, she’d reimagined them with her own warm spices and a generosity of brown sugar that made them feel like home.
That recipe card, now stained with decades of flour and vanilla splatters, sits in my recipe box to this day. It taught me something fundamental about cooking: the best recipes aren’t locked in tradition—they’re living, breathing creations that adapt to our seasons, our moods, and the people we love. These muffins became my gateway into understanding how flavors from different cultures could dance together in perfect harmony.
What is Banana Pumpkin Muffins Recipe?
Banana pumpkin muffins are a seasonal celebration of two incredibly versatile ingredients that rarely get the spotlight together. Unlike traditional banana or pumpkin muffins that stand alone, this hybrid version creates something entirely new: muffins with an incredibly moist crumb, subtle warmth from cinnamon and ginger, and a delicate earthiness from the pumpkin puree that lets the banana shine through.
The beauty of this recipe lies in the ingredient synergy. Pumpkin puree adds moisture and a velvety texture, while ripe bananas contribute natural sweetness and binding power. Together, they create muffins that stay soft for days—a rare achievement in home baking. The spice blend (cinnamon, ginger, and nutmeg) bridges both flavors, creating a warm, inviting complexity that makes people ask for the recipe before they’ve even finished chewing.
This recipe yields 12 generous muffins and is naturally lower in added fats compared to traditional butter-heavy versions, making it feel indulgent without the guilt.
Why You’ll Love This Banana Pumpkin Muffins Recipe
- Incredibly moist and tender crumb – The combination of pumpkin puree, mashed banana, and a careful balance of oil and butter creates a crumb structure that stays soft and luscious for up to 5 days. This isn’t a muffin that turns dry by day two.
- Perfectly balanced sweetness – We’re using both granulated and brown sugar, which creates complexity. Brown sugar adds moisture and caramel notes, while granulated sugar provides structure and helps with browning. Neither overpowers the other.
- Foolproof technique – This recipe uses a simple wet-and-dry method with no creaming required. We’re not fighting with room temperature ingredients or worrying about overmixing, making it perfect for beginners and experienced bakers alike.
- Make-ahead friendly – Bake these on Sunday and enjoy them all week. They freeze beautifully and thaw at room temperature in 30 minutes, making them perfect for meal prep.
- Sophisticated spice profile – Cinnamon, ginger, and nutmeg create depth without overwhelming the fruit flavors. This is the kind of warming spice blend that makes people pause and say, “What is that flavor?”
- Naturally gluten-free adaptable – Simply swap in a 1:1 gluten-free flour blend and you’ve got a muffin that works for different dietary needs without sacrificing texture.
The Ingredients
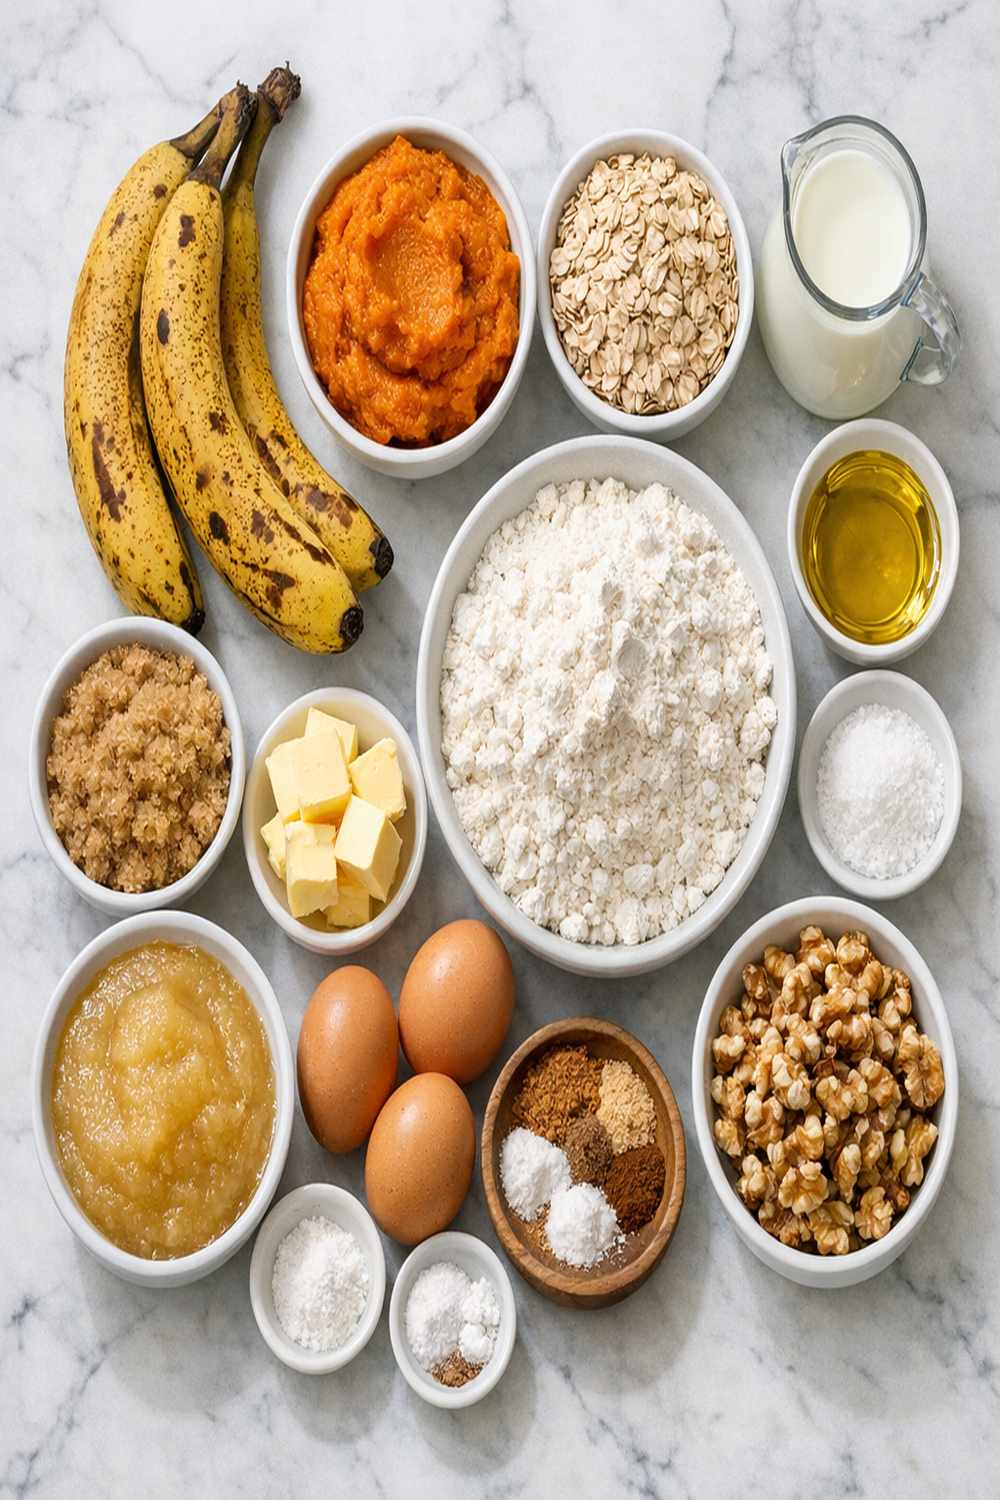
Let me walk you through each ingredient and why it matters. I’ve developed this recipe to use pantry staples you likely already have, plus a few seasonal items that make all the difference. The measurements are precise—baking is chemistry, and these ratios have been tested dozens of times to guarantee success.
- Non-stick cooking spray (for prepping the muffin tin without oil buildup)
- ½ cup granulated sugar (provides structure and helps muffins brown beautifully)
- ½ cup pure pumpkin puree (canned or fresh, never “pumpkin pie filling” which contains added sugar)
- ½ teaspoon fine sea salt (balances sweetness and enhances all flavors)
- 1 teaspoon baking soda (the leavening agent—don’t confuse with baking powder)
- ½ teaspoon ground ginger (use fresh-ground if possible for brighter flavor)
- 1 teaspoon ground cinnamon (Ceylon cinnamon has more subtle warmth than cassia)
- 4 tablespoons unsalted butter (melted and cooled slightly, brings classic muffin flavor)
- ¼ cup extra-virgin olive oil (adds moisture without the heavy richness of all-butter recipes)
- 2 large eggs (room temperature for better emulsification and tender crumb)
- 1 teaspoon pure vanilla extract (not imitation—the difference is noticeable)
- 1½ cups all-purpose flour (spooned and leveled, never packed—this is crucial for proper rise)
- ½ cup light brown sugar (packed, adds moisture and caramel undertones)
- 2 ripe bananas (mashed—they should have brown spots for maximum sweetness and binding power)
- ¼ teaspoon ground nutmeg (freshly grated is ideal, but pre-ground works fine)
Makes: 12 muffins | Prep time: 15 minutes | Bake time: 18–20 minutes
How to Make Banana Pumpkin Muffins
This recipe follows a straightforward wet-and-dry method that eliminates guesswork. We’re folding rather than stirring, which protects the delicate crumb structure. Each step builds toward one goal: muffins with tender, moist interiors and golden-brown tops that stay fresh all week.
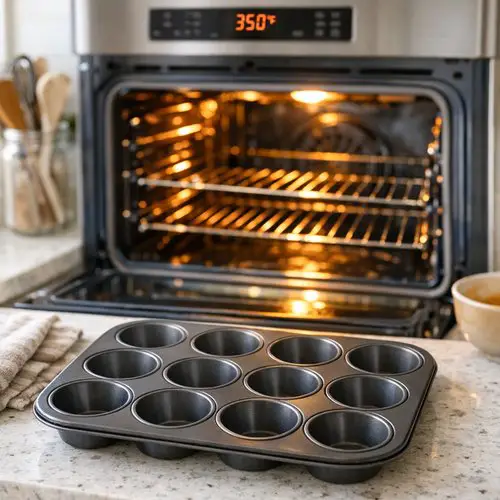
Step 1: Prepare Your Oven and Pan
Start by preheating your oven to 350°F. This moderate temperature is intentional—it allows the muffins to cook through gently without burning the tops before the centers set. While the oven preheats, lightly coat a 12-cup muffin tin with non-stick cooking spray, making sure to get the bottom corners and the area where the cups meet the tin. This prevents the bottom edges from sticking, which is the most common complaint I hear.
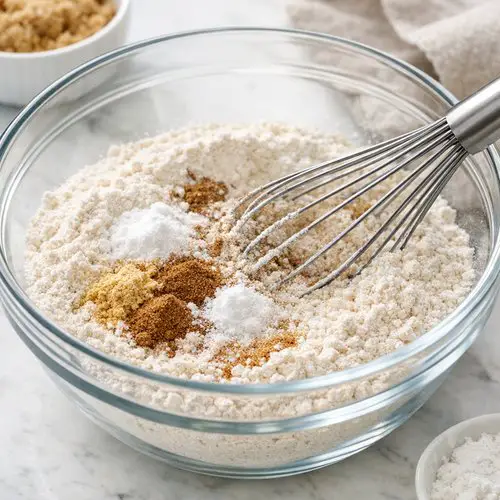
Step 2: Combine All Dry Ingredients
In a medium mixing bowl, whisk together the flour, baking soda, cinnamon, ginger, nutmeg, and salt. Whisk vigorously for about 30 seconds—this incorporates air and distributes the leavening agent and spices evenly throughout the flour. Set this bowl aside. This step is non-negotiable; skipping it often results in muffins with odd textures or spice pockets.
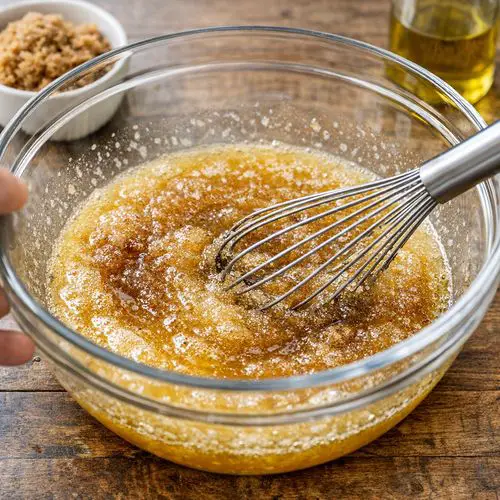
Step 3: Combine Wet Ingredients (The Most Important Step)
In a large mixing bowl, combine the granulated sugar, packed brown sugar, olive oil, and melted butter. Whisk together for about 2 minutes until the mixture becomes smooth, pale, and slightly fluffy—you’ll actually see visible emulsification happening. This is where the magic begins. The whisking action helps the oils and sugar combine, creating a better texture in the final muffin.
Now add your room-temperature eggs one at a time, whisking well after each addition. The eggs are your binder and your leavening helper. Room temperature eggs incorporate more smoothly and create better emulsification than cold eggs pulled straight from the refrigerator.
Finally, add the mashed banana, pumpkin puree, and vanilla extract. Whisk until completely combined—there should be no streaks of white pumpkin visible. This entire process should take about 2–3 minutes from start to finish.
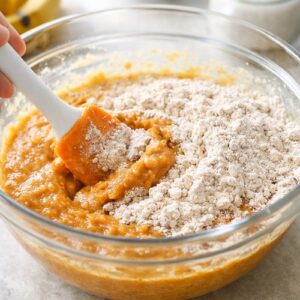
Step 4: The Fold (This Determines Everything)
Here’s where patience pays off. Using a rubber spatula, add the dry ingredient mixture to the wet ingredients. Instead of stirring, fold the mixture by scraping the bottom of the bowl, pulling it up and over the dry ingredients, turning the bowl slightly, and repeating. Do this 12–15 times until you see no streaks of flour remaining and the batter just comes together.
Why folding instead of stirring? Overmixing develops gluten, which creates tough, dense muffins with tunnels (those big air pockets running through the middle). Folding gently incorporates the ingredients while keeping the batter tender. The batter will be thick and slightly lumpy—this is exactly what you want. A smooth, homogeneous batter is a sign you’ve overworked it.

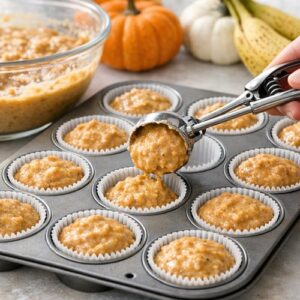
Step 5: Fill and Bake
Divide the batter evenly among the 12 prepared muffin cups, filling each about three-quarters full. Use an ice cream scoop or a ¼-cup measuring cup for consistency—this helps all muffins bake at the same rate. If you have empty cups in the tin, fill them halfway with water to ensure even heat distribution.
Place the muffin tin in your preheated 350°F oven and bake for 18–20 minutes. They’re done when a toothpick inserted into the center of a muffin comes out clean or with just a few moist crumbs clinging to it. Don’t be tempted to overbake—those few moist crumbs are your guarantee of a tender interior.
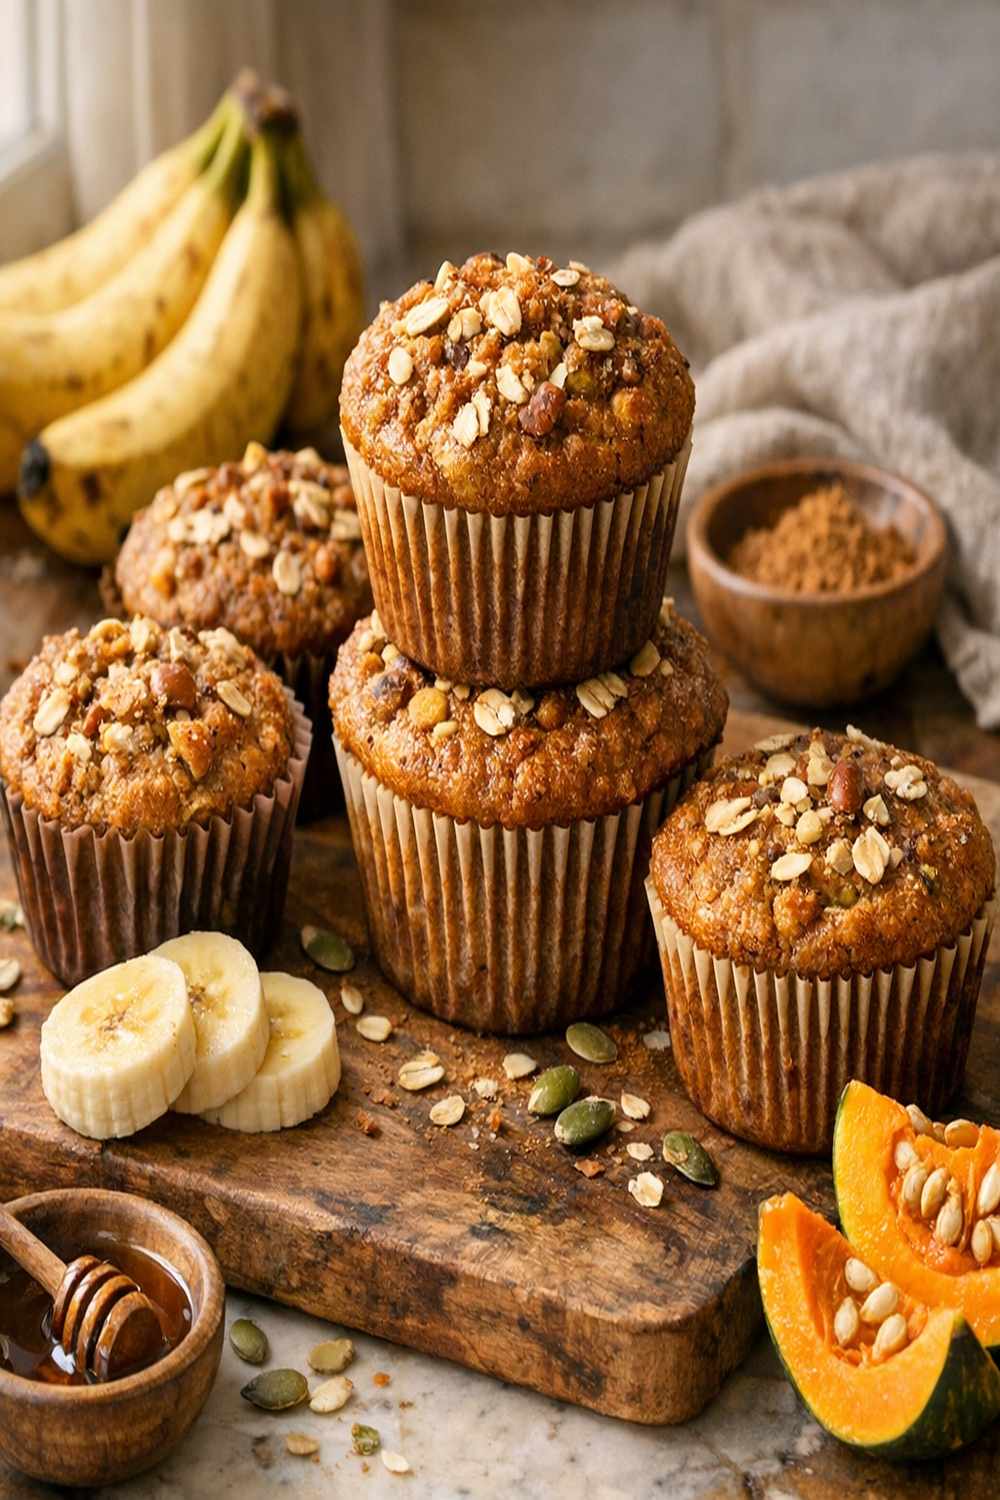
The muffins will be golden brown on top and feel set when you gently press them. The entire kitchen should smell absolutely incredible by minute 15.

Step 6: Cool and Enjoy
Let the muffins rest in the pan for 5 minutes—this allows the structure to set slightly, making them easier to remove. Then transfer them to a cooling rack. They’re technically edible at this point, but I recommend waiting 15–20 minutes before eating one so the crumb sets properly. Eating a muffin immediately from the oven while it’s steaming is glorious, but you won’t get the true texture.
Expert’s Nutritional Tip
The pumpkin puree in these muffins is doing more than just adding flavor and moisture—it’s delivering serious nutritional value. One-half cup of pure pumpkin contains about 40 calories, 10 grams of carbohydrates, 3 grams of fiber, and over 5,000 IU of vitamin A. This is why these muffins feel nourishing, not indulgent. The fiber from the pumpkin and whole wheat flour (if you choose to substitute some of the all-purpose) slows sugar absorption, preventing the blood sugar spike you’d get from a traditional bakery muffin.
I also recommend using the olive oil in place of some butter—it’s heart-healthy and adds moisture without making the muffins feel heavy. This is a small adjustment I learned while developing recipes in Mediterranean kitchens, and it absolutely translates to American-style baked goods.
Tips and Tricks
- Mash your bananas properly – Use very ripe bananas (the peels should be mostly brown). Mash them with a fork until almost completely smooth with just a few tiny flecks remaining. Overly chunky bananas create uneven texture, while over-blended bananas become gluey.
- Don’t skip room temperature ingredients – This isn’t just baking folklore. Room temperature eggs and butter emulsify better with the sugar, creating better crumb structure. Leave eggs out for 15 minutes and melted butter on the counter for 5 minutes before using.
- Use Ceylon cinnamon if you can find it – It has a brighter, more delicate flavor than common cassia cinnamon. You’ll notice the difference, and your guests will ask what makes these taste special.
- Invest in a kitchen scale – While cup measurements work, weighing your flour (about 190 grams per cup) eliminates the biggest source of baking failures. A $15 digital scale is one of the best kitchen investments you’ll ever make.
- Fill empty muffin cups halfway with water – This creates steam in the oven, which promotes even rising and prevents the muffins on the outer edges from baking too quickly.
- Test for doneness with a wooden toothpick, not a cake tester – Wooden toothpicks are thinner and give you better feedback about the muffin’s doneness. The few moist crumbs you want to see are easier to spot on wood than on metal.
- Don’t open the oven before 16 minutes – Each time you open it, you release heat and disrupt rising. Resist the urge to peek.
Make-Ahead Guide
Freezing the Batter: You can prepare the batter up to 1 day in advance. Cover it tightly with plastic wrap and refrigerate. When you’re ready to bake, let it sit at room temperature for 10 minutes, then proceed with baking. The cold batter will take an extra 2–3 minutes to bake.
Baking and Freezing Muffins: Baked muffins freeze beautifully for up to 3 months. Cool them completely, wrap each one individually in plastic wrap, then place them in a freezer-safe container or zip-top bag. To thaw, leave them on the counter for 30 minutes, or wrap one in a damp paper towel and microwave for 20–30 seconds. This method keeps them incredibly moist.
Refrigeration Option: Covered in an airtight container, these muffins last 5 days in the refrigerator. I actually prefer them slightly chilled—the flavors become more pronounced and the texture is perfect.
Common Mistakes to Avoid
- Using pumpkin pie filling instead of pure puree – This is the #1 mistake. Pie filling contains added sugar, spices, and condensed milk. Your muffins will be cloyingly sweet and have an odd texture. Read the label carefully—it should say “100% pure pumpkin puree.”
- Overmixing the batter – I see this constantly. People stir the batter until it’s completely smooth because it “looks better,” but this overdevelops gluten and creates tough, dense muffins with those air-pocket tunnels running through them. Stop folding as soon as you see no flour streaks.
- Using cold eggs and butter – Cold ingredients don’t emulsify properly with the sugar and oil, creating a greasy crumb and uneven texture. Let them sit on the counter for 15 minutes.
- Overbaking by even 2–3 minutes – The difference between a moist, tender muffin and a dry one is literally 2–3 minutes. Set a timer and start checking at 17 minutes. Those few moist crumbs on the toothpick are your target.
Can I Store Banana Pumpkin Muffins?
Counter storage (2–3 days): Keep muffins in an airtight container at room temperature. They’ll stay fresh and moist thanks to the pumpkin and banana content.
Refrigerator storage (up to 5 days): Place muffins in an airtight container and refrigerate. Interestingly, refrigeration keeps them fresher longer because it slows down moisture loss and any potential mold growth. I actually prefer them slightly chilled.
Freezer storage (up to 3 months): Wrap each cooled muffin individually in plastic wrap, then place in a freezer-safe container or bag. Thaw at room temperature for 30 minutes or microwave a single muffin wrapped in a damp paper towel for 20–30 seconds.
Pro tip: Individual plastic wrap means you can grab one frozen muffin on a busy morning, wrap it in a damp paper towel, and microwave it. It’ll be perfectly warm and moist by the time you reach your car.
Nutrition Information
Per muffin (based on USDA nutrition database for similar recipes): approximately 210 calories, 6.5g fat, 34g carbohydrates, 3g fiber, 18g sugar, 3.5g protein. The fiber content from pumpkin and whole grains helps moderate the blood sugar impact of the natural sugars. These are substantial muffins—one is a complete breakfast when paired with coffee or yogurt.
The combination of ripe banana (natural sugars, potassium) and pumpkin puree (vitamin A, fiber, antioxidants) makes these nutritionally superior to traditional bakery muffins. You’re actually getting significant nutrients alongside indulgence.
What Can I Serve With Banana Pumpkin Muffins?
These muffins are naturally versatile. Serve them as part of a complete breakfast spread or as an afternoon snack. They pair beautifully with coffee, herbal tea, or hot apple cider. Here are my favorite serving combinations:
- Classic coffee pairing – Enjoy with a cup of strong coffee or cappuccino. The warm spices in the muffins complement espresso’s bitterness perfectly. This is my go-to Thursday morning.
- Yogurt parfait – Crumble a muffin over Greek yogurt with granola and a drizzle of honey. This transforms a muffin into a more protein-rich breakfast.
- Almond butter addition – While the muffin is still warm, spread a thin layer of almond or peanut butter on top. The fat slows sugar absorption and makes the breakfast more satisfying.
- Brunch spread – Serve alongside smoked salmon, cream cheese, and fresh fruit. These muffins are fancy enough for entertaining and comforting enough for family.
- Meal prep containers – Pack one muffin alongside nut-free energy bites and fresh berries for a balanced on-the-go breakfast that lasts all week.
Seasonal Variations
Fall (Original Recipe): This is the classic version with cinnamon, ginger, and nutmeg. Serve with spiced cider and cranberry sauce on the side.
Winter: Add ½ teaspoon of cardamom and ¼ teaspoon of black pepper (yes, really—it adds complexity) along with the traditional spices. Top with a cream cheese glaze and crushed candied ginger.
Spring: Reduce the pumpkin to ¼ cup and add ¼ cup of applesauce. Switch half the cinnamon for a blend including 1/8 teaspoon of turmeric for an earthier, almost savory note that feels lighter.
Summer: These muffins are less seasonal for summer, but you can swap the pumpkin puree for Greek yogurt for a tangier summer version. Reduce sweetness by 2 tablespoons and add 1 teaspoon of lemon zest for brightness.
Substitutes
- All-purpose flour to whole wheat – Substitute up to ½ cup of the flour with whole wheat flour for added fiber and nuttiness. The muffins will be slightly denser but wonderfully hearty. You may need to add 1 tablespoon of milk if the batter seems too dry.
- Olive oil to coconut oil – Use the same amount of melted coconut oil, which adds a subtle tropical note. Use refined coconut oil if you don’t want the coconut flavor to dominate.
- Brown sugar to coconut sugar – This creates a lower-glycemic muffin. The flavor is slightly more caramel-forward with less molasses notes.
- Regular eggs to flax eggs – Mix 2 tablespoons of ground flaxseed with 6 tablespoons of water and let sit for 5 minutes. This creates vegan muffins, though the crumb will be slightly denser.
- Granulated sugar to honey or maple syrup – Reduce to ⅓ cup of honey or maple syrup total (using less liquid sweetener than granulated sugar). The muffins will be moister and have different browning patterns.
- Vanilla extract to almond extract – Use only ½ teaspoon of almond extract (it’s potent) for a subtle nod to fall flavors without going full-on dessert.
- All-purpose flour to gluten-free blend – Use a 1:1 gluten-free flour blend. Most work perfectly without adjustments, though your muffins may brown slightly faster.
Banana Pumpkin Muffins Recipe
Ingredients
Method
- Start by preheating your oven to 350°F. This moderate temperature is intentional—it allows the muffins to cook through gently without burning the tops before the centers set. While the oven preheats, lightly coat a 12-cup muffin tin with non-stick cooking spray, making sure to get the bottom corners and the area where the cups meet the tin. This prevents the bottom edges from sticking, which is the most common complaint I hear.

- In a medium mixing bowl, whisk together the flour, baking soda, cinnamon, ginger, nutmeg, and salt. Whisk vigorously for about 30 seconds—this incorporates air and distributes the leavening agent and spices evenly throughout the flour. Set this bowl aside. This step is non-negotiable; skipping it often results in muffins with odd textures or spice pockets.

- In a large mixing bowl, combine the granulated sugar, packed brown sugar, olive oil, and melted butter. Whisk together for about 2 minutes until the mixture becomes smooth, pale, and slightly fluffy—you'll actually see visible emulsification happening. This is where the magic begins. The whisking action helps the oils and sugar combine, creating a better texture in the final muffin. Now add your room-temperature eggs one at a time, whisking well after each addition. The eggs are your binder and your leavening helper. Room temperature eggs incorporate more smoothly and create better emulsification than cold eggs pulled straight from the refrigerator. Finally, add the mashed banana, pumpkin puree, and vanilla extract. Whisk until completely combined—there should be no streaks of white pumpkin visible. This entire process should take about 2–3 minutes from start to finish.

- Here's where patience pays off. Using a rubber spatula, add the dry ingredient mixture to the wet ingredients. Instead of stirring, fold the mixture by scraping the bottom of the bowl, pulling it up and over the dry ingredients, turning the bowl slightly, and repeating. Do this 12–15 times until you see no streaks of flour remaining and the batter just comes together. Why folding instead of stirring? Overmixing develops gluten, which creates tough, dense muffins with tunnels (those big air pockets running through the middle). Folding gently incorporates the ingredients while keeping the batter tender. The batter will be thick and slightly lumpy—this is exactly what you want. A smooth, homogeneous batter is a sign you've overworked it.
- Divide the batter evenly among the 12 prepared muffin cups, filling each about three-quarters full. Use an ice cream scoop or a ¼-cup measuring cup for consistency—this helps all muffins bake at the same rate. If you have empty cups in the tin, fill them halfway with water to ensure even heat distribution. Place the muffin tin in your preheated 350°F oven and bake for 18–20 minutes. They're done when a toothpick inserted into the center of a muffin comes out clean or with just a few moist crumbs clinging to it. Don't be tempted to overbake—those few moist crumbs are your guarantee of a tender interior. The muffins will be golden brown on top and feel set when you gently press them. The entire kitchen should smell absolutely incredible by minute 15.
- Let the muffins rest in the pan for 5 minutes—this allows the structure to set slightly, making them easier to remove. Then transfer them to a cooling rack. They're technically edible at this point, but I recommend waiting 15–20 minutes before eating one so the crumb sets properly. Eating a muffin immediately from the oven while it's steaming is glorious, but you won't get the true texture.

Nutrition
Notes
Tried this recipe?
Let us know how it was!FAQs
Can I use fresh pumpkin instead of canned puree?
Absolutely! Roast a small sugar pumpkin (about 2 pounds), scoop out the flesh, and puree it in a food processor until completely smooth. You’ll need to strain it through cheesecloth for 2–3 hours to remove excess moisture, since fresh pumpkin is more watery than canned. Use the strained puree measurement for measurement-to-measurement substitution. Fresh pumpkin creates an even more delicate flavor, though the color will be slightly more orange.
Why are my muffins sinking in the middle?
This happens for one of three reasons: the oven temperature is off (use an oven thermometer), the batter was overmixed (which creates excessive rise followed by collapse), or you’re overbaking them. Check your oven temperature first, then review the mixing instructions. The batter should be folded gently, not stirred until smooth.
Can I make these as mini muffins or a loaf?
Yes to both! For mini muffins (24 count), reduce baking time to 12–14 minutes. For a loaf, grease and flour a standard 9×5-inch loaf pan, pour in the batter, and bake at 350°F for 50–55 minutes. A toothpick should come out clean. Let the loaf cool in the pan for 10 minutes before turning out onto a cooling rack.
Why does my batter seem too thick or too thin?
Thickness varies based on how wet your bananas are and how much your pumpkin puree drains. If the batter seems too thick (won’t drop easily from your spatula), add milk 1 tablespoon at a time. If it’s too thin (pours like regular batter), add flour 1 tablespoon at a time. The batter should be thick enough that it just barely spreads when spooned into muffin cups.
Can I reduce the sugar in this recipe?
You can reduce the granulated sugar to ⅜ cup and the brown sugar to ⅜ cup (total ¾ cup instead of 1 cup) without majorly affecting texture. Beyond that, you’ll lose structure and browning. If you’re sensitive to sugar, these muffins already have relatively modest added sugar compared to bakery versions—the banana and pumpkin provide most of the sweetness naturally.
How do I know when to bake and when my oven might run hot or cold?
An oven thermometer is your best friend. They cost $6–$10 and solve more baking problems than anything else in your kitchen. Place one in the center of your oven while it preheats. If your oven runs hot (actual temperature is 25–50°F higher than you set), lower your setting by 25°F. If it runs cold, raise your setting. This simple adjustment eliminates most baking frustrations.
More Recipes You’ll Love
- Apple Cider Donut Holes Baked – Another seasonal favorite with warm spices and that perfect muffin-like texture, baked not fried.
- these fresh muffins – A spring and early summer twist that uses the same folding technique for an equally tender crumb with bright, tart flavor.
- Fruit on the Bottom Overnight Oats – For when you want breakfast ready before you even wake up—pair these muffins with overnight oats for the ultimate make-ahead morning.
These banana pumpkin muffins have been my answer to countless requests over the years because they deliver on every level: they’re straightforward enough for your first time baking, sophisticated enough to serve at brunch, nutritious enough to feel good about eating, and delicious enough to make people ask for the recipe. They taught me that the best recipes are the ones that bring people together, whether shared warm from the oven or grabbed from the freezer on a Tuesday morning. Enjoy!
