This post contains affiliate links. As an Amazon Associate I earn from qualifying purchases.
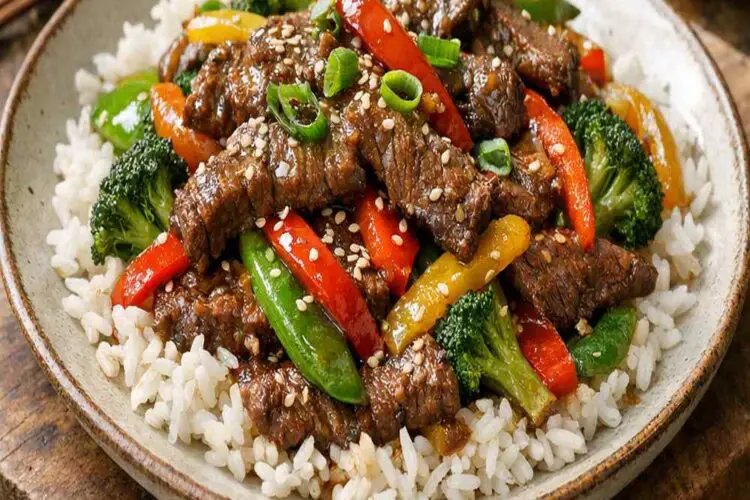
Before you throw those leftovers away, turn them into something even better. This Asian Beef Stir Fry Recipe was born from exactly that moment—standing in front of my refrigerator at 6 PM on a Wednesday, staring at yesterday’s sirloin and half a bell pepper, wondering if I could create something as delicious as takeout. That night, I discovered the magic of transforming what we already have into restaurant-quality meals that taste nothing like an afterthought. If you’re craving bold, umami-rich flavors without the delivery fees, we’re about to become best friends.
What I love most about stir fries is their honest simplicity—they celebrate what’s actually in your kitchen rather than demanding a special trip to the store. This recipe has become my weeknight salvation and my proof that leftover transformation is actually alchemy.
How to Turn Last Night’s Beef Into Asian Stir Fry Recipe (Better Than the Original)
I grew up watching my grandmother prepare quick meals for our multicultural family dinners—dishes that borrowed from Chinese, Vietnamese, and Thai traditions all on the same table. She had this incredible gift of making anything feel intentional, never apologetic. When I’m creating stir fries now, I channel that exact energy: taking what we have, understanding the science of how flavors marry, and transforming dinner into something we actually crave.
The beauty of this stir fry approach is that it doesn’t just reheat leftovers—it fundamentally changes their character through high heat, proper seasoning layering, and the Maillard reaction. That browning, that sear? That’s where the magic lives. Your leftover beef isn’t just warmed through; it’s reborn with crispy edges and deeper flavor.
What Leftovers Work Best
Not all leftovers are created equal when it comes to stir frying. Understanding which ingredients transform beautifully and which ones struggle will set you up for success before you even heat your wok or skillet.
- Cooked beef (sirloin, ribeye, or flank) – The gold standard for leftover stir fry. These cuts already have developed flavor and stand up beautifully to high heat without becoming tough. Slice them thin against the grain for the best texture.
- Raw beef that’s been refrigerated (within 2 days) – Even better than cooked, honestly. This gives us the opportunity to apply the tenderizing technique we’ll discuss in the steps, creating that silky texture that defines restaurant-quality stir fry.
- Yesterday’s vegetables (carrots, peppers, onions, broccoli) – These actually become superior in stir fry because their moisture has already begun to concentrate, making them less likely to release water and dilute our sauce.
- Cooked rice or noodles – Perfect for serving alongside, or you can add them directly to the pan for a one-dish meal (though we’ll focus on the pure stir fry here).
- Soft vegetables to avoid (tomatoes, zucchini, mushrooms) – These become mushy and lose their structure. Fresh versions work much better here. Save those cooked soft vegetables for soups or grain bowls instead.
- Heavily seasoned or saucy leftovers – If your leftover beef has already been marinated in something specific, taste it first. Strong flavors can clash with our Asian-inspired sauce profile.
The Transformation Pantry: What to Keep on Hand
Here’s where the real magic happens—these bridge ingredients are the connective tissue that turns ordinary leftovers into something spectacular. I keep these on my shelf at all times because they’re the difference between “reheated dinner” and “I’m impressed by what you made.” These are pantry staples that unlock endless possibilities, not just for stir fries but for weeknight cooking in general.
Soy sauce or tamari provides the savory umami foundation. Oyster sauce adds depth and subtle sweetness. Rice vinegar brings brightness. Sesame oil contributes that aromatic, toasted quality we crave. Cornstarch is our secret weapon for creating that glossy, restaurant-style sauce coating. These five ingredients—plus garlic and ginger—are honestly all you need to transform anything into something crave-worthy.
I also recommend keeping baking soda in your spice drawer. Yes, really. The technical reason? It raises the pH level of your beef, which breaks down proteins and creates that silky, tender texture you get at the best dim sum restaurants. It’s not a shortcut; it’s real food science in action.
The Ingredients – Leftovers + Bridge Ingredients
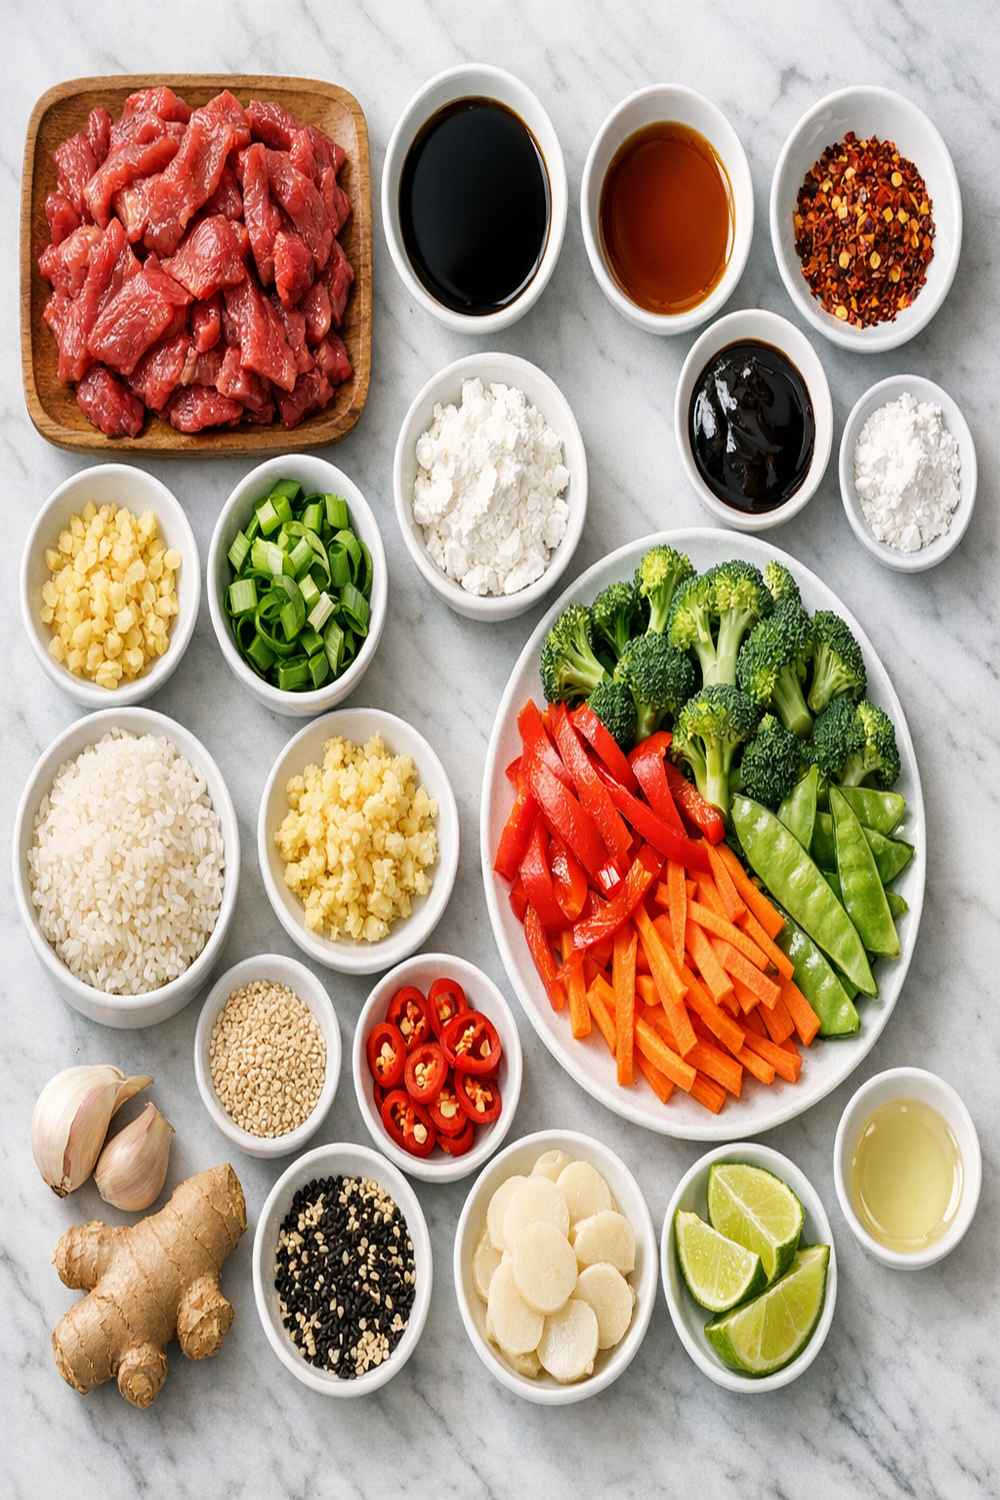
This recipe is designed for flexibility. What matters most is the ratio of beef to vegetables (roughly 1:1) and the sauce components. Everything else adapts beautifully based on what’s actually in your refrigerator and pantry.
- 2 stems scallion (white and green parts separated, for layered flavor)
- ½ small onion (thinly sliced against the grain)
- 1 teaspoon sesame seeds (for finishing garnish and nutty flavor)
- 1 teaspoon fresh ginger (grated or minced, not from a jar)
- ¼ cup carrot (cut into thin matchsticks for quick cooking)
- 2 tablespoons soy sauce (or tamari for gluten-free cooking)
- 2 tablespoons neutral vegetable oil (high smoke point for proper wok temperature)
- Dash of salt and pepper (to taste, as finishing seasoning)
- ¼ cup bell pepper (any color, sliced into thin strips)
- 8 ounces top sirloin steak (thinly sliced against the grain, leftover or fresh)
- 1 tablespoon rice vinegar (brightens the entire dish)
- 2 tablespoons water (dilutes sauce to proper consistency)
- ¾ teaspoon baking soda (this is the tenderizing secret—don’t skip it)
- 2 teaspoons sesame oil (always added at the very end)
- 1 tablespoon oyster sauce (adds savory depth and subtle sweetness)
- 1 teaspoon brown sugar (balances the savory components)
- ½ teaspoon red pepper flakes (adjust based on your heat preference)
- 2 cloves garlic (minced finely for even distribution)
- 1 tablespoon cornstarch (creates that glossy sauce coating)
Serves: 2 as a main course, or 4 as part of a larger meal
The Transformation: How to Make Asian Beef Stir Fry Recipe From Leftovers
This is where the science of cooking meets the art of flavor building. We’re not just combining ingredients; we’re orchestrating a sequence of steps that unlock maximum texture and taste. Each step has a purpose, and understanding the “why” behind each one transforms you from following a recipe to truly cooking.
Step 1: Prepare Your Beef With the Tenderizing Technique
If you’re using leftover cooked beef, slice it thinly against the grain and set it aside. If you’re using fresh or raw beef, this step becomes crucial. Pat your beef completely dry with paper towels—moisture is the enemy of a proper sear. Slice it thinly against the grain (this shortens the protein fibers, making them easier to chew).
Now the magic: toss your sliced beef with the baking soda and let it sit for 15-20 minutes at room temperature. This isn’t a shortcut—it’s genuine food science. The baking soda raises the pH of the meat’s surface, which denatures the proteins and allows them to bond with water molecules. The result? That silky, velvety texture you find at restaurants, not that tough, chewy texture from home cooking. This single step is the difference between good stir fry and crave-worthy stir fry.

Step 2: Create Your Sauce Components (Do This While Beef Rests)
While your beef is undergoing its transformation, let’s build our sauce. In a small bowl, whisk together your soy sauce, oyster sauce, brown sugar, red pepper flakes, cornstarch, and the 2 tablespoons of water until completely smooth. This is your master sauce—it’s doing heavy lifting by providing umami, sweetness, heat, and body all at once.
In a separate small container, have your rice vinegar and sesame oil ready but separate. We’ll add these at different times for different purposes. The vinegar adds brightness right before serving, while the sesame oil goes in at the very last second to preserve its delicate, toasted aroma.
Mince your garlic finely and grate your ginger. This matters more than you might think—large pieces cook faster than small pieces, and we want even distribution of flavor throughout the entire dish. Separate your scallion into white parts (which go in with the aromatics) and green parts (which finish the dish for color and fresh flavor).

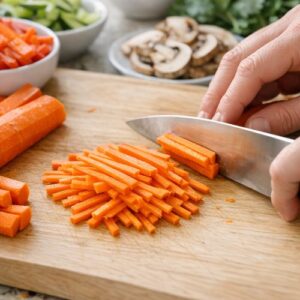
Step 3: Prep Your Vegetables for Quick, Even Cooking
The secret to a successful stir fry isn’t exotic ingredients—it’s proper knife work and even sizing. Slice your carrots into matchsticks about ⅛-inch thick. Slice your bell pepper into strips of similar thickness. Slice your onion against the grain, keeping the pieces bite-sized.
Why does this matter? Stir frying happens fast—we’re talking 4-5 minutes total cooking time for vegetables once they hit the heat. If your pieces are different sizes, some will be crunchy-raw while others turn to mush. Uniform sizing ensures everything reaches that perfect tender-crisp texture simultaneously.
Arrange all your prepped ingredients within arm’s reach of your cooking vessel. Once we start cooking, there’s no time to step away and chop. Stir frying rewards preparation and punishes hesitation.
Step 4: Heat Your Wok or Skillet to the Right Temperature
This might be the most important step, and it’s often overlooked. Place your wok or large skillet over high heat for 2-3 minutes before adding any oil. You should be able to hold your hand about 6 inches above the surface for only 2-3 seconds before it’s uncomfortably hot.
Why so hot? High heat creates the Maillard reaction—that beautiful browning that develops complex, savory flavors. It also keeps vegetables from releasing too much water, which would steam them instead of sear them. Low or medium heat is the enemy of great stir fry.
Once your vessel is properly hot, add your oil in a thin stream around the edges of a wok (or directly into a skillet). Let it heat for just 10-15 seconds—you should see it shimmer and move easily.

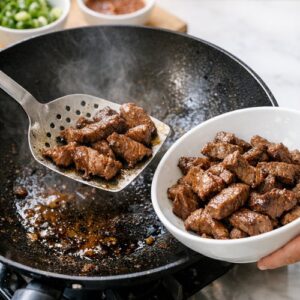
Step 5: Cook Your Beef First, Then Remove It
This is crucial: we’re not cooking everything together. We cook each component separately because they need different cooking times and techniques. Add your beef to the screaming hot pan in a single layer. Resist the urge to stir immediately—let it sit for 30-45 seconds to develop color and crust.
If you’re using cooked leftover beef, you only need to warm it through and add a light sear (about 1 minute total). If you’re using raw beef, cook it until it’s just barely done—about 2-3 minutes for medium-rare, which is what you want since we’ll likely eat this immediately. Remove all the beef to a clean plate. Some fond (those browned bits) might stick to the pan—don’t wash it. That’s liquid gold for flavor.
Step 6: Sear Your Hearty Vegetables First
Add your sliced onions and carrot matchsticks to the same hot pan. These vegetables need more cooking time than delicate peppers or herbs. Let them sit without stirring for about 1 minute to develop color, then toss and cook for another 1-2 minutes. You want them to have some color but still maintain a slight firmness.
If your vegetables were already leftover and cooked, you’ll only need to warm them through—about 30 seconds of tossing. Fresh vegetables need the full 2-3 minutes.
Step 7: Add Aromatics and Secondary Vegetables
Push your cooked vegetables to the side of your pan, creating a little well in the center. Add your minced garlic, grated ginger, and the white parts of your scallion to this empty space. Let them sit in direct contact with the hot pan for just 15-20 seconds—this “blooms” their essential oils and distributes their aroma throughout your dish.
Now add your bell pepper strips and toss everything together. Cook for another 1-2 minutes until the peppers have softened slightly but still have some snap to them. This is the tender-crisp texture we’re after—vegetables that have flavor and warmth but haven’t lost their structural integrity.

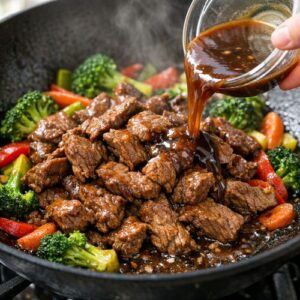
Step 8: Return the Beef and Build Your Sauce
Add your beef back to the pan along with all its accumulated juices. Give your sauce mixture a final stir to ensure the cornstarch is suspended (it settles), then pour it over everything. Toss continuously for about 30-45 seconds until the sauce thickens and coats everything evenly.
You’ll see the sauce transform from cloudy to glossy and translucent—that’s the cornstarch doing its job. This creates that beautiful, restaurant-style coating that makes the dish feel substantial and finished.
Step 9: Finish With Brightness and Aroma
Remove your pan from heat. Add the rice vinegar and toss to combine—this brightens everything and prevents the dish from feeling heavy. Drizzle your sesame oil over the top and fold it in gently. Sesame oil is delicate and its flavor is best preserved when not exposed to heat.
Taste and adjust seasoning with salt and pepper. Different soy sauce brands have different sodium levels, so this final tasting is important. Some people prefer more heat—add more red pepper flakes here if needed.
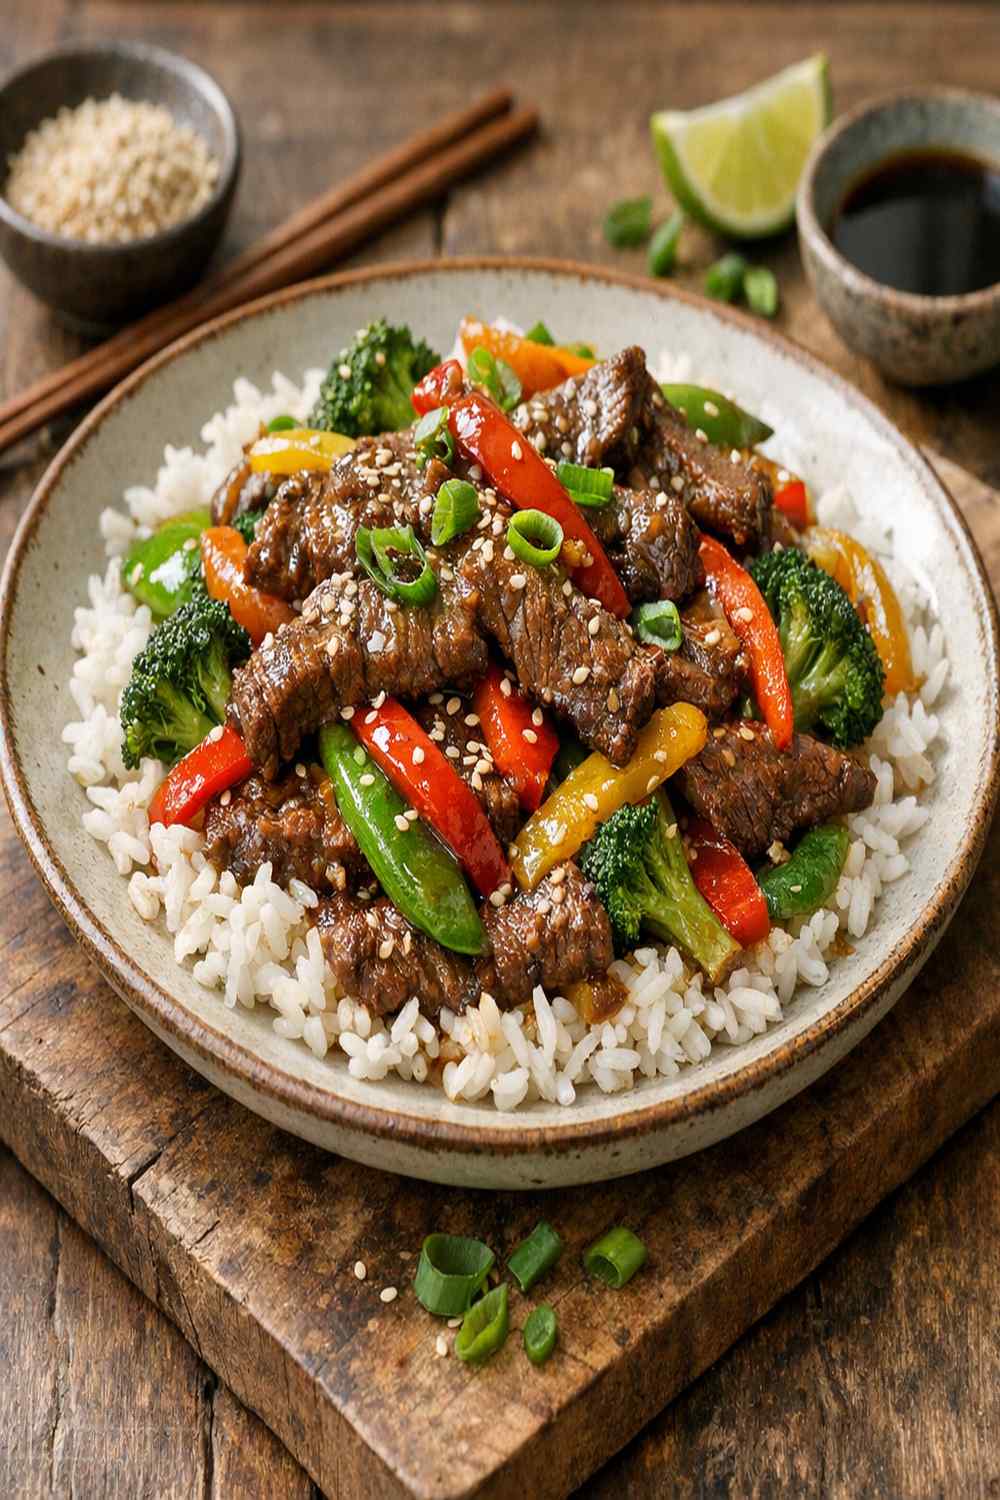
Step 10: Plate and Garnish for Maximum Impact
Transfer your stir fry to serving bowls or plates. Scatter the green parts of your scallion and the sesame seeds over the top. These final garnishes aren’t just pretty—the raw scallion adds a bright, fresh contrast to the warm cooked components, and the sesame seeds add a subtle nutty crunch that makes the dish feel complete.
Serve immediately over steamed white rice, brown rice, or cauliflower rice depending on your preference. The heat of the stir fry will warm your serving vessel and rice if you time it right.

Expert’s Nutritional Tip: The Umami Advantage
One thing I’ve learned from years of recipe development and studying food science is that umami-rich dishes—ones built on soy sauce, oyster sauce, and aged proteins—actually lead to greater satiety. The umami taste signals to our brain that we’re consuming something substantial and satisfying, which means you’ll feel full on smaller portions. This stir fry delivers approximately 25 grams of protein per serving along with complex carbohydrates from vegetables, plus the beneficial compounds in fresh ginger (gingerol, which has anti-inflammatory properties).
The combination of soy sauce and oyster sauce isn’t just flavor layering—it’s creating a more complete amino acid profile. These fermented products contain glutamates that activate our taste receptors more fully, which is why the dish feels so satisfying even when portions are modest.
Make-Ahead Guide: Preparing This Dish for Busy Weeknights
This recipe becomes even more valuable when you think about meal prep strategically. Here’s how I structure it for maximum efficiency:
Option 1: Full Prep Day – Slice and store your beef in an airtight container for up to 2 days. Prepare your vegetables and store them in separate containers (this keeps them from wilting each other). Make your sauce mixture and store in a glass jar. On cooking day, you’re literally just heating your pan and assembling.
Option 2: Partial Prep – Slice vegetables the morning of cooking. Prepare your sauce base in the morning, but add the cornstarch only when you’re ready to cook (cornstarch can absorb liquid over time). Keep your beef properly stored if it’s already prepped.
Option 3: Leftover Transformation Strategy – If you already have cooked beef and vegetables from another meal, you’re only minutes away from dinner. This is when stir fry becomes your busiest-weeknight secret weapon.
Storage note: This stir fry is best eaten immediately or within 2 hours. If you’re storing it, refrigerate in an airtight container for up to 3 days, but understand that it will lose its crispness as the sauce absorbs into the vegetables and the vegetables release water. To reheat, add it to a hot pan with a splash of water or broth for 1-2 minutes, or enjoy it cold as a grain bowl component.
Common Mistakes to Avoid
After developing and teaching this recipe countless times, I’ve noticed patterns in what trips people up. Avoiding these mistakes is half the battle:
- Overcrowding the pan – This is the #1 error. When you add too much at once, the temperature drops, steam replaces sear, and you end up with steamed vegetables instead of stir-fried ones. Work in batches if needed, or use a larger vessel. Restaurant woks are wide and shallow precisely for this reason.
- Adding sauce too early – Sauce introduced before vegetables are properly cooked will steam everything and prevent browning. Always sear first, sauce last.
- Insufficient heat – If your pan isn’t properly preheated, nothing will sear correctly. Give your heat source 2-3 minutes before you start cooking. The moment you add beef or vegetables, you should hear an aggressive sizzle.
- Not slicing against the grain – The grain of the meat is the direction of the muscle fibers. Slicing perpendicular to these fibers shortens them, making the meat tender. Slicing with the grain leaves long fibers that become chewy. This single detail transforms texture completely.
How to Adapt Based on What You Have
The framework of this recipe is so flexible that it accommodates almost any dietary preference or ingredient availability. Understanding substitutions helps you develop real cooking intuition rather than just following instructions.
- If you have leftover chicken instead of beef – Use the exact same technique. Chicken breast should be sliced thin and receives the same baking soda treatment. Cooking time will be identical since both are sliced thin.
- If you don’t have oyster sauce – Substitute with an equal amount of hoisin sauce (richer, sweeter) or fish sauce (more pungent, use half the amount). Each changes the flavor profile slightly, but all are delicious.
- If your vegetables are dry or have been sitting – Add an extra tablespoon of water to your sauce mixture, and consider adding a small splash of chicken broth instead of plain water. This adds moisture and depth.
- If you prefer no heat – Omit the red pepper flakes entirely. The dish is delicious without them; they’re purely optional.
- If you have broccoli, snap peas, or mushrooms – These work beautifully in place of carrots or peppers. Cut them into bite-sized pieces and follow the same cooking sequence. Broccoli takes slightly longer than bell peppers.
- If you’re making this vegetarian – Replace the beef with extra-firm tofu (pressed and cubed) or increase your vegetable portions. Use vegetable broth instead of water, and substitute soy sauce with tamari if needed for gluten concerns.
- If you need it gluten-free – Use tamari instead of regular soy sauce (tamari is gluten-free), and verify your oyster sauce is GF certified. Everything else is naturally gluten-free.
Seasonal Variations: Building Intuition for Year-Round Cooking
One of my favorite aspects of teaching cooking is helping people move beyond recipes into seasonal thinking. This stir fry framework adapts beautifully to what’s actually thriving in each season:
Spring: Replace carrots with thin asparagus spears, add snap peas, and fold in some baby bok choy. The lighter vegetables celebrate spring’s fresh energy. Add a bit of lemon zest to your garnish.
Summer: Use zucchini instead of some carrots, add cherry tomatoes (add these in the last 30 seconds to prevent them from exploding), and incorporate fresh basil or Thai basil into your garnish. Fresh corn kernels added near the end are spectacular.
Fall: Include butternut squash (pre-cut into small cubes and cooked slightly longer), add dried shiitake mushrooms (rehydrate and slice), and increase your ginger slightly. This seasonal version feels warmer and more grounding.
Winter: Use hearty vegetables like broccoli, Brussels sprout leaves, and cabbage. These vegetables can handle longer cooking and develop deeper flavors. A splash of white miso in your sauce adds complexity and warmth.
Zero Waste: Using Every Last Bit
This is where cooking becomes not just delicious but responsible. Every part of your ingredients serves a purpose:
Those scallion white parts you set aside? They’re in your sauce base, but any extras can be saved in a glass of water in the refrigerator and used for garnishing other dishes or tossing into soups. Carrot tops and peels don’t belong in this dish, but they belong in your stock pot—save them for vegetable broth.
Bell pepper seeds and membranes? If you’re careful while slicing, save these for broth as well. Ginger skin doesn’t need to be peeled for flavor purposes, so minimize waste there. If you do peel it, those thin strips steep beautifully in hot water for a ginger tea.
Any leftover sauce that clings to your pan? Don’t waste it. Use a rubber spatula to scrape every drop into your serving vessel, or save it for the next cooking session. This concentrated sauce becomes the base for another batch.
Consider this: the vegetables you’re using likely came in packaging. That packaging might be recyclable or compostable. The soy sauce bottle is glass and recyclable. Building awareness of waste becomes as natural as the cooking itself.
Can I Store Asian Beef Stir Fry Recipe?
Since we’re often making this from leftovers, storage deserves special attention. This dish is actually day-two food in many cases, meaning it’s already been safely stored once.
If you have leftovers from tonight’s dinner, store them in an airtight glass container in the refrigerator for up to 3 days. The vegetables will gradually soften and the sauce will continue to be absorbed, but the flavor remains delicious and the dish becomes more like a warming rice bowl component.
Do not freeze stir fry. The vegetables release water during freezing, creating a mushy texture when thawed. The sauce becomes watery and separated. If you want to meal prep, it’s better to freeze your cooked beef separately and your raw vegetables separately, then assemble and cook fresh.
To reheat, transfer to a hot pan with a splash of water or broth and warm through for 1-2 minutes, tossing gently. Alternatively, serve cold over rice as a grain bowl—this is actually delicious and a different experience entirely. Cold stir fry and fresh rice is its own satisfying meal.
Nutrition Information
Per serving (based on 2 servings): Approximately 320 calories, 25g protein, 12g carbohydrates, 18g fat (4g saturated), 4g fiber, 850mg sodium (much of this from soy sauce), and 2g sugar.
This nutrition profile reflects USDA data for the components. The beauty of this dish is that it delivers substantial protein without excess calories—the beef provides complete amino acids, the vegetables contribute fiber and micronutrients, and the minimal oil keeps calories in check while delivering essential fatty acids.
The high sodium content deserves a note: soy sauce is naturally sodium-rich. If you’re managing sodium intake, you can reduce soy sauce to 1 tablespoon and add a splash of additional water to your sauce. You’ll lose some umami depth, but the dish remains delicious and you’ll significantly reduce sodium.
Interestingly, the nutritional profile of this leftover transformation is often superior to the original meal. When beef is cooked once, cooled, stored, and then recooked quickly, it loses fewer nutrients than beef that’s cooked once and served immediately but reheated at lower temperatures for longer. The high-heat flash-cooking of stir frying is genuinely one of the most nutritionally efficient cooking methods.
What to Serve With Asian Beef Stir Fry Recipe?
This stir fry is nearly a complete meal on its own, but a few thoughtful sides transform dinner into something memorable. I think about contrast—since the stir fry is warm, rich, and savory, I want to serve something cool, bright, or fresh alongside it.
Steamed white rice is the classic choice, and for good reason. The neutral flavor and soft texture provide a canvas that lets the stir fry shine. Brown rice works beautifully too if you prefer earthier flavor and more texture.
Fresh cucumber salad (something like our my favorite salad) provides cool, crisp contrast and a brightness that balances the umami richness. The vinegar in a cucumber salad cuts through heaviness beautifully.
If you want to round out the meal without adding dishes, consider steaming some additional vegetables like broccoli or bok choy on the side. This adds volume, nutrition, and variety without requiring additional seasoning or cooking technique.
A simple green salad with a light vinaigrette provides freshness and a textural contrast that makes the meal feel more complete. The slight bitterness of fresh greens balances the savory sauce perfectly.
For a more substantial meal, pair this stir fry with our Asian Beef Recipe or Asian Beef And Vegetables for a comprehensive Asian-inspired dinner experience.
Asian Beef Stir Fry Recipe
Ingredients
Method
- If you're using leftover cooked beef, slice it thinly against the grain and set it aside. If you're using fresh or raw beef, this step becomes crucial. Pat your beef completely dry with paper towels—moisture is the enemy of a proper sear. Slice it thinly against the grain (this shortens the protein fibers, making them easier to chew). Now the magic: toss your sliced beef with the baking soda and let it sit for 15-20 minutes at room temperature. This isn't a shortcut—it's genuine food science. The baking soda raises the pH of the meat's surface, which denatures the proteins and allows them to bond with water molecules. The result? That silky, velvety texture you find at restaurants, not that tough, chewy texture from home cooking. This single step is the difference between good stir fry and crave-worthy stir fry.

- While your beef is undergoing its transformation, let's build our sauce. In a small bowl, whisk together your soy sauce, oyster sauce, brown sugar, red pepper flakes, cornstarch, and the 2 tablespoons of water until completely smooth. This is your master sauce—it's doing heavy lifting by providing umami, sweetness, heat, and body all at once. In a separate small container, have your rice vinegar and sesame oil ready but separate. We'll add these at different times for different purposes. The vinegar adds brightness right before serving, while the sesame oil goes in at the very last second to preserve its delicate, toasted aroma. Mince your garlic finely and grate your ginger. This matters more than you might think—large pieces cook faster than small pieces, and we want even distribution of flavor throughout the entire dish. Separate your scallion into white parts (which go in with the aromatics) and green parts (which finish the dish for color and fresh flavor).

- The secret to a successful stir fry isn't exotic ingredients—it's proper knife work and even sizing. Slice your carrots into matchsticks about ⅛-inch thick. Slice your bell pepper into strips of similar thickness. Slice your onion against the grain, keeping the pieces bite-sized. Why does this matter? Stir frying happens fast—we're talking 4-5 minutes total cooking time for vegetables once they hit the heat. If your pieces are different sizes, some will be crunchy-raw while others turn to mush. Uniform sizing ensures everything reaches that perfect tender-crisp texture simultaneously. Arrange all your prepped ingredients within arm's reach of your cooking vessel. Once we start cooking, there's no time to step away and chop. Stir frying rewards preparation and punishes hesitation.
- This might be the most important step, and it's often overlooked. Place your wok or large skillet over high heat for 2-3 minutes before adding any oil. You should be able to hold your hand about 6 inches above the surface for only 2-3 seconds before it's uncomfortably hot. Why so hot? High heat creates the Maillard reaction—that beautiful browning that develops complex, savory flavors. It also keeps vegetables from releasing too much water, which would steam them instead of sear them. Low or medium heat is the enemy of great stir fry. Once your vessel is properly hot, add your oil in a thin stream around the edges of a wok (or directly into a skillet). Let it heat for just 10-15 seconds—you should see it shimmer and move easily.
- This is crucial: we're not cooking everything together. We cook each component separately because they need different cooking times and techniques. Add your beef to the screaming hot pan in a single layer. Resist the urge to stir immediately—let it sit for 30-45 seconds to develop color and crust. If you're using cooked leftover beef, you only need to warm it through and add a light sear (about 1 minute total). If you're using raw beef, cook it until it's just barely done—about 2-3 minutes for medium-rare, which is what you want since we'll likely eat this immediately. Remove all the beef to a clean plate. Some fond (those browned bits) might stick to the pan—don't wash it. That's liquid gold for flavor.
- Add your sliced onions and carrot matchsticks to the same hot pan. These vegetables need more cooking time than delicate peppers or herbs. Let them sit without stirring for about 1 minute to develop color, then toss and cook for another 1-2 minutes. You want them to have some color but still maintain a slight firmness. If your vegetables were already leftover and cooked, you'll only need to warm them through—about 30 seconds of tossing. Fresh vegetables need the full 2-3 minutes.
- Push your cooked vegetables to the side of your pan, creating a little well in the center. Add your minced garlic, grated ginger, and the white parts of your scallion to this empty space. Let them sit in direct contact with the hot pan for just 15-20 seconds—this "blooms" their essential oils and distributes their aroma throughout your dish. Now add your bell pepper strips and toss everything together. Cook for another 1-2 minutes until the peppers have softened slightly but still have some snap to them. This is the tender-crisp texture we're after—vegetables that have flavor and warmth but haven't lost their structural integrity.
- Add your beef back to the pan along with all its accumulated juices. Give your sauce mixture a final stir to ensure the cornstarch is suspended (it settles), then pour it over everything. Toss continuously for about 30-45 seconds until the sauce thickens and coats everything evenly. You'll see the sauce transform from cloudy to glossy and translucent—that's the cornstarch doing its job. This creates that beautiful, restaurant-style coating that makes the dish feel substantial and finished.
- Remove your pan from heat. Add the rice vinegar and toss to combine—this brightens everything and prevents the dish from feeling heavy. Drizzle your sesame oil over the top and fold it in gently. Sesame oil is delicate and its flavor is best preserved when not exposed to heat. Taste and adjust seasoning with salt and pepper. Different soy sauce brands have different sodium levels, so this final tasting is important. Some people prefer more heat—add more red pepper flakes here if needed.
- Transfer your stir fry to serving bowls or plates. Scatter the green parts of your scallion and the sesame seeds over the top. These final garnishes aren't just pretty—the raw scallion adds a bright, fresh contrast to the warm cooked components, and the sesame seeds add a subtle nutty crunch that makes the dish feel complete. Serve immediately over steamed white rice, brown rice, or cauliflower rice depending on your preference. The heat of the stir fry will warm your serving vessel and rice if you time it right.
Nutrition
Notes
Tried this recipe?
Let us know how it was!FAQs
Is It Safe to Eat Leftover Beef That’s Been Refrigerated for Several Days?
Absolutely, with proper storage. Cooked beef is safe in the refrigerator for 3-4 days in an airtight container. The key is storing it properly—airtight, refrigerated immediately after cooling, and kept at or below 40°F. When you’re ready to use it, check for off smells or visible mold before cooking. When in doubt, throw it out, but properly stored cooked beef is genuinely safe for several days.
Can I Make This Stir Fry Ahead of Time and Reheat It?
You can make it and store it for reheating, but understand that the texture will shift. Vegetables will soften further as they sit in sauce, and the vegetables will release water that dilutes the sauce. The flavor remains good, but it’s a different eating experience than freshly cooked. If you want to meal prep, prepare your components separately and assemble fresh—this takes only 5 minutes and yields a vastly superior result.
What If My Sauce Comes Out Too Thick or Too Thin?
If it’s too thick, add water a tablespoon at a time and stir to combine. If it’s too thin, mix a small amount of cornstarch with cold water to create a slurry, add it to your hot stir fry, and stir for 30 seconds until thickened. The cornstarch only thickens when it reaches a certain temperature and gets stirred into hot liquid, so don’t skip the heat component.
Does the Baking Soda Really Make a Difference, or Can I Skip It?
It genuinely makes a significant difference, and I’d encourage you not to skip it. The baking soda creates silky, tender beef that rivals restaurants. It’s not a shortcut; it’s legitimate food science. If you have concerns about baking soda (sodium, alkalinity), you can skip it, but your beef will be slightly less tender. The meat will still taste good—it just won’t have that remarkable silky texture.
Can I Use Soy Sauce Alternatives Like Coconut Aminos or Liquid Aminos?
Coconut aminos will work but tastes noticeably different—it’s sweeter and less umami-forward. Liquid aminos (like Bragg’s) are actually dehydrated soy with added liquid, so they work beautifully and taste nearly identical to soy sauce. If you’re avoiding soy entirely for allergy reasons, coconut aminos or tamari (which is soy-free) are your best bets. The flavor will shift slightly, but the dish remains delicious. Adjust seasonings to your preference.
More Leftover Transformation Recipes
- Asian Beef Recipe – An alternative approach to transforming leftover beef with different flavor profiles
- Asian Beef And Vegetables – A companion recipe that combines beef and vegetables in a slightly different preparation style
- Baby Carrots In The Oven – A side dish technique that pairs beautifully with Asian-inspired mains
- Bacon Cheddar Dip – While different in flavor profile, this recipe teaches the same sauce-building principles applied to an entirely different context
The journey from “what’s in my refrigerator” to “this tastes like a restaurant meal” is the real education in cooking. This stir fry recipe has taught me that constraints breed creativity, that understanding technique beats following recipes blindly, and that the most satisfying meals often come from working with what we already have.
More Recipes You Will Love
- This Homemade Baked Recipe – Worth adding to your recipe collection.
- This Easy Chicken Dinner – Worth adding to your recipe collection.
- This Flavorful Chicken Dish – Worth adding to your recipe collection.
Every time you make this, you’re not just creating dinner—you’re