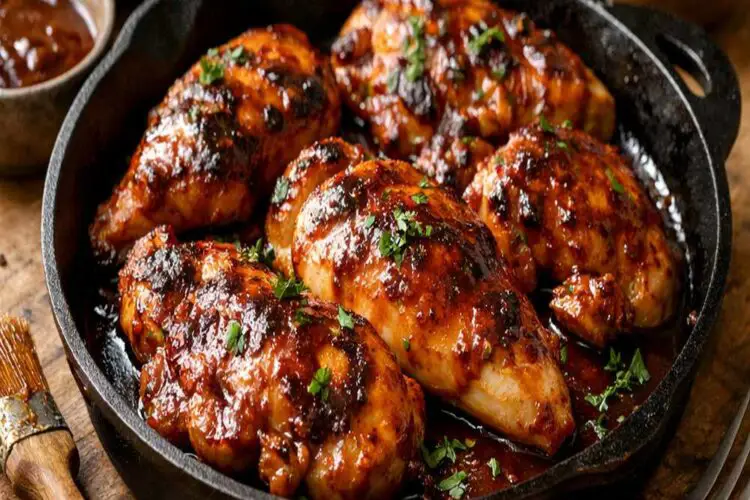
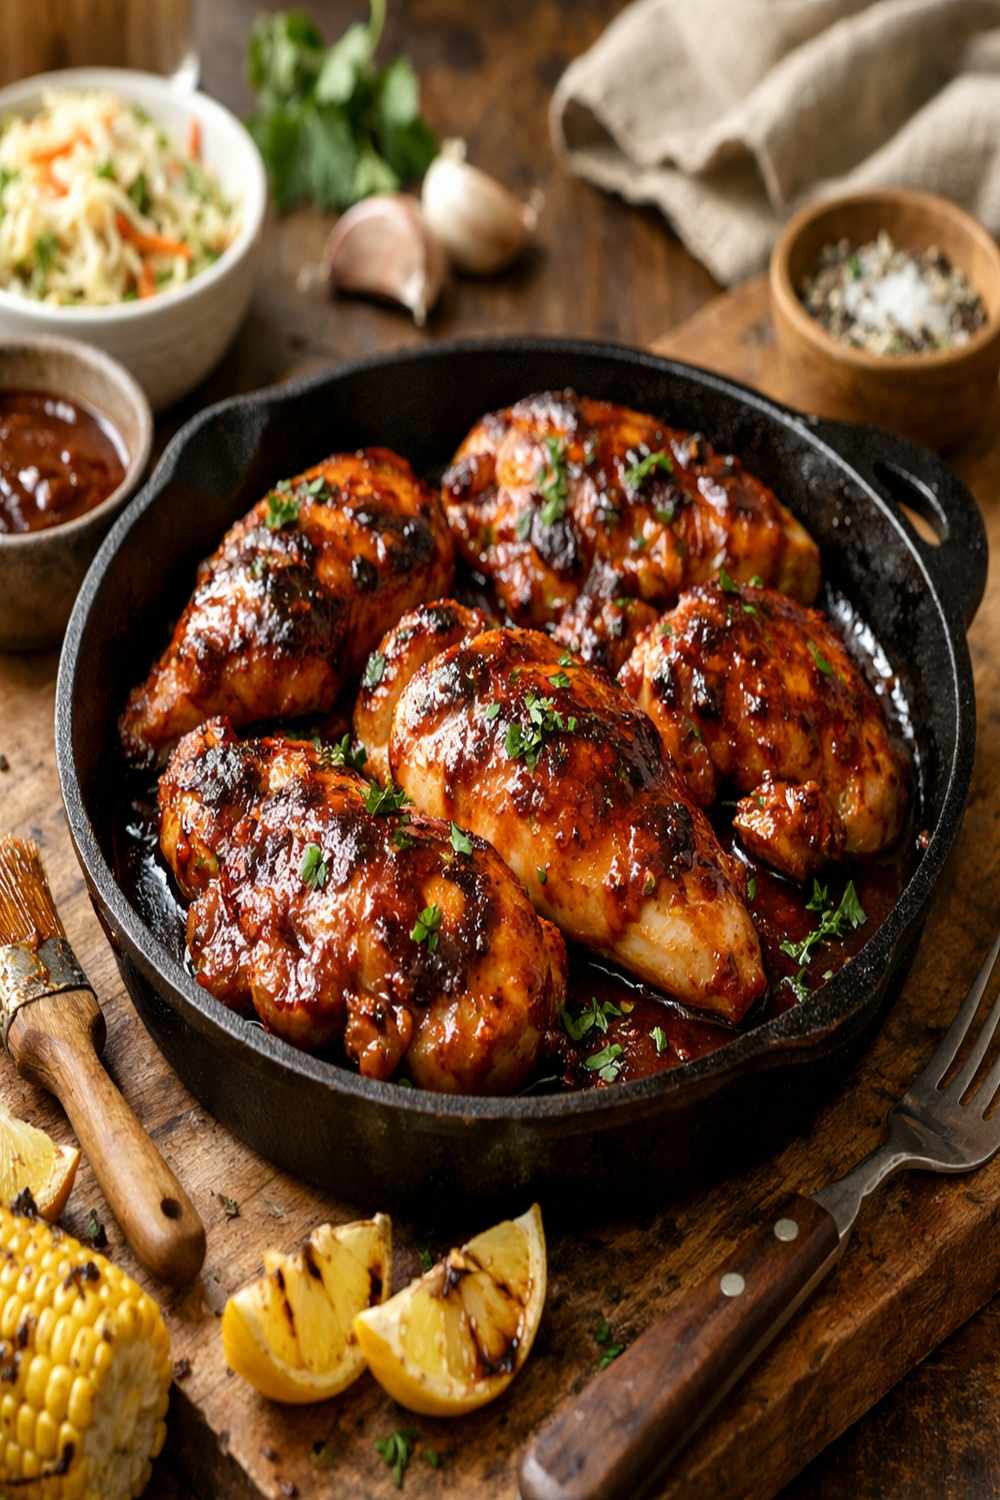
There’s something magical about caramelized barbecue sauce clinging to tender chicken—the kind of dish that transforms an ordinary Tuesday night into something worth celebrating. Whether you’re serving it alongside Apple Cider Vinegar Coleslaw Recipe for that classic picnic vibe or pairing it with roasted vegetables, this stovetop version delivers genuine barbecue flavor without firing up an outdoor grill. Perfect for weeknight dinners, meal prep, or feeding a hungry family fast.
How I Discovered My Love for Stovetop Barbecue
I grew up in a household where my mother’s side brought Southern traditions to the table, while my father’s Indian heritage infused everything with unexpected spices. One summer, when we couldn’t use our backyard grill due to renovations, my mom adapted her beloved barbecue chicken to the stovetop—and honestly, it became our family’s secret weapon.
What amazed me wasn’t just that it worked, but how the sauce reduced and concentrated in the skillet, creating this glossy, deeply flavored glaze that rivaled anything we’d made outdoors. That dish taught me something fundamental about cooking: sometimes the most memorable meals come from creative problem-solving, not following tradition blindly. Now, years later, I make this recipe constantly because it’s fast, reliable, and absolutely delicious.
What is Stovetop Barbecue Chicken?
Stovetop barbecue chicken is a simplified, faster version of traditional grilled barbecue that delivers the same smoky-sweet satisfaction in about 30 minutes. Rather than relying on outdoor heat and smoke, we build flavor through a combination of warm spices—chili powder, garlic, oregano, and a whisper of cayenne—then finish with a thick coating of barbecue sauce that caramelizes beautifully in the skillet.
This method works particularly well with boneless, skinless chicken thighs because their higher fat content keeps them moist and forgiving, even if you accidentally overcook them slightly. The covered-then-uncovered cooking technique steams the chicken through first, then allows the sauce to reduce and concentrate in the final minutes, creating that restaurant-quality glaze we all crave.
What makes this approach special is its adaptability. You’re not locked into a specific grill temperature or weather pattern. You control the heat, the timing, and exactly how thick and sticky your final sauce becomes. It’s barbecue on your own terms.
Why You’ll Love This Stovetop Barbecue Chicken Recipe
- Ready in 30 minutes flat – From raw chicken to plated dinner, this entire recipe comes together faster than most takeout delivery. Perfect for busy weeknights when you need something substantial and satisfying without hours of preparation.
- Foolproof and forgiving – The covered cooking method keeps chicken incredibly moist while you build layers of flavor. Even if you’re new to cooking chicken, you’ll nail this on your first try because there’s very little that can go wrong.
- Uses ingredients you already have – This recipe relies on pantry staples and basic spices. You don’t need special equipment, exotic ingredients, or advance planning. If you have chicken and barbecue sauce, you’re basically ready to go.
- Makes incredible leftovers – Cold barbecue chicken is honestly better the next day. The flavors deepen and marry together beautifully, making this perfect for meal prep or lunch boxes throughout the week.
- Deeply satisfying without being heavy – Boneless, skinless thighs provide that tender, juicy texture without excess grease. You get genuine barbecue satisfaction without feeling weighed down, which means you can actually enjoy your evening instead of fighting a food coma.
- Completely customizable – Love heat? Double the cayenne. Prefer sweeter sauce? Use more barbecue sauce or a sweeter variety. This recipe is a foundation that welcomes your personal flavor preferences and dietary needs.
The Ingredients
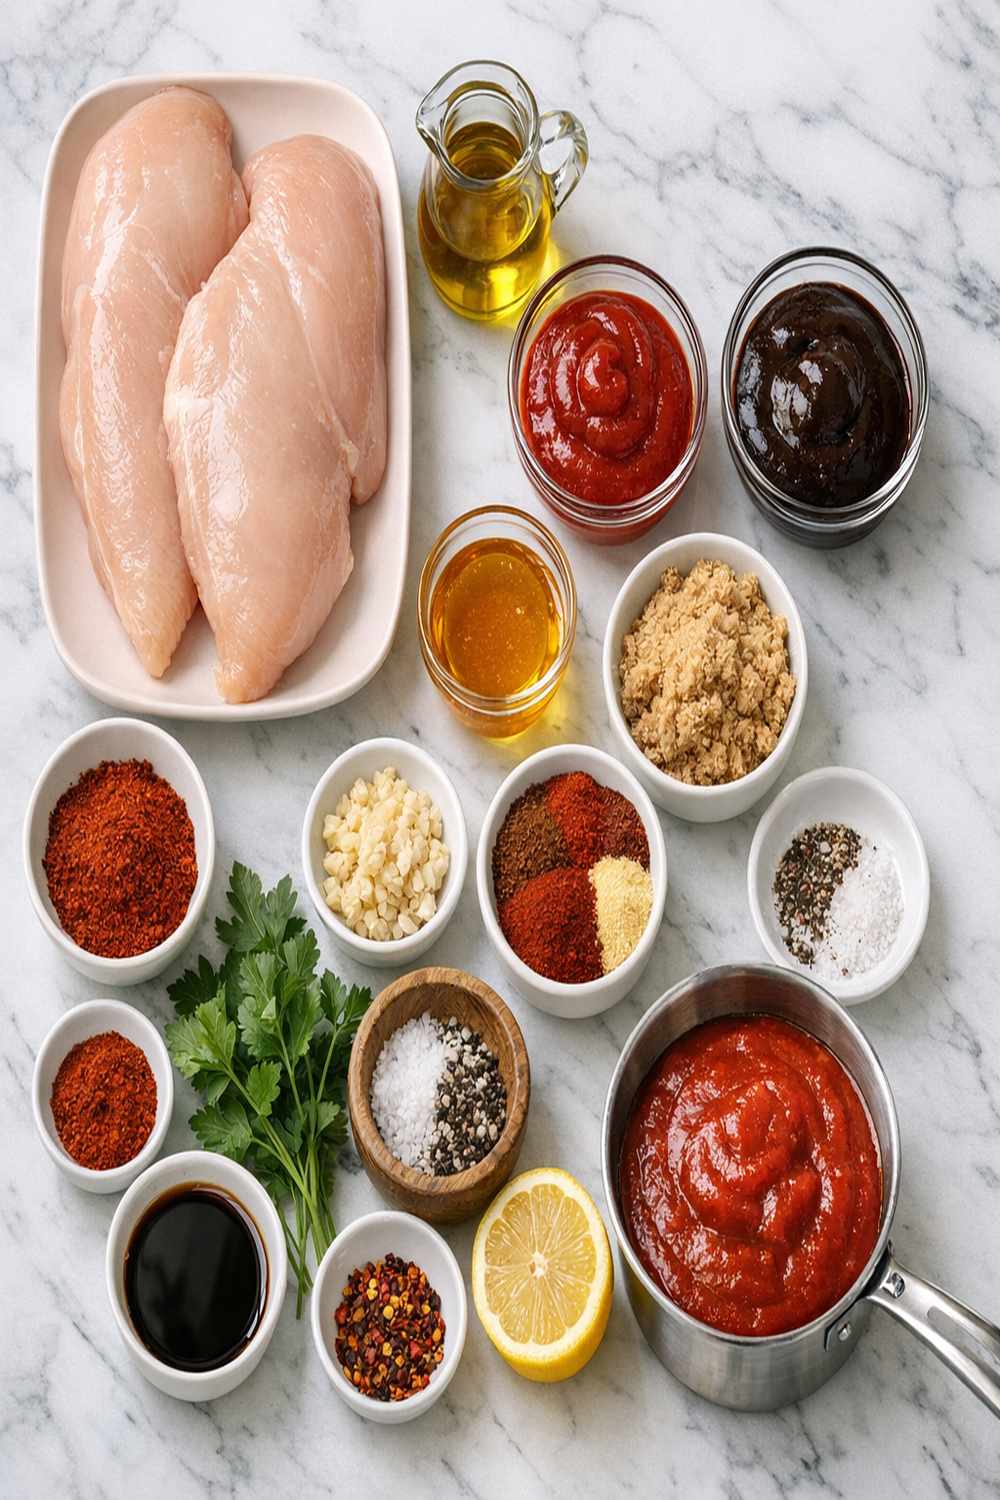
I’ve designed this ingredient list around building maximum flavor while keeping your pantry minimal. Notice we’re using warm spices—chili powder, garlic, oregano—to create a flavor foundation before the barbecue sauce enters. This two-stage approach means your finished chicken tastes complex and developed, not one-dimensional. Here’s what we need, serves 2 as a main course:
- ¼ teaspoon onion powder (dehydrated onion adds savory depth without additional moisture)
- Pinch of cayenne pepper (optional but recommended; adds warmth and complexity)
- ½ cup barbecue sauce (use your favorite brand or homemade; sweeter sauces will caramelize faster)
- 1 tablespoon olive oil (extra virgin for better flavor, though regular works perfectly)
- 2 boneless, skinless chicken thighs (about 8 ounces total; room temperature for even cooking)
- ½ teaspoon kosher salt (fleur de sel or Diamond Crystal work beautifully; sea salt is saltier, so use less)
- 1 tablespoon water (to help steam the chicken during covered cooking)
- 1 teaspoon chili powder (ground dried chiles, the foundation of our warm spice profile)
- ¼ teaspoon dried oregano (Mexican oregano is more robust; Mediterranean is delicate—either works)
- ¼ teaspoon garlic powder (more concentrated than fresh garlic, perfect for quick cooking)
How to Make Stovetop Barbecue Chicken?
This recipe follows a three-phase cooking method: seasoning, steaming, and glazing. Each phase builds on the previous one, creating layers of flavor and texture that taste far more complex than the time investment suggests. Let me walk you through exactly how to execute each step so your chicken turns out restaurant-perfect every single time.
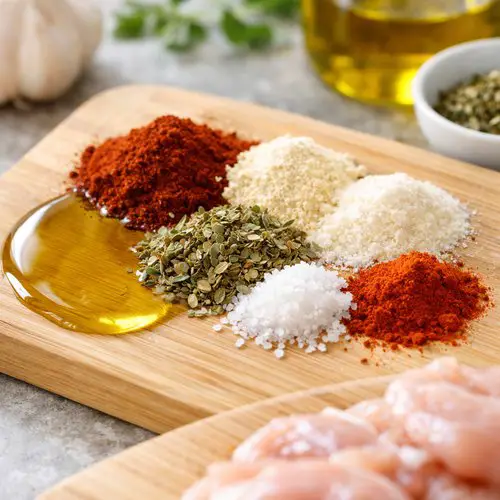
Step 1: Create Your Spice Blend and Coat the Chicken
In a shallow bowl or on a small cutting board, combine your olive oil, chili powder, onion powder, garlic powder, dried oregano, salt, and cayenne pepper if using. Stir these together thoroughly—you want the spices evenly distributed throughout the oil, creating a paste-like consistency. This step takes just two minutes but makes an enormous difference in flavor distribution.
Pat your chicken thighs dry with paper towels (this helps the spice blend stick better and encourages browning). Place them in the bowl and use your hands or tongs to coat both sides thoroughly with the spice mixture. Make sure every surface makes contact with the seasoned oil. This direct contact allows the warm spices to begin releasing their essential oils and perfuming the chicken before heat even enters the equation.
Step 2: Heat Your Skillet and Brown the Chicken
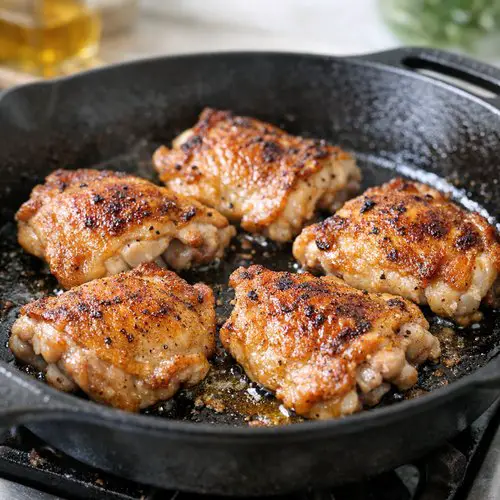
Place a medium skillet (cast iron works wonderfully here because it distributes heat so evenly, but any heavy-bottomed skillet works beautifully) over medium-high heat. Let it preheat for about one minute—you want it genuinely hot, not just warm. A quick way to check: hold your hand about 4 inches above the pan; if you need to pull it away after 3-4 seconds, you’re at the right temperature.
Carefully place your seasoned chicken thighs into the hot pan. You should hear an immediate sizzle—this is the Maillard reaction beginning, where the proteins and sugars in the chicken interact with heat to create complex brown flavors. Don’t move the chicken for the first couple of minutes; you want that initial browning to develop undisturbed.
After about 2-3 minutes, check the underside. It should be golden brown and slightly caramelized. If it looks pale, give it another minute. Once you’ve achieved that beautiful browning, flip the chicken over and brown the opposite side for another 2-3 minutes. This foundational browning creates the flavor backbone for everything that follows.
Step 3: Steam the Chicken Under Cover
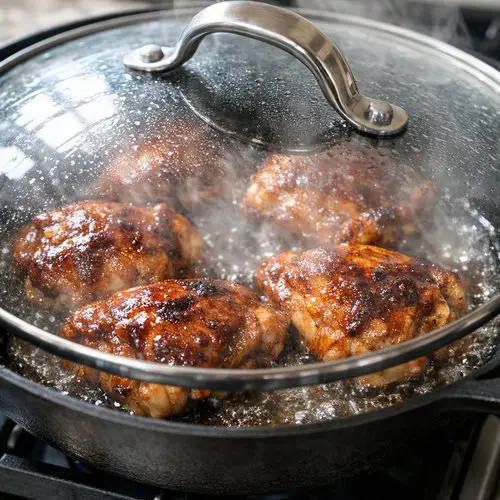
Once both sides are golden, add the water to the bottom of the skillet (not directly on the chicken—along the sides is perfect). Immediately cover the skillet with a lid or even a baking sheet if you don’t have a lid. This traps steam and creates a humid cooking environment that gently brings the chicken to doneness without additional browning.
Reduce your heat to medium and let the covered chicken cook for 5 minutes undisturbed. During this time, steam is doing the heavy lifting, cooking the chicken through while keeping it incredibly moist. You’ll hear gentle sizzling and see steam escaping when you peek—this is exactly what should happen.
After 5 minutes, carefully remove the lid (watch out for the escaping steam!), flip the chicken over, and replace the cover. Cook for another 5 minutes. This second covered phase ensures even cooking throughout the thigh, which is thicker than chicken breast and needs this extra time to reach perfect doneness.
Step 4: Check for Doneness and Add the Barbecue Sauce
Remove the lid and check your chicken’s internal temperature using an instant-read thermometer. You’re looking for 165°F (74°C) at the thickest part. This is the USDA-recommended safe internal temperature for poultry. Alternatively, pierce the thickest part with a fork or knife tip—the juices should run completely clear with no pink. If you see any pink in the juices, cover and cook for another 2-3 minutes, then check again.
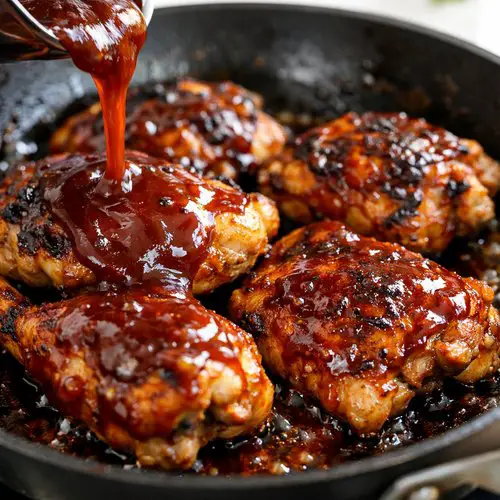
Once your chicken is fully cooked, pour half of your barbecue sauce evenly over the two thighs. Use a spoon or basting brush to distribute it so every surface gets coated. The warm chicken will immediately begin reducing and thickening the sauce.

Step 5: Build Your Final Glaze
Flip the chicken over and pour the remaining barbecue sauce over the other side. Now here’s where the magic happens: with the lid off and the heat still at medium, let the chicken cook uncovered for 2-3 minutes. Use a basting brush or spoon to continuously coat the chicken with the sauce, essentially painting layer upon layer of barbecue coating onto the surface.
Watch closely during these final minutes. The sauce will bubble gently around the edges and begin darkening slightly. This reduction concentrates the barbecue flavor and creates that gorgeous, sticky glaze that makes barbecue chicken so irresistible. The chicken should look glossy and caramelized, almost lacquered.
After 2-3 minutes, when the sauce has thickened considerably and clings beautifully to the chicken, you’re finished. The entire cooking process from raw to plated takes approximately 20-25 minutes, making this one of the fastest ways to create genuine barbecue flavor.
Expert’s Nutritional Insight: Understanding Chicken Thighs
As someone who grew up watching my mother stretch every ingredient, I learned early that boneless, skinless chicken thighs are among the most nutritionally dense poultry options available. While breast meat gets all the attention, thighs contain approximately 50% more iron and significantly more B vitamins, particularly B12 and niacin. The fat content—about 5-7 grams per 3-ounce serving—isn’t something to fear; it’s primarily unsaturated fat that carries fat-soluble vitamins and keeps the meat incredibly moist during cooking.
According to USDA nutritional data, a 3-ounce serving of cooked boneless, skinless chicken thigh contains roughly 178 calories, 21 grams of protein, and 9 grams of fat. When finished with barbecue sauce (adding about 50-60 calories depending on the brand), you’re looking at a satisfying, protein-rich main course that keeps you fuller longer than leaner cuts. This is why I always recommend thighs for home cooking—they’re forgiving, flavorful, and genuinely better for you than the marketing machine suggests.
Tips and Tricks for Perfect Stovetop Barbecue Chicken
- Room temperature chicken cooks more evenly – Remove your chicken from the refrigerator 15-20 minutes before cooking. Cold chicken straight from the fridge will have a higher temperature differential between outside and inside, making it harder to cook through without overcooking the exterior. Room temperature chicken cooks predictably and evenly.
- Pat dry equals better browning – Moisture on the chicken surface steams rather than browns. Spend 30 seconds patting your thighs completely dry with paper towels. This small step dramatically improves your initial browning and sets up everything that follows.
- Don’t crowd your skillet – If making this recipe for more than two people, resist the urge to squeeze extra chicken in. A crowded pan drops the temperature and creates steam instead of browning. Cook in batches if needed; it only adds 10-15 minutes total.
- Cast iron is your secret weapon – If you own a cast iron skillet, use it for this recipe. Its thermal mass maintains even heat distribution better than stainless steel, resulting in more uniform browning and more predictable cooking.
- Choose your barbecue sauce strategically – Thin, vinegar-based sauces need slightly longer cooking to reduce properly. Thick, molasses-heavy sauces caramelize quickly. Thinner sauces work slightly better for this method, but either type is perfectly fine—just adjust your final uncovered cooking time accordingly.
- The thermometer never lies – If you’re nervous about doneness, invest in a quick-read instant thermometer (they’re inexpensive and genuinely invaluable). Guessing leads to either undercooked chicken or dry, overcooked meat. Thermometers eliminate both problems.
- Basting is not optional—it’s transformation – Those final 2-3 minutes where you continuously brush sauce onto the chicken aren’t just for appearance. This active basting creates multiple thin layers of sauce that concentrate together, building a depth of flavor you can’t achieve any other way.
Common Mistakes to Avoid
- Opening the lid too frequently during steaming – Every time you lift the lid, you release steam and extend cooking time. Resist the urge to check on your chicken constantly. Trust the process and keep that lid down for the full 10 minutes of steaming.
- Using barbecue sauce from the beginning – The warm spice blend in the first step is your flavor foundation. Adding barbecue sauce too early masks these subtle, complex flavors. Wait until step 4 to add the sauce, after you’ve built maximum savory depth.
- Skipping the initial browning step – Some home cooks try to skip browning and go straight to steaming to save time. This is a mistake. Those 4-6 minutes of browning create essential Maillard flavors that form the whole foundation. Don’t skip it.
- Ignoring the thickness of your chicken pieces – Uniform thickness matters enormously for even cooking. If one thigh is significantly thicker than the other, pound the thicker one slightly to match its partner. This ensures both pieces finish cooking simultaneously.
Make-Ahead Guide: Preparing This Recipe for Your Week
Spice blend preparation (3 days ahead): Mix your olive oil with all dry spices and store in a small container. This allows flavors to marry slightly. Simply coat your chicken when you’re ready to cook.
Chicken marination (up to 24 hours ahead): Combine your seasoned oil with the chicken, cover, and refrigerate. The overnight marination actually deepens flavor development. Just remember to bring the chicken to room temperature 20 minutes before cooking.
Cooking ahead for meal prep: This recipe stores beautifully. Cook the entire batch, let cool completely, then refrigerate in an airtight container for up to 4 days. The flavors actually improve overnight as the spices and sauce fully penetrate the meat. Reheat gently in a skillet over medium-low heat for about 5 minutes, adding a splash of water to prevent drying.
Freezing for future meals: Cooked barbecue chicken freezes excellently for up to 3 months. Wrap pieces individually in plastic wrap, then place in a freezer bag. Thaw overnight in the refrigerator and reheat as directed above. The texture remains excellent through one freeze-thaw cycle.
Can I Store Stovetop Barbecue Chicken?
Refrigerator storage: Let your cooked chicken cool to room temperature before transferring to an airtight container. Properly stored barbecue chicken keeps fresh for 3-4 days in the refrigerator. The flavor actually deepens slightly as it sits, making day-two servings sometimes better than day-one.
Freezer storage: Barbecue chicken freezes beautifully for up to 3 months. Wrap individual pieces in plastic wrap before placing in a freezer bag to prevent freezer burn. Thaw overnight in the refrigerator before reheating.
Reheating: The best method is gentle skillet reheating over medium-low heat with a splash of water or chicken broth, which takes about 5 minutes. You can also microwave (though the skin texture suffers slightly), or warm in a 325°F oven covered with foil for about 10-12 minutes.
Leftover sauce: If you have extra barbecue sauce remaining after cooking, store it separately in an airtight container for up to 1 week. Reuse it for other proteins or as a dipping sauce.
Nutrition Information
Based on USDA nutritional data for boneless, skinless chicken thighs with barbecue sauce, each serving (one cooked thigh with glaze) contains approximately 220 calories, 24 grams of protein, 11 grams of fat (mostly unsaturated), and 6 grams of carbohydrates from the barbecue sauce. The sodium content varies by barbecue sauce brand but typically ranges from 400-600mg per serving, which is reasonable for a flavorful main course.
This recipe is naturally gluten-free if you use certified gluten-free barbecue sauce, and it’s naturally dairy-free. The spice blend provides beneficial compounds like capsaicin (from chili powder) and antioxidants from oregano. The higher fat content in thigh meat compared to breast meat actually improves your absorption of fat-soluble vitamins.
Seasonal Variations: Adapting Your Barbecue Chicken
- Summer version: Add ½ teaspoon smoked paprika to your spice blend and serve alongside a bright vinegar-based side like Apple Cider Vinegar Coleslaw. The smoke flavor evokes outdoor grilling, while the bright slaw cuts through richness beautifully.
- Fall version: Swap half your barbecue sauce for a barbecue-spice blend mixed with bourbon or apple cider. Add ¼ teaspoon cinnamon to your spice rub. The warming spices and apple flavors feel seasonally appropriate while maintaining that classic barbecue essence.
- Winter version: Incorporate Worcestershire sauce or soy sauce into your barbecue glaze (about 1 tablespoon) for deeper, more savory notes. The umami layers make this feel like comfort food rather than summer grilling. Serve with warming sides like roasted root vegetables.
- Spring version: Use a spicier barbecue sauce and add fresh lime juice to the final glaze (about ½ teaspoon). The brightness feels fresh and seasonal while maintaining authentic barbecue flavor.
What Can I Serve With Stovetop Barbecue Chicken?
The beauty of this recipe is its versatility—it pairs beautifully with countless sides. Think about balancing the rich, sweet barbecue sauce with bright, acidic, or cooling accompaniments. Here are my go-to pairings that I use constantly in my own kitchen:
- Apple Cider Vinegar Coleslaw – The sharp vinegar brightness perfectly cuts through barbecue richness. This pairing recreates that classic picnic experience while adding essential freshness to your plate.
- Cornbread or biscuits – Use the barbecue sauce and chicken drippings to create a quick dipping sauce for warm cornbread. This combination is absolutely transportive.
- Grilled or roasted vegetables – Baby Carrots In The Oven become naturally sweet as they caramelize, providing a textural contrast to the tender chicken. Season them with a pinch of the same spices you used on the chicken for flavor cohesion.
- Rice pilaf or simple rice – Plain white or brown rice acts as a neutral canvas, allowing the barbecue flavors to shine while soaking up any extra sauce from the plate.
- Potato salad or baked beans – These classic barbecue sides exist for good reason. Their creamy or savory profiles balance the sweet-spicy chicken beautifully.
- Fresh garden salad – Serve alongside a crisp salad with vinaigrette dressing. The acidity refreshes your palate between bites of rich barbecue chicken.
- Iced tea or apple cider beverages – The natural tannins in unsweetened tea or the subtle apple notes in Apple Cider Iced Tea complement barbecue flavors beautifully while aiding digestion.
Substitutes and Variations
- Chicken breast instead of thighs – Boneless, skinless chicken breasts work but require different timing. Use thinner breasts (or pound them to ½-inch thickness) and reduce covered cooking time to 7 minutes total (3-4 minutes per side). Check temperature carefully since breasts dry out faster than thighs. The meat won’t be quite as moist, but it absolutely works for lighter preferences.
- Bone-in, skin-on thighs – If you prefer skin, use bone-in thighs and skip the initial browning step (the skin browns nicely on its own). Extend covered cooking time to 12-15 minutes since bones conduct heat slower. The skin becomes beautifully crispy while the meat stays incredibly moist.
- Different barbecue sauce brands or homemade sauce – Vinegar-based sauces (popular in the Carolinas) result in tangier chicken. Tomato-based sauces (Kansas City style) create richer, sweeter results. Mustard-based sauces (South Carolina style) add unexpected depth. Any style works beautifully—adjust your spice blend slightly if needed to complement your sauce choice.
- Alternative spices – If you don’t have chili powder, substitute equal amounts of paprika plus a pinch of cayenne. Smoked paprika adds authentic grill flavor. Ground cumin can replace oregano for a slightly different warm spice profile. Adapt to your spice cabinet and preferences.
- Pork instead of chicken – Boneless pork chops or pork tenderloin pieces cook beautifully using this exact method. Pork’s higher fat content makes it incredibly forgiving. Increase covered cooking time slightly (8-10 minutes) to ensure pork reaches safe internal temperature of 145°F.
- Oil substitutes – Use avocado oil, grapeseed oil, or even melted butter instead of olive oil. Butter creates slightly richer flavor, while neutral oils let the spices shine more prominently.
Barbecue Chicken On Stove Recipe
Ingredients
Method
- In a shallow bowl or on a small cutting board, combine your olive oil, chili powder, onion powder, garlic powder, dried oregano, salt, and cayenne pepper if using. Stir these together thoroughly—you want the spices evenly distributed throughout the oil, creating a paste-like consistency. This step takes just two minutes but makes an enormous difference in flavor distribution. Pat your chicken thighs dry with paper towels (this helps the spice blend stick better and encourages browning). Place them in the bowl and use your hands or tongs to coat both sides thoroughly with the spice mixture. Make sure every surface makes contact with the seasoned oil. This direct contact allows the warm spices to begin releasing their essential oils and perfuming the chicken before heat even enters the equation.

- Place a medium skillet (cast iron works wonderfully here because it distributes heat so evenly, but any heavy-bottomed skillet works beautifully) over medium-high heat. Let it preheat for about one minute—you want it genuinely hot, not just warm. A quick way to check: hold your hand about 4 inches above the pan; if you need to pull it away after 3-4 seconds, you're at the right temperature. Carefully place your seasoned chicken thighs into the hot pan. You should hear an immediate sizzle—this is the Maillard reaction beginning, where the proteins and sugars in the chicken interact with heat to create complex brown flavors. Don't move the chicken for the first couple of minutes; you want that initial browning to develop undisturbed. After about 2-3 minutes, check the underside. It should be golden brown and slightly caramelized. If it looks pale, give it another minute. Once you've achieved that beautiful browning, flip the chicken over and brown the opposite side for another 2-3 minutes. This foundational browning creates the flavor backbone for everything that follows.

- Once both sides are golden, add the water to the bottom of the skillet (not directly on the chicken—along the sides is perfect). Immediately cover the skillet with a lid or even a baking sheet if you don't have a lid. This traps steam and creates a humid cooking environment that gently brings the chicken to doneness without additional browning. Reduce your heat to medium and let the covered chicken cook for 5 minutes undisturbed. During this time, steam is doing the heavy lifting, cooking the chicken through while keeping it incredibly moist. You'll hear gentle sizzling and see steam escaping when you peek—this is exactly what should happen. After 5 minutes, carefully remove the lid (watch out for the escaping steam!), flip the chicken over, and replace the cover. Cook for another 5 minutes. This second covered phase ensures even cooking throughout the thigh, which is thicker than chicken breast and needs this extra time to reach perfect doneness.
- Remove the lid and check your chicken's internal temperature using an instant-read thermometer. You're looking for 165°F (74°C) at the thickest part. This is the USDA-recommended safe internal temperature for poultry. Alternatively, pierce the thickest part with a fork or knife tip—the juices should run completely clear with no pink. If you see any pink in the juices, cover and cook for another 2-3 minutes, then check again. Once your chicken is fully cooked, pour half of your barbecue sauce evenly over the two thighs. Use a spoon or basting brush to distribute it so every surface gets coated. The warm chicken will immediately begin reducing and thickening the sauce.

- Flip the chicken over and pour the remaining barbecue sauce over the other side. Now here's where the magic happens: with the lid off and the heat still at medium, let the chicken cook uncovered for 2-3 minutes. Use a basting brush or spoon to continuously coat the chicken with the sauce, essentially painting layer upon layer of barbecue coating onto the surface. Watch closely during these final minutes. The sauce will bubble gently around the edges and begin darkening slightly. This reduction concentrates the barbecue flavor and creates that gorgeous, sticky glaze that makes barbecue chicken so irresistible. The chicken should look glossy and caramelized, almost lacquered. After 2-3 minutes, when the sauce has thickened considerably and clings beautifully to the chicken, you're finished. The entire cooking process from raw to plated takes approximately 20-25 minutes, making this one of the fastest ways to create genuine barbecue flavor.

Notes
Tried this recipe?
Let us know how it was!FAQs
Can I use frozen chicken for this recipe?
I don’t recommend cooking frozen chicken using this method because the temperature differential between the frozen center and the heated exterior makes it nearly impossible to cook evenly. The exterior will overcook before the frozen center reaches safe temperature. Always thaw chicken overnight in the refrigerator before cooking. If you’re in a time crunch and forgot to thaw, use the defrost function on your microwave (about 4-5 minutes for two thighs), then pat completely dry before cooking. The slight texture loss from microwave thawing is better than the alternative of uneven cooking.
Why is my chicken still pink inside even though I cooked it long enough?
First, remember that pink meat doesn’t always mean undercooked—myoglobin (the protein that gives meat color) can remain pink even at safe temperatures. The most reliable test is internal temperature: 165°F is the USDA safety standard for poultry. Use an instant-read thermometer inserted into the thickest part of the thigh (without touching bone). If your thermometer reads 165°F but you still see pink, the chicken is perfectly safe and likely just has higher myoglobin concentration naturally. However, if your thermometer reads below 165°F, continue cooking another 2-3 minutes and retest.
Can I make this recipe for a crowd?
Absolutely, but don’t overcrowd your skillet during browning and steaming phases. For every two additional people, use two more chicken thighs and work in batches. Brown the first batch completely, transfer to a plate, then repeat with the remaining chicken. Once all chicken is browned and steamed, you can combine everything in a larger pot or skillet for the final sauce-glazing phase. This keeps cooking times predictable and ensures every piece browns properly.
What if my barbecue sauce burns on the bottom of the skillet?
This happens when heat is too high during the final glazing phase. If you notice the sauce darkening excessively and smelling burnt (rather than caramelized), immediately reduce heat to low and add 1-2 tablespoons water to the skillet. Stir gently to loosen any stuck bits and distribute heat more evenly. The sauce should bubble gently, not aggressively boil. You’re aiming for caramelization (deep brown, complex flavor) not burning (black, acrid taste). If burning does occur, you can salvage the chicken by transferring it to a clean skillet, discarding the burnt sauce, and applying fresh sauce. Always keep heat at medium, never higher, for the final glazing step.
Is this recipe actually faster than grilling, or does it just seem that way?
It’s genuinely faster in most cases. Grilling requires preheating time (10-15 minutes for charcoal, 5-10 minutes for gas), then cooking time (15-20 minutes for chicken). This stovetop method requires just 5 minutes of skillet preheating (which happens while you’re seasoning chicken) plus 20-25 minutes of cooking time. Total time is roughly 25-30 minutes soup-to-nuts, versus 30-45 minutes for grilling when you count preheating. Beyond speed, you have complete control over heat and can recover from mistakes easier on the stovetop. Grilling produces genuinely excellent results, but this stovetop method competes beautifully on both flavor and time efficiency.
More Recipes You’ll Love
- Air Fry Chicken Bites – Another quick chicken method that’s perfect for meal prep or picky eaters who prefer bite-sized portions.
- Baby Carrots In The Oven – A simple roasted vegetable side that pairs beautifully with barbecue chicken and rounds out your meal nutrition.
- Apple Cider Iced Tea – The perfect beverage pairing that complements barbecue flavors while keeping meals refreshing.
- Alice Springs Chicken Sauce – If you love this stovetop chicken method but want to explore different sauce profiles, this iconic restaurant-inspired sauce is absolutely incredible.
There’s something deeply satisfying about pulling a perfectly glazed, tenderly cooked piece of barbecue chicken from your skillet and knowing you created restaurant-quality food in your own kitchen in under 30 minutes. This recipe has become my absolute go-to when I want genuine flavor without the fuss, when I’m feeding my family on a Tuesday night, or when unexpected guests arrive and I need something impressive and fast.
The combination of warm spices, tender chicken, and caramelized barbecue sauce hits that perfect sweet-savory-spicy balance that makes people close their eyes between bites and ask for seconds. More importantly, it’s forgiving enough for beginners and interesting enough to keep experienced home cooks excited. Every time I make this, I’m transported back to that summer when my mom’s creative problem-solving taught me that sometimes the best meals come not from following tradition exactly, but from making it your own.
Make this recipe tonight. Serve it with your favorite sides. Notice how quickly your family gathers around the table. That’s the magic of good food made easy. Enjoy!
