Easy Mac Salad Recipe: Make Once on Sunday, Eat Well All Week

Listen, I know you’re busy. You’re juggling work, family, life—and somewhere in there, you’re supposed to eat well too. That’s where this mac salad recipe becomes your secret weapon. We’re going to make this once on Sunday and eat beautifully throughout the week. No excuses, no takeout needed. I’ve scaled everything for meal prep success, and I’m walking you through the exact system I use to keep my family fed with fresh, delicious food even when Monday hits like a ton of bricks.
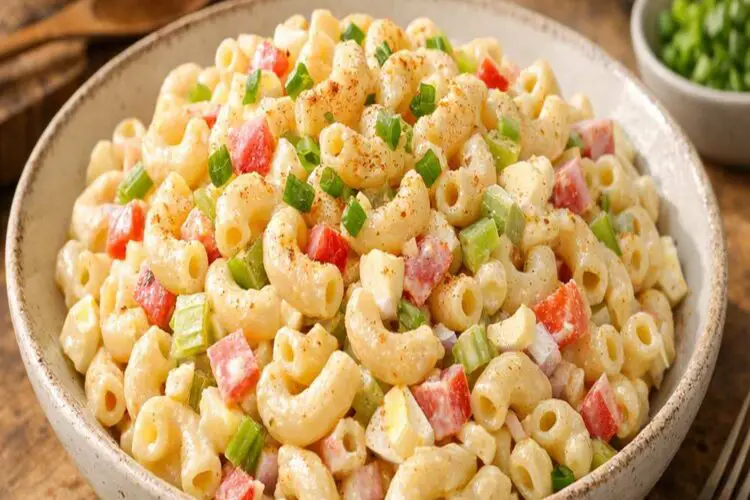
This isn’t just any mac salad. We’re talking about creamy, tangy, vegetable-packed perfection that actually tastes better after a day or two in the refrigerator. Think of it as a foundation recipe—similar to how BLT wraps with secret sauce give you that satisfying, complete meal-prep protein, this salad becomes your versatile companion for the entire week.
Basic Mac Salad Recipe Meal Prep: Cook Once, Eat All Week
I discovered the power of thoughtful meal prep about seven years ago when my second daughter was born and I suddenly had zero time to think about dinner. I remember standing in my kitchen at 6 PM, exhausted, with nothing prepared. My mother-in-law—bless her—had made a massive batch of a creamy salad the day before, and we simply divided it into containers. That night, we ate well without the stress. That single moment changed how I approach feeding my family.
Now, every Sunday afternoon, I carve out about 45 minutes to make this exact mac salad. My kids know the routine. There’s something calming about that predictable rhythm—the sound of boiling water, the gentle stir of vegetables, the satisfaction of organized containers lined up in the fridge. It’s not just about nutrition (though that matters deeply). It’s about reclaiming your week from food chaos.
Why This Recipe Is Perfect for Meal Prep
- Saves 30-45 minutes daily across your week – One cooking session on Sunday eliminates five separate dinner decisions. That’s nearly four hours reclaimed for your family, your rest, or whatever matters most to you.
- Improves with time, doesn’t deteriorate – Unlike many salads that wilt, this creamy preparation actually develops deeper, more cohesive flavors over 3-4 days. The dressing coats everything evenly, and the vegetables stay crisp because we’re not using a watery vinaigrette.
- Works as lunch, dinner, or a side for five different meal contexts – Serve it cold straight from the container, warm it gently on the stovetop, nestle it alongside grilled proteins, or transform it entirely with different accompaniments each day.
Your Weekly Meal Plan With This Recipe
Here’s exactly how we transform one batch into five entirely different meals. The beauty of meal prep isn’t eating the same thing over and over—it’s intelligent repetition with thoughtful variety.
- Monday Dinner: Classic Cold Serve – Pull a container straight from the fridge, add a handful of fresh greens underneath, and pair with crusty bread. This is your low-effort, high-satisfaction start to the week.
- Tuesday Lunch: Protein Addition – Take your portion and top with sliced rotisserie chicken or crumbled feta. The mac salad becomes the base, and you’ve added 20+ grams of protein without additional cooking.
- Wednesday Dinner: Warm Transformation – Gently reheat your portion in a skillet over medium heat (we’ll talk exact timing later). Serve alongside air fry beef strips for a completely different meal experience from the same salad.
- Thursday Lunch: Sandwich or Wrap Integration – Use your mac salad as a filling inside whole grain wraps or between hearty bread slices. It becomes a portable, satisfying lunch that doesn’t require assembly that morning.
- Friday Celebration: Final Remix – Combine remaining portions with fresh herbs you pick up midweek, add a squeeze of fresh lemon juice, and serve as a lighter side during your Friday dinner. You’ve eaten well all week without repeating the same presentation once.
The Ingredients – Scaled for a Full Week
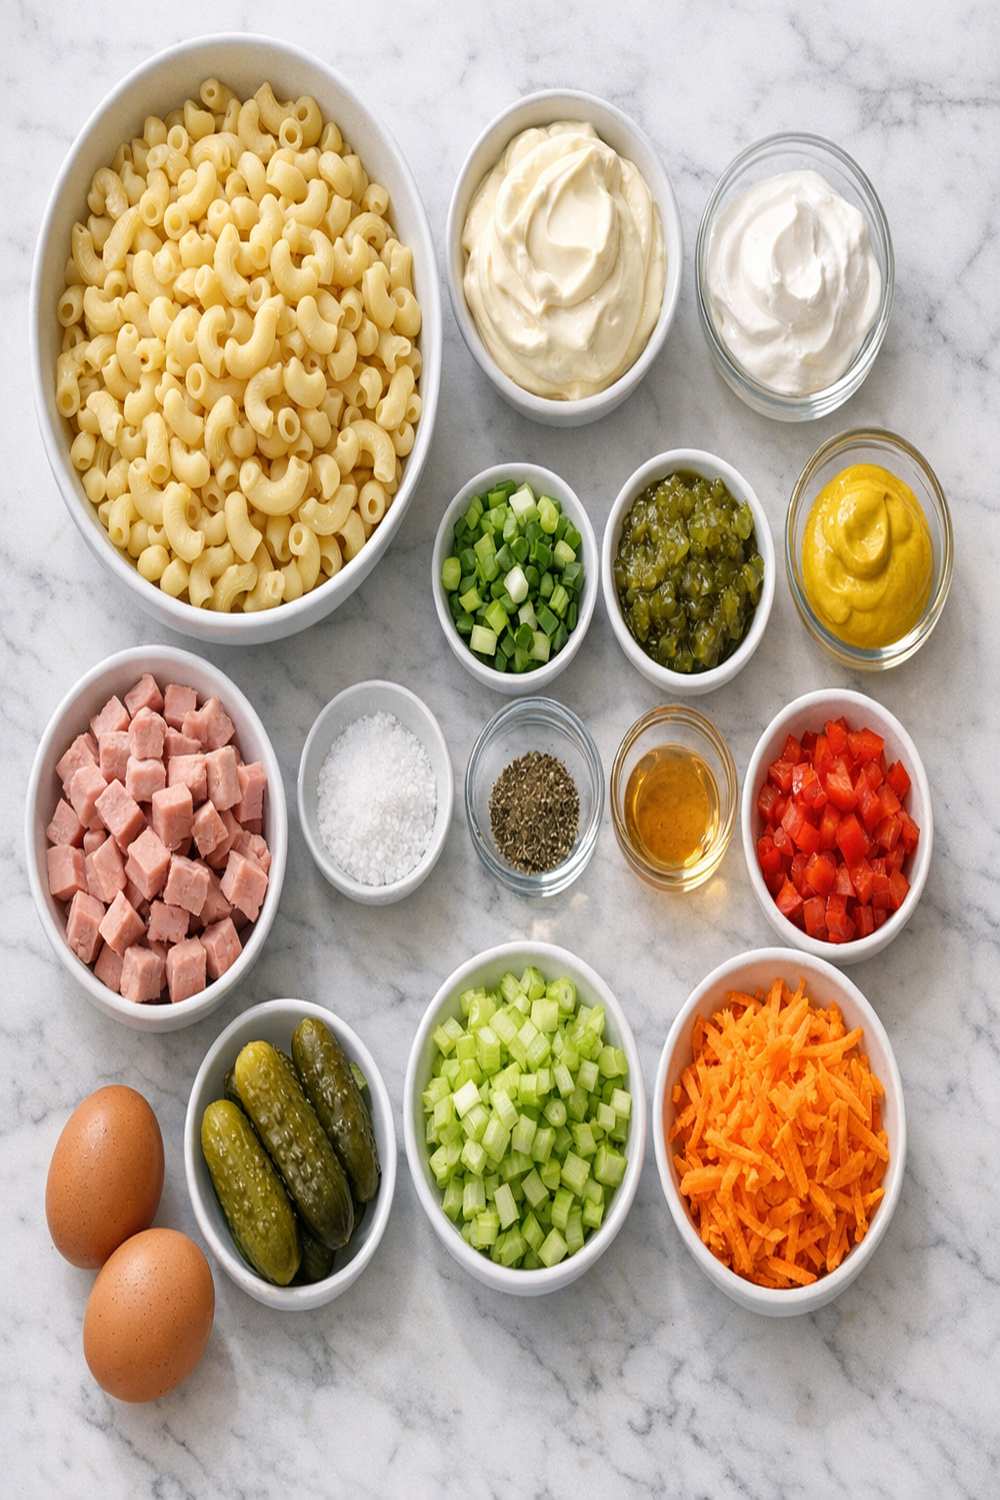
I’ve scaled this for six generous servings, which gives us flexibility for varying appetites and meal combinations throughout the week. All these ingredients are chosen for their stability during storage—we’re not using delicate components that break down. Everything here holds beautifully for 4-5 days when stored properly.
- 2 tablespoons sweet pickle juice (30ml; doubles down on that tangy, balanced flavor profile)
- ⅛ teaspoon garlic powder (0.25g; don’t overdo this—it intensifies during storage)
- 3 tablespoons fresh lemon juice (45ml; adds brightness that develops over days rather than fading)
- ¾ cup mayonnaise made with olive oil (175g; olive oil-based versions oxidize less quickly than standard varieties during storage)
- 1 pound dry elbow pasta (227g dry pasta yields approximately 6 cups cooked; the starch content helps absorb dressing evenly)
- ¼ teaspoon fresh ground black pepper (0.5g; grind it yourself just before mixing for maximum impact)
- ⅓ cup finely diced red onion (45g; red onion’s natural sugars balance the salad’s tanginess better than white varieties)
- ⅓ cup thinly sliced celery (55g; slice thinly so it softens evenly with the dressing rather than remaining woody)
- ¾ cup finely diced red bell pepper (100g; sweet pepper maintains crispness better than green varieties when refrigerated)
- ½ cup finely diced sweet gherkins (80g; the vinegar in these contributes flavor depth and acts as a natural preservative)
- ¼ cup sour cream (70g; adds tanginess without excess moisture that would make the salad watery by day four)
- 1 tablespoon granulated sugar (12g; balances acid and salt, creating the signature creamy-tangy flavor)
- 1 tablespoon Dijon mustard (15g; acts as an emulsifier, keeping the dressing cohesive throughout the week)
- 3 large hard-boiled eggs, cooled (the yolks add richness; cooling before dicing prevents that grey-green oxidation ring)
- ⅛ teaspoon crushed red pepper flakes (optional, 0.1g; adds complexity without heat if you prefer mild)
- ½ teaspoon sea salt (3g; use kosher or sea salt for better flavor distribution than iodized)
The Meal Prep Process: How to Make Basic Mac Salad Recipe in Bulk
We’re treating this as a system, not just a cooking project. The goal is efficiency without cutting corners on quality. I’ve timed this entire process—from water boiling to final storage—at 45 minutes. Here’s exactly how we do it:
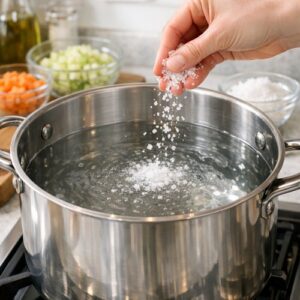
Step 1: Start Your Water and Prep Station
Fill a large pot (at least 6-quart capacity) three-quarters full with cold water and add a generous pinch of sea salt—about one tablespoon. Place it on your highest heat setting. While water heats, set up your prep station with all vegetables washed, dried, and ready to cut. This waiting period is perfect for gathering your bowls, measuring spoons, and storage containers. When everything is within arm’s reach, your actual cooking moves at twice the speed.
Pro tip from my professional kitchen experience: mise en place—having everything prepared and measured before you begin—is the difference between relaxed cooking and stressed cooking. Take five extra minutes now and save yourself fifteen minutes of scrambling later.

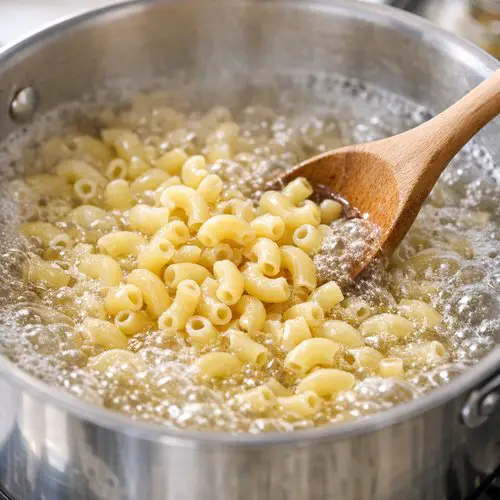
Step 2: Cook Your Pasta to Perfect Tenderness
Once your water reaches a rolling boil, add your pound of elbow pasta and stir immediately to prevent sticking. Set a timer for one minute less than the package suggests—we want al dente texture that won’t turn mushy after absorbing dressing over several days. At about 8 minutes total (depending on brand), taste a piece. It should have just a slight firmness in the center, not chalky, but not completely soft either.
Drain immediately into a colander, then rinse under cold running water for about 30 seconds while gently stirring with your fingers. This stops the cooking process and removes excess starch. Drizzle with one teaspoon of olive oil and toss gently—this prevents clumping as it cools.
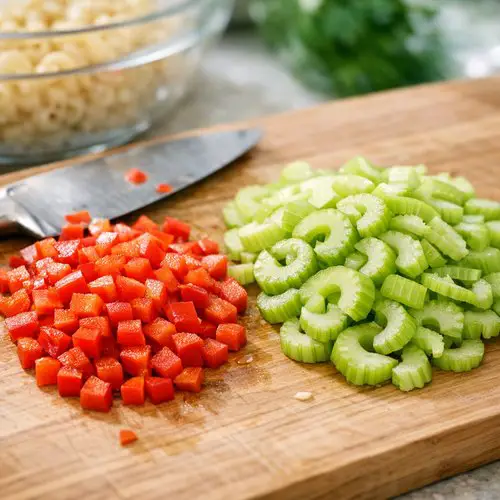
Step 3: Prepare Your Vegetables With Precision
While pasta cools slightly, dice your red bell pepper into ¼-inch pieces (uniform size means even texture distribution). Slice your celery into thin half-moons—the thinner you slice, the more evenly it softens with the dressing. Dice your red onion finely; the smaller pieces distribute their sharp flavor throughout rather than creating onion-forward bites. Cut your sweet gherkins into small dice as well—these add crucial texture contrast.
The texture consistency matters in meal prep salads more than many home cooks realize. If your vegetable pieces are drastically different sizes, some soften completely by day four while others remain crunchy. Aim for uniform ¼-inch to ⅜-inch pieces across all vegetables.
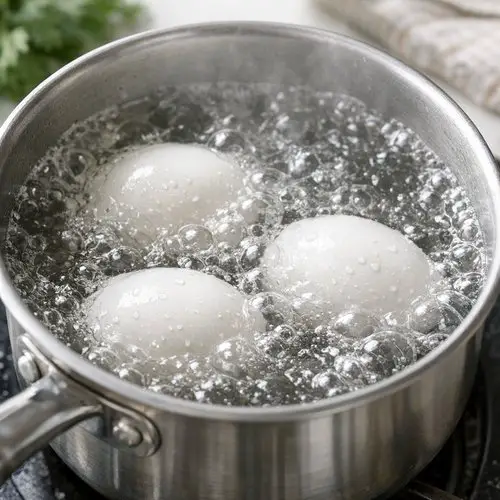
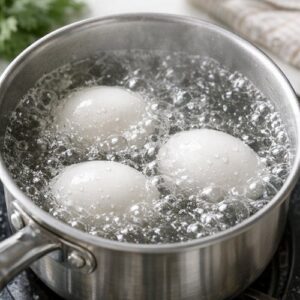
Step 4: Boil and Cool Your Eggs Efficiently
If you haven’t already prepared hard-boiled eggs, place three large eggs in a small saucepan, cover with cold water, and bring to a boil. Once boiling, remove from heat, cover, and let sit for 12 minutes exactly. Transfer to an ice bath immediately to stop cooking. This prevents that grey-green ring and ensures a creamy, pale yellow yolk.
Once cooled (about 10 minutes), peel gently under cool running water—the water helps separate the membrane from the white. Dice into ¼-inch pieces.
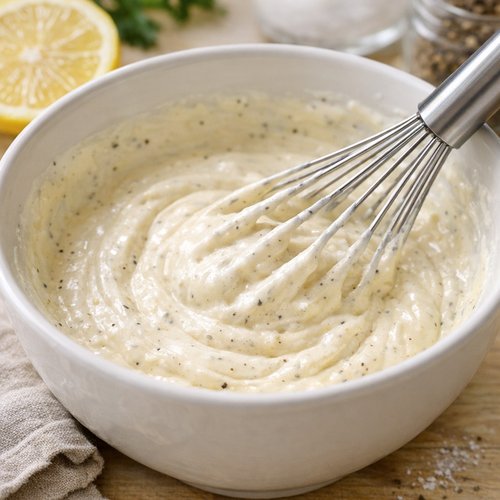
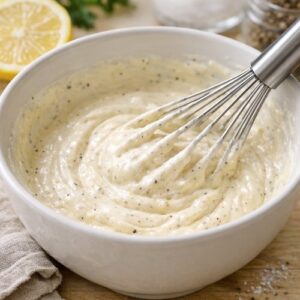
Step 5: Build Your Dressing in a Separate Bowl
In a medium bowl, whisk together your mayonnaise, sour cream, Dijon mustard, and fresh lemon juice. This combination is your emulsified base. Add your granulated sugar, salt, black pepper, and garlic powder, whisking until the sugar completely dissolves. This takes about 30 seconds of actual whisking—you should see no grains remaining.
Stir in your sweet pickle juice and the optional crushed red pepper if using. Taste this dressing now—before it meets the pasta. It should taste bright, tangy, slightly sweet, and rich. If it seems one-dimensional, you probably need more acid (lemon juice) or salt. Season now rather than after everything is mixed.
This is the moment when understanding flavor balance, not just following instructions, makes all the difference. My multicultural upbringing taught me that the best dishes hit multiple flavor notes at once—acid, salt, fat, sweetness, subtle heat. Your dressing should make you pause and think, “Yes, that’s exactly right.”
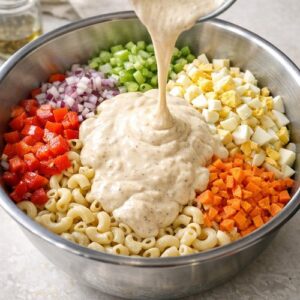
Step 6: Combine Everything in Your Final Assembly Bowl
In your largest mixing bowl, combine your cooled pasta with all prepared vegetables and diced eggs. Pour your prepared dressing over everything and fold gently but thoroughly using a large rubber spatula—this isn’t a job for your hands, which can crush delicate pasta. Fold for about one minute, making sure every piece of pasta gets coated.
The pasta will seem slightly underdressed at this moment. Don’t panic. As this sits, the pasta continues absorbing moisture from the vegetables and dressing, reaching perfect creaminess by tomorrow. If you taste it now and it seems underseasoned, hold off on adjusting—taste again after it’s been refrigerated overnight before adding more salt.

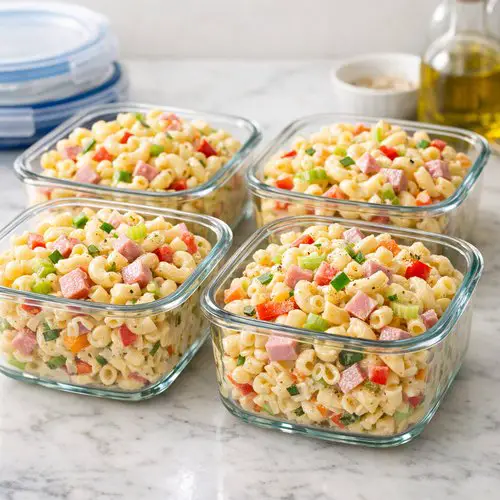
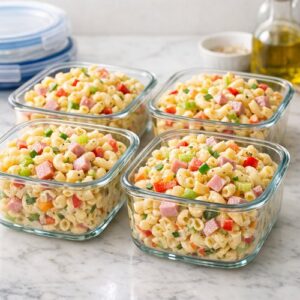
Step 7: Portion Into Your Storage System
Divide your finished mac salad evenly into your storage containers. I use 32-ounce glass containers with fitted lids—one container per day, plus one extra for flexibility. Fill each container only three-quarters full so the lid closes securely without pressure. Overstuffed containers create a sloppy mess when you open them.
Press a piece of parchment paper directly onto the surface of each portion before sealing the lid. This extra step prevents condensation from dripping back onto your salad during storage, which can make it watery by day four or five.
Storage and Organization System
- Glass containers with airtight seals – Glass doesn’t retain odors or flavors like plastic, and you can see exactly what’s inside at a glance. The airtight seals maintain proper humidity without allowing condensation buildup. I prefer 32-ounce containers—large enough for a generous portion, small enough to fit easily in a standard refrigerator.
- Parchment paper barrier method – Place a small square of parchment paper directly on top of the salad before closing the lid. This prevents condensation from the lid dripping back onto your salad, which is the primary cause of that watery, separated texture by day four.
- Label with date and “consume by” day – Use painter’s tape and a permanent marker on the side of each container. Write the date you made it and the recommended consumption date. This takes 20 seconds and eliminates any guessing about whether something is still good. I typically mark the fifth day as my cutoff—by then, even properly stored salad has begun to separate slightly.
Expert’s Nutritional Tip: The Power of This Particular Protein Combination
Let me share something I’ve learned through years of recipe development and studying food science: the eggs in this salad do far more than add protein and richness. The yolk’s lecithin acts as a natural emulsifier, helping the mayo-based dressing stay cohesive throughout your storage period rather than separating into greasy pools. Additionally, eggs provide choline—a nutrient crucial for brain health that many home cooks overlook. When you’re meal prepping, you’re not just saving time; you’re ensuring consistent nutrition throughout your week. This salad delivers approximately 12 grams of protein per serving (including the pasta), plus the satiating fats from the yolk and mayo that keep you satisfied for hours.
How to Reheat Without Losing Quality
Here’s the beautiful secret: this mac salad tastes equally excellent cold, room temperature, or gently warmed. But the method matters for texture preservation.
Cold serving (Monday-Tuesday): Pull straight from the refrigerator. If it seems slightly thick, let it sit on the counter for 5-10 minutes—the dressing will loosen as it warms slightly. This is my preferred method for the first two days.
Gentle stovetop warming (Wednesday-Thursday): Transfer your portion to a non-stick skillet over medium-low heat. Stir gently and continuously for about 4-5 minutes until warmed through. The key is never above medium heat—high heat breaks down the mayo-based dressing and causes that separated, greasy appearance. If it seems too thick while warming, add just one tablespoon of warm water and stir gently.
Microwave method (if that’s your only option): Transfer to a microwave-safe bowl, cover loosely with a paper towel, and heat in 30-second intervals, stirring gently between each. Total time is usually 60-90 seconds for a full portion. This isn’t my preferred method because uneven microwave heat can create those tough, rubbery pasta textures, but it works in a pinch.
Important: Never reheat directly from the refrigerator on high heat. The temperature shock and intense heat break the emulsion of your dressing, causing it to separate.
Can I Freeze Basic Mac Salad Recipe?
Here’s my honest answer, and I know it’s not what you hoped to hear: freezing is not ideal for this particular salad, but it’s possible under specific conditions. You have a two-week window for freezing without significant quality loss. After that, the mayonnaise-based dressing begins to separate and the vegetables lose their texture.
If you must freeze: transfer your portion to a freezer-safe container, leaving ½-inch headspace for expansion. Freeze flat for easier thawing and storage. Thaw in the refrigerator overnight (never at room temperature) before reheating using the stovetop method I described above. Expect slightly softer vegetables and a dressing that’s less cohesive than fresh, but still perfectly edible.
My professional recommendation? Make this recipe in smaller batches more frequently—every 4-5 days rather than every two weeks. The quality difference is substantial, and honestly, the rhythm of regular cooking is more enjoyable than managing frozen portions.
Common Mistakes to Avoid: What I’ve Seen Go Wrong
Mistake #1: Oversizing Your Vegetables – When pieces are larger than ⅜ inch, they don’t soften evenly with the dressing. By day three, you’re biting through chunks of raw onion while other vegetables have become mushy. Uniform sizing is crucial for meal prep success.
Mistake #2: Skipping the Pasta Rinse – Some home cooks keep the starchy cooking water on their pasta thinking it’ll help absorption. Actually, that excess starch makes everything gluey by day two. The cold rinse stops cooking and removes starch, and the light oil toss prevents clumping. Don’t skip this step.
Mistake #3: Making the Dressing Too Thin – Adding too much sour cream or juice makes your dressing runny initially, which means it’s watery by day three. Your dressing should taste almost slightly too thick before you mix it into the pasta. It will thin as vegetables release their moisture during storage.
Mistake #4: Overfilling Your Storage Containers – This creates pressure that forces condensation onto your salad every time you open the lid. Fill three-quarters full only, and your salad stays fresh longer while being easier to transport and handle.
Seasonal Variations: Keeping This Fresh Year-Round
Spring Version (March-May): Replace half your red bell pepper with diced fresh peas (if raw; if frozen, blanch and cool first). Add 2 tablespoons of fresh dill and reduce the pickle juice by half—spring flavors lean brighter and fresher. The green peas brighten the entire aesthetic and add seasonal vegetable variety.
Summer Version (June-August): Add diced fresh tomatoes (drain them well to avoid excess moisture) and fresh basil at serving time rather than during storage. Use champagne vinegar instead of red wine vinegar for a lighter touch. Increase your lemon juice by one tablespoon for brightness that matches summer’s intensity.
Fall Version (September-November): Replace half the red onion with diced shallots, which have deeper, sweeter notes. Add ¼ cup of diced apple (toss with lemon juice immediately to prevent browning) and a tiny pinch of smoked paprika. This version pairs beautifully with roasted turkey or chicken.
Winter Version (December-February): This is when the classic version shines exactly as written. But if you want variation, add roasted beets (small dice, added day-of to prevent staining) and use apple cider vinegar instead of red wine vinegar. Add fresh thyme instead of dill for warmer spice notes.
Make-Ahead Guide: Your Complete Meal Prep Timeline
Three days before cooking: Check your refrigerator inventory. Do you have all your core ingredients? Know your serving containers are clean and available? This prevents Sunday-afternoon scrambling.
Two days before: Wash and dry all your vegetables. Store them in airtight containers with paper towels to absorb excess moisture. This dramatically reduces your Sunday prep time.
One day before (optional): Hard-boil your eggs and store them unpeeled in the refrigerator. They’ll keep for up to a week and peel more easily when made ahead.
Sunday, morning: Pull all your ingredients out about one hour before you plan to cook. This brings everything closer to room temperature, which helps your dressing emulsify better and your pasta cool more quickly.
Sunday, cooking time: Follow my step-by-step process, which should take 45 minutes total from water boiling to containers sealed and refrigerated.
Sunday evening through Friday: Your week is essentially set. Grab a container, heat if desired, and eat well.
Nutrition Information
Per serving (based on six generous servings): approximately 420 calories, 18 grams protein, 22 grams fat, 42 grams carbohydrates, and 3 grams fiber. This breaks down according to USDA nutritional databases for comparable recipes.
What excites me about these numbers in the meal prep context is the macronutrient balance. You’re getting complex carbohydrates from the pasta, complete protein from the eggs, and healthy fats from the mayo-based dressing. This combination means stable blood sugar and sustained energy throughout your morning or afternoon. When you’re eating from these containers all week, you’re not experiencing those 3 PM energy crashes—you’re maintaining consistent energy because every portion is nutritionally complete, not just filling.
The fiber content (3 grams per serving) comes primarily from the vegetables, which contributes to digestive health throughout your week. If you want to increase this number for enhanced fullness, you could substitute whole grain elbow pasta (adds about 1 additional gram of fiber per serving) without changing any other components.
What to Pair With Basic Mac Salad Recipe Throughout the Week
Pairing strategically is what transforms meal prep from monotonous to genuinely enjoyable. You’re eating the same salad base, but entirely different meals through thoughtful side selections.
- Monday: With crusty sourdough and mixed greens – Start your week gently with familiar, comforting flavors. The bread gives you something to hold, the greens add fresh crunch and lightness.
- Tuesday: Alongside grilled chicken breast and roasted asparagus – Introduce more protein and a different texture. The mac salad becomes your creamy component, while asparagus adds bitter notes that balance the sweetness.
- Wednesday: With those air-fried beef strips we mentioned earlier – This is when you’re ready for something more substantial. The savory beef contrasts beautifully with the creamy-tangy salad.
- Thursday: Nestled inside whole grain wraps with fresh lettuce and sliced tomato – Transform your salad into a portable sandwich. The structure changes completely, keeping your palate interested.
- Friday: Topped with fresh herbs and lemon wedge, served alongside grilled shrimp or white fish – End your week lighter but celebratory. Fresh herbs you add day-of provide brightness that makes everything feel special despite being your fifth day of this salad.
Notice we’re varying protein sources, cooking methods, and presentation styles while using the identical salad base. This is the secret to meal prep sustainability—consistency where it matters (nutrition, convenience) and variation where it keeps you engaged (flavors, textures, contexts).
Basic Mac Salad Recipe
Ingredients
Method
- Fill a large pot (at least 6-quart capacity) three-quarters full with cold water and add a generous pinch of sea salt—about one tablespoon. Place it on your highest heat setting. While water heats, set up your prep station with all vegetables washed, dried, and ready to cut. This waiting period is perfect for gathering your bowls, measuring spoons, and storage containers. When everything is within arm's reach, your actual cooking moves at twice the speed. Pro tip from my professional kitchen experience: mise en place—having everything prepared and measured before you begin—is the difference between relaxed cooking and stressed cooking. Take five extra minutes now and save yourself fifteen minutes of scrambling later.
- Once your water reaches a rolling boil, add your pound of elbow pasta and stir immediately to prevent sticking. Set a timer for one minute less than the package suggests—we want al dente texture that won't turn mushy after absorbing dressing over several days. At about 8 minutes total (depending on brand), taste a piece. It should have just a slight firmness in the center, not chalky, but not completely soft either. Drain immediately into a colander, then rinse under cold running water for about 30 seconds while gently stirring with your fingers. This stops the cooking process and removes excess starch. Drizzle with one teaspoon of olive oil and toss gently—this prevents clumping as it cools.

- While pasta cools slightly, dice your red bell pepper into ¼-inch pieces (uniform size means even texture distribution). Slice your celery into thin half-moons—the thinner you slice, the more evenly it softens with the dressing. Dice your red onion finely; the smaller pieces distribute their sharp flavor throughout rather than creating onion-forward bites. Cut your sweet gherkins into small dice as well—these add crucial texture contrast. The texture consistency matters in meal prep salads more than many home cooks realize. If your vegetable pieces are drastically different sizes, some soften completely by day four while others remain crunchy. Aim for uniform ¼-inch to ⅜-inch pieces across all vegetables.

- If you haven't already prepared hard-boiled eggs, place three large eggs in a small saucepan, cover with cold water, and bring to a boil. Once boiling, remove from heat, cover, and let sit for 12 minutes exactly. Transfer to an ice bath immediately to stop cooking. This prevents that grey-green ring and ensures a creamy, pale yellow yolk. Once cooled (about 10 minutes), peel gently under cool running water—the water helps separate the membrane from the white. Dice into ¼-inch pieces.
- In a medium bowl, whisk together your mayonnaise, sour cream, Dijon mustard, and fresh lemon juice. This combination is your emulsified base. Add your granulated sugar, salt, black pepper, and garlic powder, whisking until the sugar completely dissolves. This takes about 30 seconds of actual whisking—you should see no grains remaining. Stir in your sweet pickle juice and the optional crushed red pepper if using. Taste this dressing now—before it meets the pasta. It should taste bright, tangy, slightly sweet, and rich. If it seems one-dimensional, you probably need more acid (lemon juice) or salt. Season now rather than after everything is mixed. This is the moment when understanding flavor balance, not just following instructions, makes all the difference. My multicultural upbringing taught me that the best dishes hit multiple flavor notes at once—acid, salt, fat, sweetness, subtle heat. Your dressing should make you pause and think, "Yes, that's exactly right."
- In your largest mixing bowl, combine your cooled pasta with all prepared vegetables and diced eggs. Pour your prepared dressing over everything and fold gently but thoroughly using a large rubber spatula—this isn't a job for your hands, which can crush delicate pasta. Fold for about one minute, making sure every piece of pasta gets coated. The pasta will seem slightly underdressed at this moment. Don't panic. As this sits, the pasta continues absorbing moisture from the vegetables and dressing, reaching perfect creaminess by tomorrow. If you taste it now and it seems underseasoned, hold off on adjusting—taste again after it's been refrigerated overnight before adding more salt.
- Divide your finished mac salad evenly into your storage containers. I use 32-ounce glass containers with fitted lids—one container per day, plus one extra for flexibility. Fill each container only three-quarters full so the lid closes securely without pressure. Overstuffed containers create a sloppy mess when you open them. Press a piece of parchment paper directly onto the surface of each portion before sealing the lid. This extra step prevents condensation from dripping back onto your salad during storage, which can make it watery by day four or five.
Nutrition
Tried this recipe?
Let us know how it was!FAQs
Can I make this salad without mayonnaise for a lighter version?
Absolutely, though you’ll be creating a different dish rather than a true mac salad. Replace the mayo and sour cream with Greek yogurt (¾ cup total) and add one additional tablespoon of lemon juice. The salad will be tangier and less rich, but genuinely delicious. It’ll also store slightly longer because Greek yogurt doesn’t oxidize like mayo does. Just know the texture and flavor profile change significantly—you’re not reducing calories while keeping everything identical. You’re making a choice about what matters more to you that week.
How do I prevent this from becoming watery by day four?
The parchment paper trick I mentioned is essential—don’t skip it. Additionally, ensure your vegetables are truly dry after cutting. Any excess water on the vegetables contributes to the salad becoming diluted. Pat them with paper towels before mixing. Finally, don’t add your dressing until right before you store the final product. Some home cooks dress individual salad components and let them sit before combining—this causes vegetables to release water prematurely.
Can I use regular pasta instead of elbow pasta?
Yes, though elbow pasta holds dressing and distributes vegetables better than long varieties. If you use penne or rigatoni, aim for smaller versions rather than large. The surface area of the pasta matters—you want enough texture for the creamy dressing to cling to. Shell pasta works beautifully too and adds visual interest. The cooking time might vary slightly, so check for that al dente texture at 8 minutes rather than relying on package instructions.
Is this salad suitable for someone with mayonnaise sensitivities or preferences?
You have options beyond the Greek yogurt suggestion. Try an equal-parts blend of coconut cream and Dijon mustard for richness and tang without traditional mayo. Or use cashew cream (soaked cashews blended with water) mixed with lemon juice and salt for a naturally creamy emulsion. Both change the flavor profile, but neither feels like a compromise—they’re legitimate alternatives that many people actually prefer once they try them.
How far in advance can I boil my eggs for this recipe?
Hard-boiled eggs keep beautifully in your refrigerator for up to one week. I often boil a dozen eggs on Sunday and use them throughout the week for various recipes, snacks, and this salad. Store them unpeeled in a covered container on your refrigerator shelf (not the door, where temperature fluctuates). The longer they’ve been cooked, the easier they peel—counterintuitively, eggs that are three days old peel more easily than eggs boiled the morning of use.
More Meal Prep Recipes You’ll Love
- Bacon Cheddar Dip – A make-ahead appetizer that pairs beautifully alongside your salad for entertaining throughout the week
- Chicken Quesadillas – Another meal-prep-friendly recipe that transforms easily across multiple days
- my favorite salad – A lighter vegetable-forward complement when you want to pair alongside your mac salad
Final Thoughts: Reclaim Your Week Through Thoughtful Cooking
Here’s what I want you to understand about this mac salad recipe and meal prep in general: you’re not just saving time on Tuesday evening. You’re reclaiming your entire week. You’re removing the daily question of “What are we eating?” You’re ensuring that no matter how hectic Wednesday gets, you have something nourishing waiting in your refrigerator. You’re teaching your family (if you’re cooking for others) that eating well is a normal part of life, not something that requires last-minute scrambling or expensive takeout.
My multicultural upbringing taught me that the most meaningful meals happen when someone invested time in preparation—when food says “I care about you” through its thoughtfulness, not just its taste. This mac salad does exactly that. You’re saying to your future self, “I care enough about you to ensure you eat well this week.”
Make this once on Sunday. Taste how it improves by Tuesday. Experience the freedom of opening your refrigerator and having excellent food ready. That’s when you’ll understand why meal prep changes lives. Not because it’s trendy or efficient (though it absolutely is both), but because it allows you to live your life while still eating like you planned it.
Enjoy!
