This post contains affiliate links. As an Amazon Associate I earn from qualifying purchases.
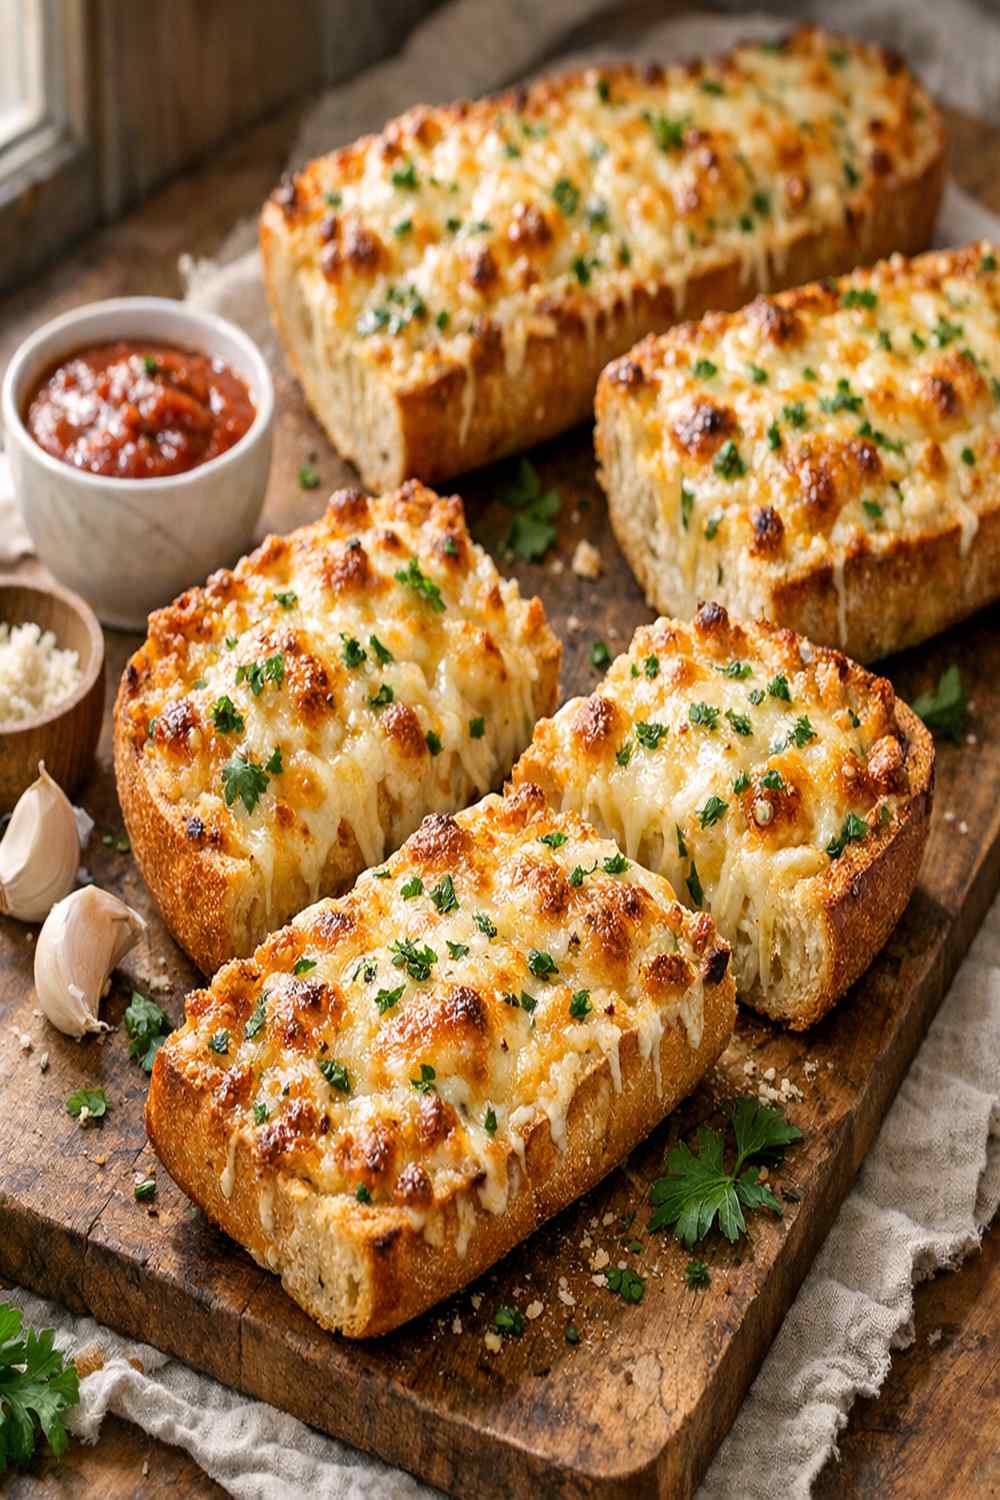
There’s nothing quite like breaking into a slice of warm, cheesy French bread—that moment when the molten cheese stretches and the garlic-butter fragrance hits your senses. We love pairing this indulgent side with casual Italian dinners, or even standing alone as the star of a weeknight meal. If you’re looking for other shareable appetizers, our Bacon Cheddar Dip brings that same crowd-pleasing energy to any gathering.
A Nostalgic Bite That Bridges Cultures
I grew up in a household where my Italian grandmother’s kitchen met my father’s love of American comfort food. Sunday dinners were chaotic, loud, and absolutely magical. My nonna would always have fresh bread warming on the counter, and my dad would butter it generously and toss it under the broiler with whatever cheese we had on hand. I remember being about eight years old, watching him transform a simple baguette into something that made everyone gather around the kitchen island, elbows competing for space. That dish—casual, unpretentious, and utterly delicious—became the foundation of my love for food that brings people together.
What is Cheesy French Bread?
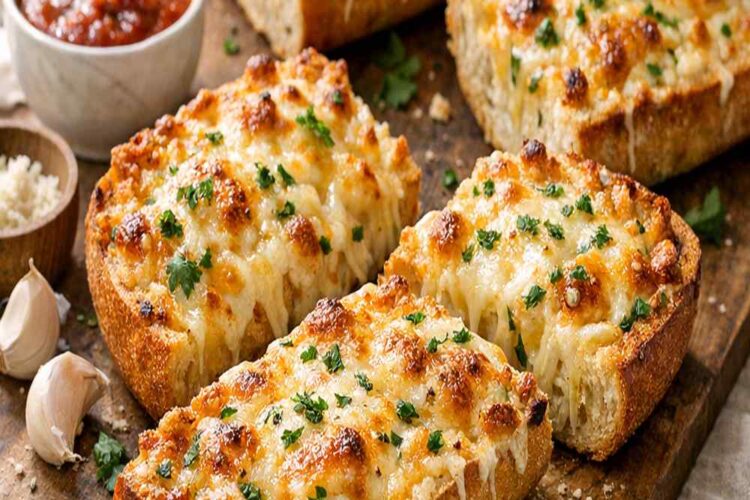
Cheesy French bread is a classic appetizer or side dish that takes a crusty baguette and transforms it into something absolutely irresistible. The bread is split lengthwise, then topped with an aromatic garlic-herb butter mixture and a generous combination of melted cheeses that create that signature golden, bubbly crust.
While the roots of this dish trace back to French culinary traditions—where bread and butter are sacred—the American version embraced it with added cheese and garlic powder, creating what we now know as garlic cheese bread. It’s become a staple in Italian-American restaurants and family kitchens alike, beloved for its simplicity and the way it transforms humble ingredients into something truly special.
What makes this version exceptional is the balance we create between the butter’s richness, fresh garlic’s bite, Italian herbs’ warmth, and two complementary cheeses that melt at slightly different rates, creating layers of flavor and texture. The Colby Jack brings a subtle sweetness and creamy melt, while the mozzarella creates that iconic stringy, bubbly top we all crave.
Why You’ll Love This Cheesy French Bread Recipe
- Ready in under 20 minutes – From oven to table faster than ordering takeout, making this perfect for unexpected guests or rushed weeknights when you still want to feel like you’ve cooked something impressive.
- Foolproof technique – Even if you’ve never made garlic bread before, our step-by-step method ensures crispy-on-the-outside, melty-on-the-inside perfection every single time without any guesswork.
- Customizable to your tastes – Want more garlic? Add another clove. Prefer different herbs? Swap in oregano or basil. This recipe is flexible enough to match your family’s preferences while maintaining its essential charm.
- Budget-friendly elegance – With just seven basic ingredients you probably already have on hand, you can create restaurant-quality bread that costs a fraction of what you’d pay for takeout.
- Crowd-pleasing magic – Whether you’re serving it alongside pasta, with soup, or as a standalone appetizer, cheesy French bread disappears faster than anything else on the table.
- Makes your kitchen smell incredible – The aroma of garlic and melting cheese toasting under heat is honestly part of the whole experience. Your family will be drawn to the kitchen like moths to flame.
The Ingredients
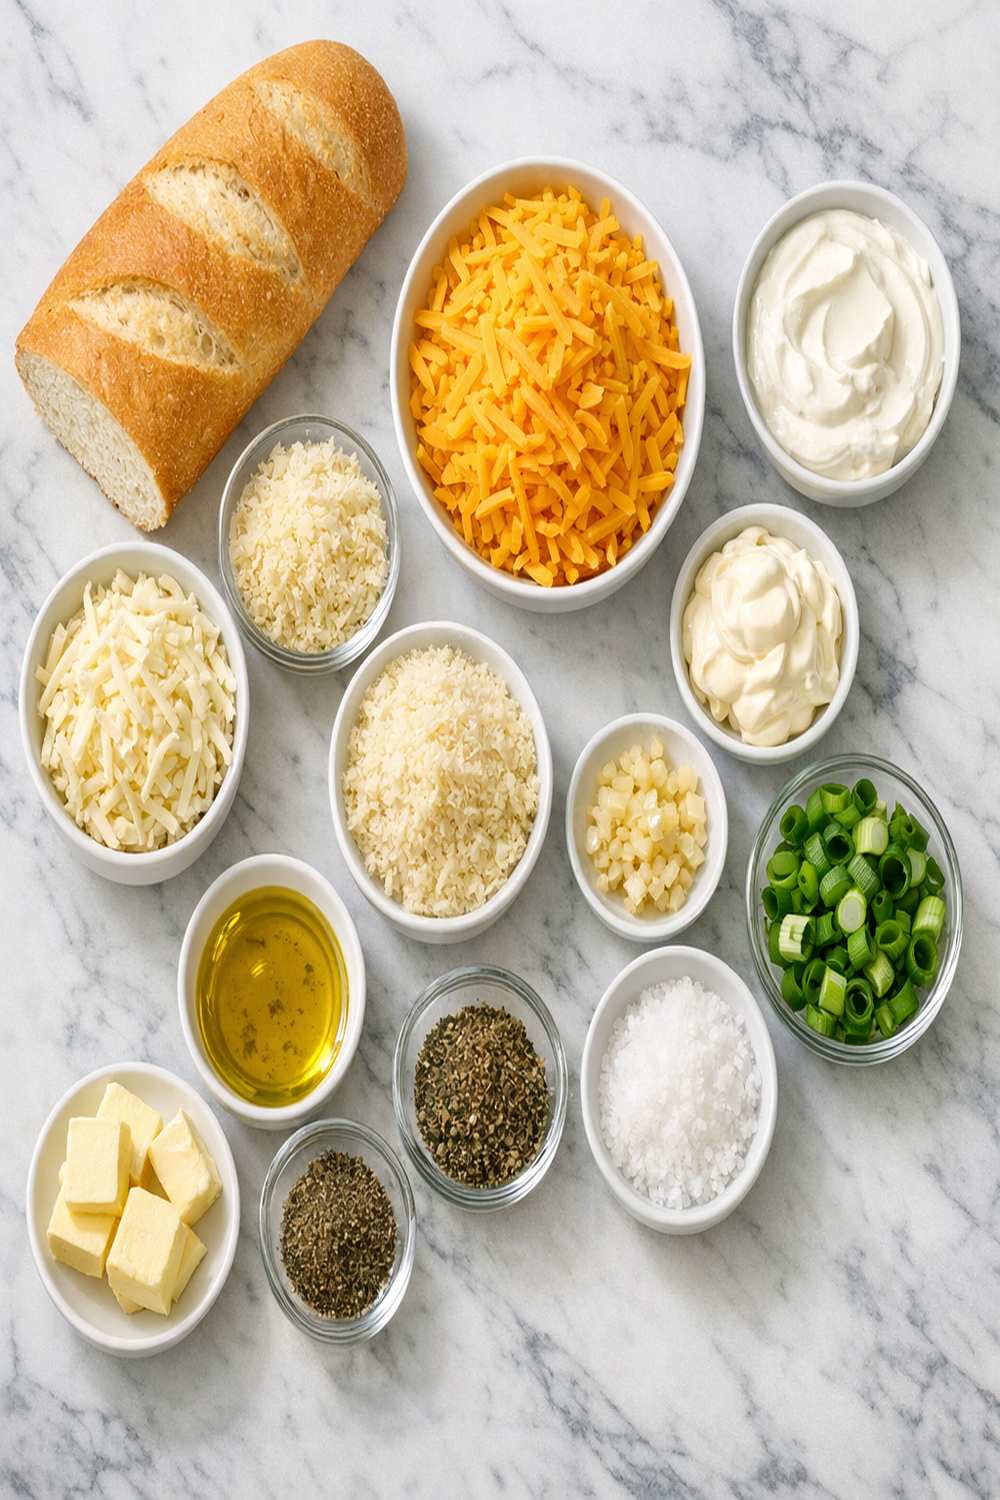
I’ve carefully selected each ingredient in this recipe because they work together in beautiful harmony. You’ll notice I’m using two different cheeses—this is intentional and creates a superior melt and flavor profile. The butter and fresh garlic form the aromatic base that makes people say “wow,” while the Italian seasoning adds warmth without being overpowering. Makes one generous loaf, serving 6-8 as a side or appetizer.
- 1 cup mozzarella cheese (whole milk mozzarella works best for stretch and browning)
- 3 cloves fresh garlic (minced finely for even distribution)
- 1 teaspoon Italian seasoning (dried herbs blend including oregano and basil)
- ½ cup unsalted butter (softened at room temperature, never melted)
- 1 cup Colby Jack cheese (freshly shredded from a block, not pre-shredded)
- ½ teaspoon garlic powder (for layered garlic flavor depth)
- ¼ teaspoon red pepper flakes (optional but recommended for subtle heat)
- ¼ cup fresh flat-leaf parsley (chopped just before serving for brightness)
- 1 loaf French bread or baguette (about 18-20 inches long, sturdy crust preferred)
How to Make Cheesy French Bread?
Let me walk you through this process step by step. I’ve made this hundreds of times, and I’ve refined every detail to ensure you get that perfect combination of crispy exterior and creamy, melted interior. Pay close attention to the temperature and timing—these are your keys to success.
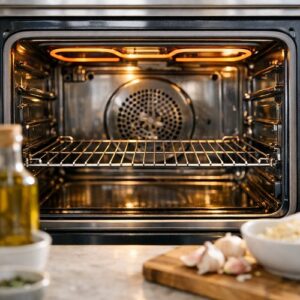
Step 1: Prepare Your Oven and Workspace
First things first: preheat your oven to 400°F and position your rack in the upper-middle section of the oven. This positioning ensures the cheese gets direct heat for optimal browning while the bread toasts through. Line a large baking sheet with parchment paper—this prevents sticking and makes cleanup effortless. Give yourself plenty of counter space because we’re about to create something glorious.

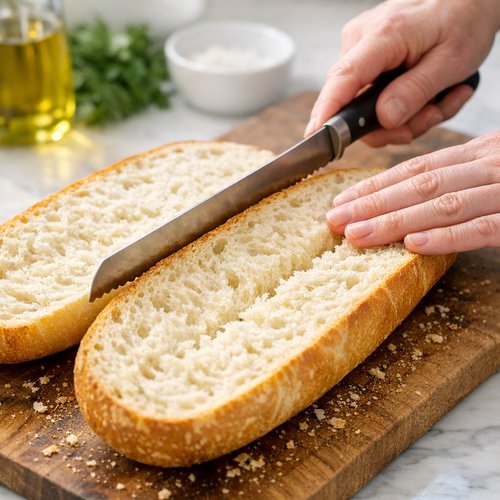
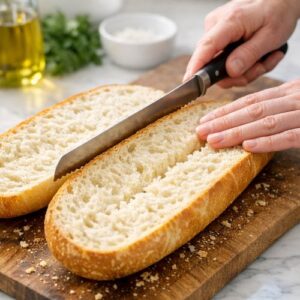
Step 2: Split and Position Your Bread
Take your French loaf and, using a sharp serrated bread knife, carefully cut it lengthwise down the middle. Use a gentle sawing motion rather than pressing down hard—you want to create an even split without crushing the interior crumb structure. Place both halves, cut-side up, directly onto your prepared baking sheet. They should sit flat with the cut side facing you, ready to be crowned with our garlic-butter mixture.
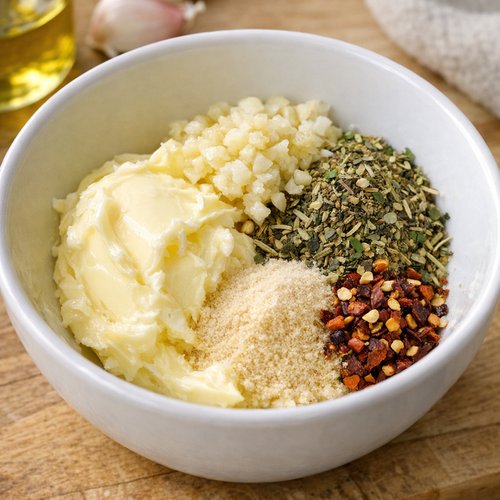
Step 3: Create the Garlic-Herb Butter Base
In a small mixing bowl, combine your softened butter with the minced fresh garlic, garlic powder, Italian seasoning, and those optional red pepper flakes. Using a small fork or the back of a spoon, blend these ingredients until the garlic and seasonings are evenly distributed throughout the butter—you’re creating a uniform, fragrant paste. The butter should be soft enough to spread easily but not melted. This mixture is the flavor foundation, so take a moment to smell it. If it smells amazing, you’re on the right track.
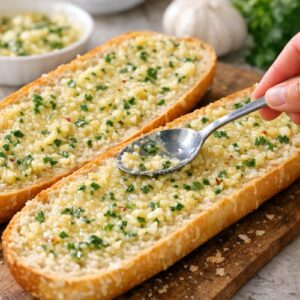
Step 4: Spread the Aromatic Mixture
Now comes the satisfying part. Using a small spatula or the back of a spoon, spread the garlic-butter mixture evenly across both cut halves of your bread. Don’t be shy—cover the entire surface generously, working from the center toward the edges. Make sure you get into the nooks and crannies. This even coverage ensures every bite contains that savory garlic-butter flavor. The bread should look generously coated, almost glistening with the butter-garlic blend.

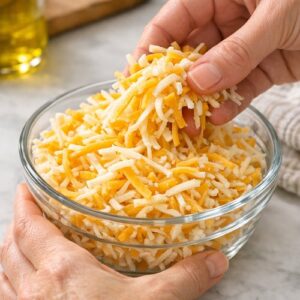
Step 5: Layer Your Cheese Combination
Here’s where the magic happens. In a small bowl, toss together your shredded Colby Jack and mozzarella cheeses so they’re mixed evenly. Now, divide this cheese mixture between your two bread halves, creating a generous, even layer across each half. You want approximately ½ cup of mixed cheese per half. Don’t skimp here—the cheese is what creates that golden, bubbly crust we’re all dreaming about. The cheese should completely cover the butter-garlic layer underneath.

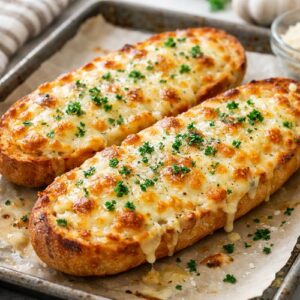
Step 6: Initial Bake for Melt and Toast
Place your prepared bread into the preheated oven and bake for 12-15 minutes. You’re looking for the cheese to become completely melted and bubbly, and the bread edges to turn golden-brown. The butter will sizzle underneath, and the kitchen will smell absolutely extraordinary. Set a timer so you don’t forget—I’ve learned this the hard way. At around the 10-minute mark, peek in to check progress. You should see active bubbling in the cheese.

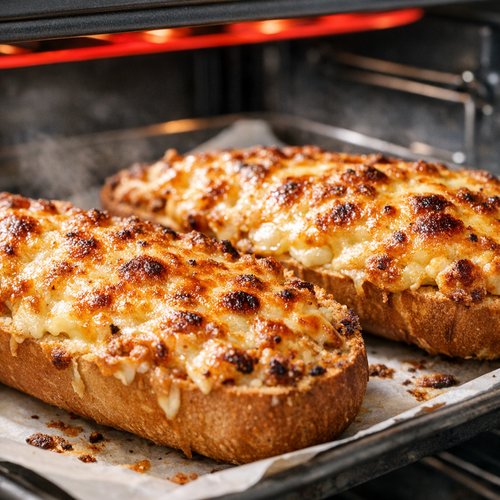
Step 7: Optional Broil for Extra Crispness (Recommended)
If you want that extra-crispy, deeply golden top that’s restaurant-style perfection, carefully transfer your baking sheet to the broiler for 1-2 minutes. Watch it closely—and I mean closely. Broilers work fast, and the difference between golden and burnt is about 30 seconds. You’re looking for the cheese edges to deepen in color and create some charred spots. Remove immediately when the top reaches your desired golden-brown shade. This step is optional but absolutely worth the attention it requires.
Step 8: Rest and Garnish
Let your cheesy French bread rest on the baking sheet for 2-3 minutes before serving. This resting period allows the cheese to set slightly so it doesn’t immediately pour off when you cut it. During this time, finely chop your fresh parsley. Just before serving, sprinkle the bright green parsley across the top for color, freshness, and a subtle herbal note that elevates the whole presentation. Slice with a serrated knife using a gentle sawing motion to avoid compressing the bread.

Tips and Tricks
- Use softened, never melted butter – Melted butter seeps into the bread and creates a greasy result. Softened butter stays on the surface and creates that perfect coating. Leave it on the counter for 20 minutes before you start.
- Shred your own cheese from a block – Pre-shredded cheese contains anti-caking agents that interfere with melting. Freshly shredded cheese melts to a silky, uniform texture that’s noticeably better.
- Don’t skip the fresh garlic – The garlic powder alone creates a pleasant background note, but fresh minced garlic adds complexity and prevents any “dusty” flavor. The combination of both creates depth.
- Cut your bread lengthwise, not into rounds – This creates maximum surface area for the cheese to melt and brown, plus it’s the traditional presentation that looks most appealing.
- Position your oven rack correctly – The upper-middle rack ensures the cheese tops brown before the bread bottom burns. If your rack is too low, your bottoms will char.
- Watch the broiler like a hawk – Set a phone timer for 1 minute and position yourself where you can see inside the oven. Broilers are temperamental, and 90 seconds can be the difference between golden and burnt.
- Use parchment paper – This is non-negotiable for easy cleanup and prevents sticking. The butter won’t burn the paper, and your baking sheet stays pristine.
- Serve immediately – Cheesy French bread is best enjoyed within minutes of coming out of the oven, while the cheese is still at peak meltiness and the bread has that ideal contrast between crispy exterior and tender interior.
Expert’s Nutritional Tip: The Science of Cheese Melting
Here’s something most home cooks don’t know: different cheeses melt at different temperatures due to their fat content and structure. Mozzarella melts at around 130°F and creates those gorgeous strings we love, while Colby Jack melts around 150°F and provides creamier, more uniform coverage. By combining both, we create a layered melting experience—the mozzarella gets bubbly and stretchy while the Colby Jack creates a smooth, rich base. This is why using just one cheese never feels quite as satisfying.
Make-Ahead Guide: Planning for Success
I love building this recipe into my meal prep workflow. Here’s my professional approach: prepare your garlic-butter mixture up to 3 days ahead and store it in a small airtight container in the refrigerator. The flavors actually deepen as they sit together. You can also assemble your entire bread up to 4 hours ahead—wrap it tightly with plastic wrap and refrigerate. When you’re ready to bake, add 2-3 extra minutes to your bake time since it’s starting from cold. This means impressive results with minimal last-minute stress.
For even more convenience, split and butter your bread the night before, wrap it in foil, and refrigerate. The next day, simply add cheese and bake. The foil insulates the bread during the initial bake, creating a softer crust while the cheese melts—perfect if you prefer less crispness. Remove the foil for the final 3-4 minutes to allow the top to brown.
Common Mistakes to Avoid
- Using cold butter instead of softened – Cold butter won’t spread evenly and creates bare spots. Leave your butter on the counter for at least 20 minutes before you begin working with it.
- Over-broiling the top – This is the most common mistake I see. Your cheese goes from golden to burnt in seconds under the broiler. Stand right there and watch it. Seriously.
- Not mixing your cheeses together – Randomly distributing unmixed cheese creates hot spots and uneven melting. Pre-mixing ensures consistent coverage and flavor in every bite.
- Cutting the bread into rounds instead of lengthwise halves – While it looks cute, you lose surface area and don’t get that ideal bread-to-cheese ratio. Halves are the way.
- Using pre-shredded cheese exclusively – Those anti-caking agents create a grainy texture when melted. Spend the extra two minutes shredding fresh cheese from a block—your taste buds will thank you.
Can I Store Cheesy French Bread?
Absolutely, though it’s best enjoyed fresh from the oven. Any leftovers can be stored in an airtight container at room temperature for up to 2 hours. After that, refrigerate in an airtight container for up to 3 days. To reheat, wrap loosely in foil and warm in a 350°F oven for 8-10 minutes until heated through and the cheese softens again.
I don’t recommend freezing pre-baked cheesy bread, as the texture changes significantly when thawed—the bread becomes dense and the cheese separates. However, you can freeze the assembled but unbaked bread for up to 1 month. Bake directly from frozen, adding 5-7 extra minutes to your baking time.
Nutrition Information
Based on USDA nutritional data, each serving (approximately 1/7 of the loaf) contains approximately 285 calories, 18g of total fat, 12g of saturated fat, 22g of carbohydrates, 11g of protein, and 520mg of sodium. The primary nutritional highlights are the protein from the cheese and the B vitamins from the enriched bread. While this is a rich, indulgent side dish, portion control and pairing it with lighter proteins and vegetables creates nutritional balance.
What Can I Serve With Cheesy French Bread?
This is where the versatility of cheesy French bread shines. We love serving it alongside Italian classics like pasta with marinara or a hearty minestrone soup. For a more complete meal, pair it with Alfredo Parmesan Chicken, which complements the garlic-cheese flavors beautifully. If you’re going the Italian-American route, serve alongside spaghetti and meatballs or chicken parmesan.
For casual entertaining, it pairs wonderfully with salads—we especially love it with a crisp green salad dressed with White Wine Vinaigrette for a light balance to the richness. You can also build a stunning appetizer board featuring cheesy bread alongside cured meats, olives, fresh vegetables, and roasted red peppers.
- Italian pasta dishes – Pair with any red sauce pasta for the classic combination that never fails.
- Soups and stews – Minestrone, tomato bisque, or vegetable soup become more special with garlic cheese bread alongside.
- Grilled meats – Serve alongside grilled chicken, steak, or Italian sausages for a complete dinner plate.
- Salad meals – With a substantial salad and some protein, cheesy bread becomes your carb component of a balanced meal.
- Appetizer boards – Feature it alongside antipasto for an elegant starter course.
- Casual game day entertaining – It disappears fastest at parties, so make two loaves when you’re having people over.
Seasonal Variations
Spring version: Add fresh lemon zest to the butter mixture and top with fresh chives instead of parsley. The brightness pairs beautifully with spring vegetables and lighter pasta dishes.
Summer variation: Mix sun-dried tomatoes into the butter and add fresh basil as garnish. This creates a Mediterranean flair perfect for outdoor entertaining and lighter summer meals.
Fall adaptation: Incorporate roasted garlic instead of fresh garlic for deeper, sweeter notes. Add a tiny pinch of smoked paprika to the butter for subtle autumn warmth.
Winter version: Use aged garlic (garlic that’s been stored longer develops sweeter notes) and add a small amount of truffle oil to the butter for luxury and depth. Top with both parsley and fresh thyme for complexity.
Substitutes
- Different bread types – Sourdough baguettes create tangier results, ciabatta provides a chewier texture, and focaccia creates a sturdier base. Any long crusty loaf works beautifully.
- Cheese alternatives – Use sharp cheddar and provolone for different flavor profiles, fontina and asiago for more assertive tastes, or even smoked gouda for complexity. The key is combining cheeses with different melting points.
- Herb variations – Substitute Italian seasoning with herbes de Provence, za’atar for Middle Eastern flair, or even a combination of dried oregano, thyme, and rosemary for more intensity.
- Garlic substitutes – Roasted garlic creates milder, sweeter results. Garlic scapes (if in season) provide similar flavor with slightly less intensity. For heat lovers, add a small amount of chili garlic paste.
- Butter alternative – Olive oil creates a more Mediterranean interpretation, though the texture won’t be quite as rich. Use the same amount and follow the recipe identically.
- Parmesan addition – Mix in ¼ cup freshly grated Parmesan cheese with your Colby Jack and mozzarella for sharper, more umami-forward flavor. This is my personal go-to variation.
Cheesy French Bread Recipe
Ingredients
Method
- First things first: preheat your oven to 400°F and position your rack in the upper-middle section of the oven. This positioning ensures the cheese gets direct heat for optimal browning while the bread toasts through. Line a large baking sheet with parchment paper—this prevents sticking and makes cleanup effortless. Give yourself plenty of counter space because we're about to create something glorious.
- Take your French loaf and, using a sharp serrated bread knife, carefully cut it lengthwise down the middle. Use a gentle sawing motion rather than pressing down hard—you want to create an even split without crushing the interior crumb structure. Place both halves, cut-side up, directly onto your prepared baking sheet. They should sit flat with the cut side facing you, ready to be crowned with our garlic-butter mixture.
- In a small mixing bowl, combine your softened butter with the minced fresh garlic, garlic powder, Italian seasoning, and those optional red pepper flakes. Using a small fork or the back of a spoon, blend these ingredients until the garlic and seasonings are evenly distributed throughout the butter—you're creating a uniform, fragrant paste. The butter should be soft enough to spread easily but not melted. This mixture is the flavor foundation, so take a moment to smell it. If it smells amazing, you're on the right track.

- Now comes the satisfying part. Using a small spatula or the back of a spoon, spread the garlic-butter mixture evenly across both cut halves of your bread. Don't be shy—cover the entire surface generously, working from the center toward the edges. Make sure you get into the nooks and crannies. This even coverage ensures every bite contains that savory garlic-butter flavor. The bread should look generously coated, almost glistening with the butter-garlic blend.
- Here's where the magic happens. In a small bowl, toss together your shredded Colby Jack and mozzarella cheeses so they're mixed evenly. Now, divide this cheese mixture between your two bread halves, creating a generous, even layer across each half. You want approximately ½ cup of mixed cheese per half. Don't skimp here—the cheese is what creates that golden, bubbly crust we're all dreaming about. The cheese should completely cover the butter-garlic layer underneath.
- Place your prepared bread into the preheated oven and bake for 12-15 minutes. You're looking for the cheese to become completely melted and bubbly, and the bread edges to turn golden-brown. The butter will sizzle underneath, and the kitchen will smell absolutely extraordinary. Set a timer so you don't forget—I've learned this the hard way. At around the 10-minute mark, peek in to check progress. You should see active bubbling in the cheese.

- If you want that extra-crispy, deeply golden top that's restaurant-style perfection, carefully transfer your baking sheet to the broiler for 1-2 minutes. Watch it closely—and I mean closely. Broilers work fast, and the difference between golden and burnt is about 30 seconds. You're looking for the cheese edges to deepen in color and create some charred spots. Remove immediately when the top reaches your desired golden-brown shade. This step is optional but absolutely worth the attention it requires.

- Let your cheesy French bread rest on the baking sheet for 2-3 minutes before serving. This resting period allows the cheese to set slightly so it doesn't immediately pour off when you cut it. During this time, finely chop your fresh parsley. Just before serving, sprinkle the bright green parsley across the top for color, freshness, and a subtle herbal note that elevates the whole presentation. Slice with a serrated knife using a gentle sawing motion to avoid compressing the bread.
Nutrition
Notes
Tried this recipe?
Let us know how it was!FAQs
Can I Make This With Garlic Bread That’s Already Prepared?
Absolutely! If you have a prepared garlic bread from the store or bakery, simply skip steps 2-4 and go directly to adding your cheese topping. Bake at 400°F for 8-10 minutes until the cheese is melted and bubbly. The prepared bread already has butter and garlic, so you’re just adding the cheese component. This is a fantastic shortcut when you’re in a time crunch.
Why Did My Cheese Get Brown and Crispy But the Bread is Still Pale?
This means your oven rack is positioned too high, putting the cheese too close to the heating element. Move your rack to the upper-middle or middle position so there’s more distance between the cheese and the heat source. You want the cheese to brown gradually as the bread toasts underneath. Alternatively, reduce your oven temperature to 375°F and extend the baking time to 15-18 minutes.
Can I Use Pre-Shredded Cheese and Still Get Good Results?
You technically can, but the results won’t be as good. Pre-shredded cheese contains cellulose and anti-caking agents that prevent it from melting into that smooth, creamy texture we want. The cheese will still melt, but it becomes grainy and separates slightly. If you only have pre-shredded available, toss it with a tiny bit of cornstarch (about ½ teaspoon per cup) before using. But honestly, spend the two extra minutes shredding from a block—it makes a noticeable difference.
My Bread is Too Soft and Soggy Instead of Crispy—What Went Wrong?
You likely used butter that was too warm or melted, or your oven temperature was too low. The softened butter should be cool enough that you can hold your finger on it without burning yourself. Also, ensure your oven is at 400°F minimum—anything lower won’t crisp the bread properly. Additionally, make sure your baking sheet is directly on the oven rack (not on another sheet), which allows heat to reach the bread bottom. Finally, don’t skip the optional broiler step if crispiness is your goal—those final 1-2 minutes make all the difference.
How Do I Know When It’s Perfectly Done?
You’re looking for three things: the cheese should be completely melted and bubbly with active bubbling around the edges, the bread edges should be golden-brown (not pale, not burnt), and the butter should be sizzling underneath (you’ll see it around the cheese edges). If you’re broiling, the top should have some deeper golden spots and perhaps tiny charred edges. When you insert a toothpick into the bread, it should meet resistance—not be soggy or doughy. Trust your eyes and nose; when it smells intensely garlicky and cheesy, you’re close. When it smells toasted, you’re done.
More Recipes You’ll Love
- Alfredo Cream Cheese – This rich, velvety sauce pairs beautifully with cheesy bread for dunking and would elevate any Italian dinner party to special-occasion status.
- Alice Springs Chicken Sauce – A surprising complement that brings heat and richness alongside the garlic-cheese bread for a memorable meal.
- BLT Wraps With Secret Sauce – For a lighter accompaniment or lunch pairing, these wraps create a fresh contrast to the indulgent bread.
I hope you make this cheesy French bread for your next family meal, casual dinner party, or simple weeknight dinner. It’s the kind of recipe that brings people together, fills bellies, and creates those warm kitchen memories that last a lifetime. The beauty of this dish is in its simplicity—just a handful of quality ingredients transformed into something restaurant-worthy through technique and attention. Whether you’re feeding your own family or impressing guests, this recipe never disappoints. The garlic aroma will draw everyone to the kitchen, and the golden, melty result will have them asking for your secret. (It’s really just good ingredients and proper technique, nothing mysterious—but you don’t have to tell them that.) Enjoy!