This post contains affiliate links. As an Amazon Associate I earn from qualifying purchases.
Learning to make Chicken Bacon Ranch Pasta Salad isn’t just about this one dish—it’s about mastering a fundamental technique that unlocks dozens of other recipes in your arsenal. This is the technique of cold salad composition, where we balance starch, protein, vegetables, and emulsified dressing to create something that tastes even better the next day. Once you understand how these elements work together, you’ll confidently create everything from grain bowls to composed salads. I’ve watched countless home cooks transform their weeknight dinner game once they grasp this principle. Let’s dive in together and unlock this culinary superpower that will make you the person everyone asks for recipes.
Master the Technique Behind Chicken Bacon Ranch Pasta Salad Recipe (And Never Struggle in the Kitchen Again)
I’ll never forget the moment this clicked for me. I was in my early twenties, standing in my tiny apartment kitchen after a disastrous potluck where my pasta salad had separated into a greasy, sad mess by the time it reached the table. My grandmother called that evening—she always seemed to know when I needed her—and walked me through the science of why cold salads need a completely different approach than hot dishes. She explained that cold starches absorb liquid differently than hot ones, that emulsions break down as temperature drops, and that timing and component selection matter more than you’d ever imagine. That conversation transformed not just this dish, but my entire approach to cooking.
What she taught me was that cold salads aren’t just “stuff tossed together”—they’re an exercise in understanding how ingredients transform as they rest. The pasta continues to absorb dressing, the vegetables weep their liquid content, and flavors marry together in ways hot dishes simply cannot. Once I understood this principle, every potluck became my moment to shine, and it could be yours too.
The Core Technique Explained
The fundamental technique here is cold salad composition through progressive emulsification and hydration control. Let me break down what’s actually happening at a chemical level, because understanding this makes you unstoppable in the kitchen.
When we cook pasta, we’re gelatinizing its starches through heat and moisture. Those starches are now porous and eager to absorb liquid. This is different from room-temperature starches, which absorb more slowly. When we combine hot pasta with other components and dressing, we’re creating a dynamic system where timing is everything.
The dressing we’re using contains an emulsion—fat (from the ranch) suspended in water through the action of emulsifiers. As the salad sits and cools, this emulsion becomes more stable, but it also means the components gradually absorb the fat and create a coating effect. The vegetables release their own moisture, which further dilutes the dressing and creates a self-basting environment. The protein (chicken and bacon) provides structural integrity and umami depth that anchors all the other flavors.
Here’s the real magic: we’re not trying to prevent this process—we’re strategically managing it. By understanding that the salad will continue to evolve as it sits, we can adjust our seasoning and dressing ratios accordingly. This is why professional chefs always taste before serving and adjust—the salad has changed since assembly.
What This Technique Unlocks
Once you master cold salad composition, you’ve suddenly got access to an entire universe of dishes. These all depend on the same fundamental understanding of how cold starches, proteins, and dressings interact:
- Mediterranean Grain Bowls – uses the same cold starch foundation with different protein and vegetable combinations
- Asian Sesame Noodle Salads – applies the same hydration principle with different emulsion profiles
- Composed Salads with Multiple Components – builds on understanding how each element maintains its own texture while contributing to the whole
- Make-Ahead Lunch Prep Bowls – uses your knowledge of how ingredients transform overnight
- Potluck and BBQ Sides – applies the dressing ratio adjustments for transport and serving
- Vegetarian Protein Salads – transfers the protein integration technique to beans, legumes, and tofu
The Ingredients – Chosen to Teach the Technique
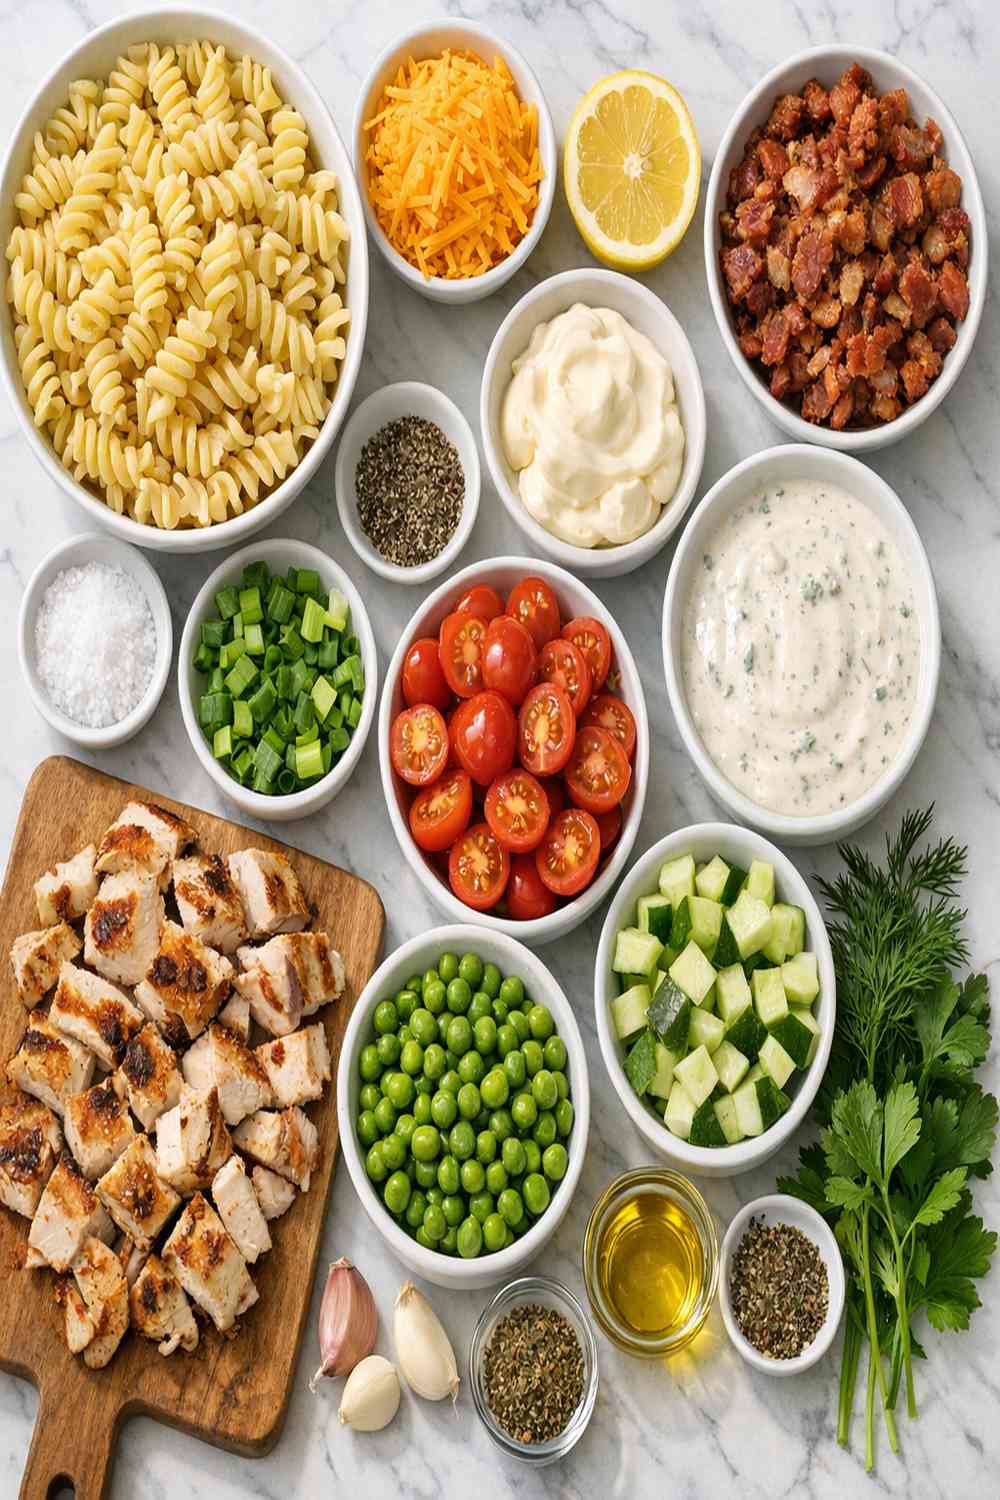
I’ve selected each ingredient in this salad specifically because it teaches you something essential about cold salad composition. Every single component is here to demonstrate a different aspect of the technique, so pay attention to what each one contributes beyond just flavor.
- 1 pound rotini pasta (the starch foundation that absorbs dressing—choose a shape with texture to hold emulsion)
- 2 cups cooked chicken breast, diced into ½-inch pieces (the protein that provides structure and remains tender when chilled)
- ¼ cup fresh parsley, chopped (the herb that provides aromatic brightness and won’t wilt when chilled)
- 1½ cups ranch dressing (the emulsified binding agent that coats everything and develops deeper flavor over time)
- 2 tablespoons fresh lemon juice (the acid that brightens flavors and prevents the salad from feeling heavy)
- 1 cup sharp cheddar cheese, shredded (the dairy element that adds richness and melts slightly into the warm pasta)
- ½ teaspoon garlic powder (the aromatic that deepens the flavor profile as the salad sits)
- ½ teaspoon ground black pepper (the spice that adds complexity and cuts through richness)
- 1 English cucumber, diced (the water-rich vegetable that maintains crunch and dilutes dressing naturally)
- 6 strips bacon, cooked and chopped (the rendered fat that intensifies umami and adds textural contrast)
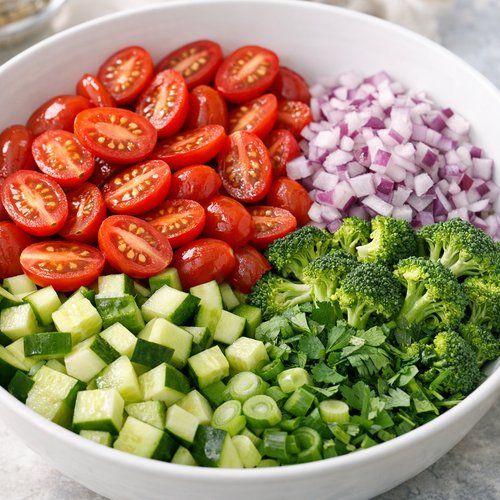
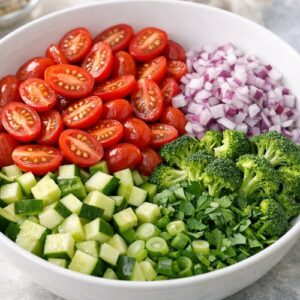
- 1 cup grape tomatoes, halved (the vegetable that releases moisture and adds brightness as it sits)
- ½ teaspoon sea salt (the mineral that enhances all flavors and controls moisture release from vegetables)
- ½ teaspoon onion powder (the umami booster that amplifies the savory elements)
Expert’s Nutritional Tip: The combination of rendered bacon fat with the emulsified ranch dressing creates a fat-soluble environment that actually helps your body absorb the fat-soluble vitamins in the vegetables. The fresh lemon juice adds citric acid, which increases mineral bioavailability—so this salad is actually more nutritious than the individual components suggest. This is why restaurant chefs always add fresh acid to dressings; it’s not just flavor, it’s chemistry.
The Masterclass: How to Make Chicken Bacon Ranch Pasta Salad Recipe
What you’re about to do isn’t just assembling ingredients—you’re orchestrating a series of chemical and physical transformations that culminate in something better than the sum of its parts. I want you to think of yourself as a conductor, and each step is an instrument in our symphony.
Step 1: Cook and Cool the Pasta Foundation
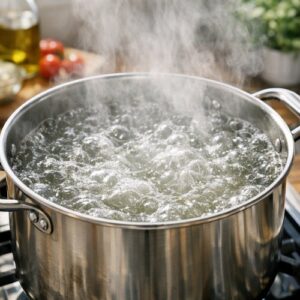
Fill a large pot with 6 quarts of water and bring it to a rolling boil—this is crucial, not a gentle simmer, but a genuine boil where steam rises vigorously. The intense heat is what creates the right starch gelatinization. Add 2 tablespoons of sea salt to the water. This isn’t just for flavor; the salt raises the boiling point slightly and seasons the starch itself, which means better flavor throughout the salad.

Add your 1 pound of rotini pasta and stir immediately and continuously for the first 30 seconds. This prevents sticking and ensures even heat distribution. Cook according to package directions, but here’s my secret: remove the pasta 1 minute before the package suggests it’s done. We want it at al dente—tender but with just a tiny bit of resistance when you bite it. This matters because the pasta will continue to absorb liquid as it cools and sits in the dressing, so that remaining bite of firmness ensures your final salad isn’t mushy.
Drain the pasta in a colander, but don’t rinse it yet. The starch coating on the pasta is actually your friend right now—it helps the warm pasta accept the dressing more readily. Instead, spread the hot pasta on a sheet pan in a thin layer and let it steam-cool for 5 minutes. This stops the cooking process while the residual heat is still present, which means the pasta is more porous and ready to absorb dressing than it would be if it were completely cold.
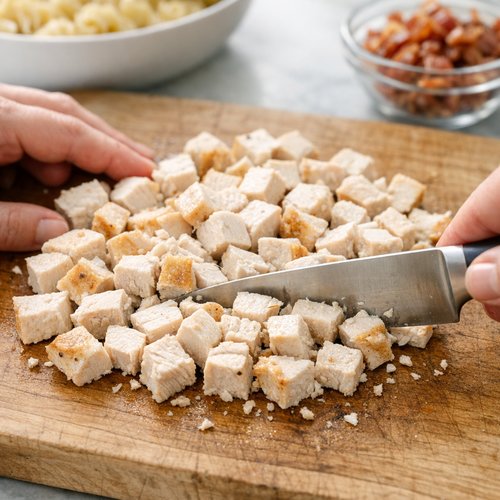
Step 2: Prepare Your Protein Components While Pasta Cools
While the pasta is cooling, dice your 2 cups of cooked chicken breast into ½-inch pieces. The size matters—too small and the chicken disappears into the dressing, too large and it doesn’t integrate. You want pieces that are substantial enough to bite through but small enough to coat evenly. If you’re cooking the chicken yourself, remember that chicken continues to cook from residual heat after you remove it from the pan, so pull it off the heat when the internal temperature is 160°F, not 165°F. It will reach that target temperature as it rests.
Your bacon should already be cooked until crispy but not brittle—it should still have a tiny bit of flexibility when you first remove it from the heat, because it will continue to crisp as it cools. Chop it into ½-inch pieces. The rendered bacon fat is essential to this dish’s flavor profile, so if you’ve cooked it in a pan rather than in the oven, reserve a tablespoon of that fat to drizzle over the salad just before serving.
Step 3: Compose Your Vegetable and Herb Elements
Halve your grape tomatoes lengthwise—this exposes more surface area and allows them to release their flavorful juice into the dressing as the salad sits. Don’t cut them the day before, though; tomatoes release too much water if left exposed for more than an hour, which will oversaturate your dressing. This is why I recommend composing this salad just a few hours before serving, not a full day ahead.
Dice your English cucumber into ¼-inch pieces. The smaller size is intentional here—cucumber is 96% water, and smaller pieces mean more surface area to hydrate the other components evenly. If you’re using regular cucumber instead of English, scoop out the seed core with a spoon, because those seeds are waterlogged and will make your salad soggy.
Chop your fresh parsley just before assembly. Fresh herbs oxidize quickly and turn bitter when cut, so timing matters. You want bright, vibrant green color, not the dull olive-green that comes from sitting around after chopping.
Step 4: Create the Perfect Assembly Bowl
Use a large mixing bowl—large enough that you can toss the salad with room to move (I use a 6-quart bowl for this recipe). Add your room-temperature pasta first, then the diced chicken. The heat from the pasta is still present at this point, which means the chicken will warm slightly and become more tender. Add the cooled bacon and reserved bacon fat.
Now sprinkle your dry seasonings directly onto the pasta mixture: sea salt, ground black pepper, onion powder, and garlic powder. Adding powdered seasonings to warm pasta means they dissolve and distribute more evenly than if you added them when cold. This is a professional technique that prevents pockets of too-salty or too-strong flavor.
Step 5: Add Vegetables and Integrate the Emulsion
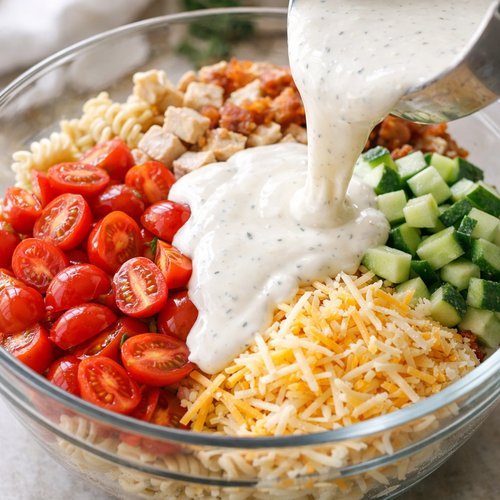
Add your halved grape tomatoes and diced cucumber to the bowl. Pour in your 1½ cups of ranch dressing, then add about three-quarters of your shredded cheddar cheese (reserve ¼ cup for topping). The cheese melts slightly into the warm pasta and creates additional creaminess, which is why we don’t add all of it now—we want some unmelted cheese on top for textural contrast.
Using a large spoon or rubber spatula, gently fold the mixture together with deliberate, controlled motions. Don’t stir in quick circles—instead, use a folding motion where you bring the bottom ingredients up and over the top. This distributes the dressing evenly while preventing the pasta from breaking (which would release excess starch and make the salad gummy). Fold for about 20-30 seconds until everything is evenly coated and no dry patches of pasta remain.
Step 6: Final Seasoning and Strategic Resting
Add your 2 tablespoons of fresh lemon juice and about half of your chopped parsley. The acid brightens all the flavors and prevents the richness from feeling heavy. Taste a spoonful and adjust seasoning if needed—remember, the salad will absorb more dressing as it sits, so you’re seasoning for its final state, not its current state.
Transfer the salad to a serving bowl or storage container and top with the remaining cheese and parsley. Now comes the critical part that separates good salad from transcendent salad: refrigeration time. Cover and refrigerate for at least 2 hours, preferably 4-6 hours. During this time, the pasta continues to absorb dressing, the vegetables release their liquid and season the entire mixture, and the flavors marry together in ways they simply cannot if served immediately.
Just before serving, give the salad a gentle stir and add a splash more dressing if needed—it will have absorbed quite a bit by now. Cold temperatures suppress flavor perception, so what tasted perfectly seasoned at room temperature might taste slightly underseasoned when cold. This is normal and why we adjust before serving.
How to Know You’ve Mastered the Technique
Mastery isn’t about following instructions perfectly—it’s about recognizing the sensory and visual indicators that tell you everything is working as intended. Here’s what to look for:
- The Coating Indicator – Every piece of pasta, every vegetable, every piece of chicken should have a visible thin coating of creamy dressing. When you look at the salad, you should see no dry patches, no visible oil separation, and no areas where the dressing has pooled at the bottom. If dressing has pooled, your emulsion has broken, which means next time you need to use a higher-quality emulsified dressing or add the dressing in stages rather than all at once.
- The Texture Test – When you bite into the salad, the pasta should be tender but retain a slight firmness. The chicken should be moist and tender, not dry or stringy. The bacon should have a crispy-tender quality, not be completely brittle. The vegetables should still have some snap, not be mushy. If everything feels uniform and mushy, you’ve let it sit too long or overseasoned with salt, which draws out water from the vegetables.
- The Flavor Development – The first bite should taste cohesive, like all the flavors have been having a conversation together rather than each standing alone. You should taste the ranch, the bacon, the cheese, the herbs, and the vegetables in a balanced way. If one element dominates, your balance is off—usually this means more fresh herbs and acid are needed to cut through the richness.
- The Temporal Indicator – A perfectly made salad actually tastes better on day two than on day one. If yours tastes significantly worse, you’ve either overseasoned, under-emulsified, or used vegetables that were cut too far in advance.
Common Technique Mistakes and How to Fix Them
- The Separated Dressing Problem – You open your salad to find oil pooled on the bottom and dry pasta on top. This happens when the emulsion breaks, usually because the dressing temperature changed too drastically or because you used a dressing with unstable emulsifiers. Next time: use a higher-quality ranch dressing, or make your own using mayonnaise (which has built-in stabilizers). You can also rescue this by draining the separated oil and adding fresh dressing mixed with a tablespoon of vinegar or lemon juice, which re-emulsifies the mixture.
- The Mushy Pasta Problem – The pasta disintegrates when you try to serve it, and the salad feels more like porridge than salad. This means you cooked the pasta too long initially, or you let the salad sit too long after assembly, or you added too much dressing. Prevention: cook pasta to al dente (1 minute under package directions), assemble no more than 8 hours ahead, and remember that you can always add more dressing but you can’t remove it.
- The Flat Flavor Problem – Everything tastes okay but uninspired. The individual components taste like themselves but don’t sing together. This is usually a salt and acid problem—you need more seasoning and more fresh lemon juice or vinegar. Add 1 teaspoon of fresh lemon juice, stir, taste, and repeat until bright. Then add ¼ teaspoon salt, stir, and taste again. Bright and salty is what you’re after.
- The Oversalted Problem – Everything tastes aggressively salty and the vegetables feel mushy. Salt draws moisture from vegetables, and if you overseasoned, those vegetables have released all their water into the salad. Prevention: always season the warm pasta initially, then taste before adding the dressing (which already has salt). Add additional salt conservatively, just ¼ teaspoon at a time.
Practice Variations to Build Your Skill
Master the classic version first, then challenge yourself with these progressively complex variations that deepen your understanding of cold salad composition:
Variation 1: The Simplified Version – Make the salad with just pasta, chicken, bacon, tomatoes, and dressing. Skip the fresh herbs, fresh lemon juice, and extra seasonings. This teaches you the core technique without distraction. The trade-off is that the salad will taste flatter and less sophisticated—this helps you understand why fresh components and acid matter so much.
Variation 2: The Seasonal Version – Replace the English cucumber with shredded bell peppers (adds sweetness and color) and the grape tomatoes with 1 cup of corn kernels (if making in summer). This challenges you to understand how different vegetables with different water contents and flavor profiles integrate into the same base technique. You’ll notice the sweetness changes your seasoning needs—you might need slightly more salt and definitely more acid.
Variation 3: The Homemade Dressing Challenge – Abandon the bottled ranch and make your own by whisking together ¾ cup mayonnaise, ¼ cup sour cream, 2 tablespoons fresh dill, 1 tablespoon fresh chives, 1 teaspoon lemon juice, ½ teaspoon garlic powder, and salt and pepper to taste. This teaches you how to build an emulsion from scratch and gives you complete control over seasoning and thickness. You’ll understand exactly why commercial dressings work the way they do.
Make-Ahead Guide for Maximum Flavor
From my years developing recipes for busy families, I’ve learned that timing is everything with cold salads. Here’s my professional approach to make-ahead assembly:
24 hours before serving: Cook and dice your chicken breast. Store it in an airtight container in the coldest part of your refrigerator. Cook your bacon, chop it, and store separately.
8-12 hours before serving: Cook your pasta, cool it, and store in an airtight container. This prevents it from drying out while allowing enough time for the flavors to develop when combined with dressing.
2-4 hours before serving: Prepare your vegetables (tomatoes, cucumber) and herbs (chop parsley). Store separately in sealed containers. Do not cut vegetables more than 4 hours in advance—tomatoes start releasing excessive liquid, and cucumber begins to soften.
1-2 hours before serving: Assemble the complete salad as directed. The window between 2-6 hours after assembly is your sweet spot for maximum flavor development and optimal texture. After 8 hours, the pasta becomes quite soft and the vegetables have released significant water, which can oversaturate the dressing.
Can I Store Chicken Bacon Ranch Pasta Salad Recipe?
Yes, and this is one of the salad’s greatest strengths for meal prep and entertaining. Store the assembled salad in an airtight container in the coldest part of your refrigerator (usually the back of the bottom shelf, away from the door).
Optimal storage window: 4-6 hours after assembly, before it reaches peak flavor, the salad actually improves subtly as it sits. Full refrigeration window: up to 3 days, though the texture will gradually soften and the pasta will absorb more dressing, potentially making it less creamy by day three.
Resurrecting Day-Old Salad: If your salad seems dry on day two or three, add 2-3 tablespoons of additional ranch dressing and stir well. The pasta will have absorbed quite a bit, and the fresh dressing revives the texture and flavor profile. Do not freeze this salad—the pasta becomes unpleasantly mushy upon thawing, and the emulsion often breaks during the freeze-thaw cycle.
Nutrition Information
Based on USDA FoodData Central for standard commercial ingredients, one serving (approximately 1.5 cups, assuming the recipe makes 8 servings):
- Calories: 480
- Protein: 28 grams (from chicken and cheese, crucial for satiety and muscle recovery)
- Total Fat: 24 grams (mostly from ranch dressing and bacon)
- Saturated Fat: 7 grams
- Carbohydrates: 42 grams (primarily from pasta)
- Fiber: 2 grams (from vegetables and herbs)
- Sodium: 650 milligrams (about 28% of daily value)
Nutritional Insight: This salad provides a complete macronutrient balance with protein, healthy fats, and complex carbohydrates. The fresh lemon juice and herbs add polyphenols—powerful antioxidants that support cellular health. The combination of fat (from bacon and dressing) with vitamin C-rich tomatoes actually improves the absorption of lycopene, a beneficial compound in tomatoes.
What to Serve With Chicken Bacon Ranch Pasta Salad Recipe?
This salad is rich and substantial, so I pair it with lighter components that let it shine. From my multicultural background, I’ve learned that the best menus balance richness with freshness, warmth with cold.
Grilled vegetables that have been tossed with fresh herbs and lemon juice—think grilled zucchini, asparagus, or eggplant. These add brightness and char flavor that contrasts beautifully with the creamy salad. Try serving it alongside Baby Carrots In The Oven for a simple roasted option that requires no additional work.
Fresh bread that’s still warm from the oven. My go-to is a simple ciabatta or focaccia that you can toast briefly and brush with herbed olive oil. The contrast between warm bread and cold salad is deeply satisfying.
A bright salad with peppery greens like arugula or watercress, dressed simply with oil and vinegar. This provides textural contrast and prevents the meal from feeling heavy.
For picnics and potlucks, I always pair this salad with BLT Wraps With Secret Sauce, which complements the ranch and bacon flavors while adding a hands-held element that’s perfect for buffet-style serving.
- Cold sparkling water with fresh lemon – the effervescence cleanses the palate between bites and the citrus echoes the brightness in the salad
- Light white wine like Pinot Grigio – the acidity balances the richness of the ranch and cheese
- Iced herbal tea like chamomile or mint – refreshing and neutral, letting the salad be the star
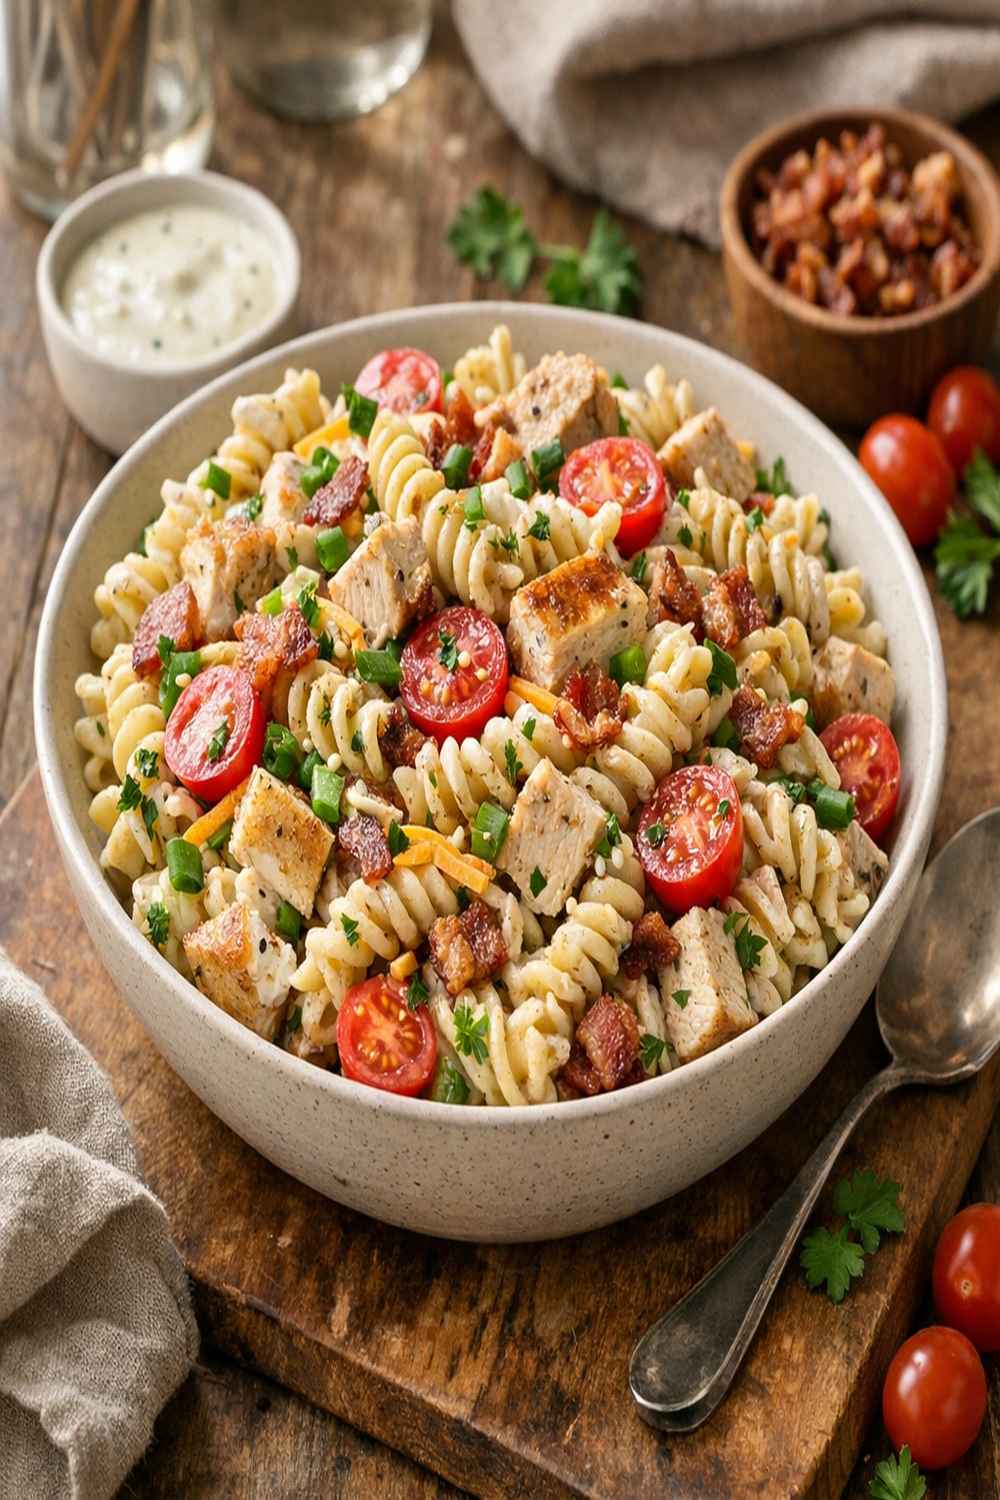
Chicken Bacon Ranch Pasta Salad Recipe
Ingredients
Method
- Fill a large pot with 6 quarts of water and bring it to a rolling boil—this is crucial, not a gentle simmer, but a genuine boil where steam rises vigorously. The intense heat is what creates the right starch gelatinization. Add 2 tablespoons of sea salt to the water. This isn't just for flavor; the salt raises the boiling point slightly and seasons the starch itself, which means better flavor throughout the salad. Add your 1 pound of rotini pasta and stir immediately and continuously for the first 30 seconds. This prevents sticking and ensures even heat distribution. Cook according to package directions, but here's my secret: remove the pasta 1 minute before the package suggests it's done. We want it at al dente—tender but with just a tiny bit of resistance when you bite it. This matters because the pasta will continue to absorb liquid as it cools and sits in the dressing, so that remaining bite of firmness ensures your final salad isn't mushy. Drain the pasta in a colander, but don't rinse it yet. The starch coating on the pasta is actually your friend right now—it helps the warm pasta accept the dressing more readily. Instead, spread the hot pasta on a sheet pan in a thin layer and let it steam-cool for 5 minutes. This stops the cooking process while the residual heat is still present, which means the pasta is more porous and ready to absorb dressing than it would be if it were completely cold.
- While the pasta is cooling, dice your 2 cups of cooked chicken breast into ½-inch pieces. The size matters—too small and the chicken disappears into the dressing, too large and it doesn't integrate. You want pieces that are substantial enough to bite through but small enough to coat evenly. If you're cooking the chicken yourself, remember that chicken continues to cook from residual heat after you remove it from the pan, so pull it off the heat when the internal temperature is 160°F, not 165°F. It will reach that target temperature as it rests. Your bacon should already be cooked until crispy but not brittle—it should still have a tiny bit of flexibility when you first remove it from the heat, because it will continue to crisp as it cools. Chop it into ½-inch pieces. The rendered bacon fat is essential to this dish's flavor profile, so if you've cooked it in a pan rather than in the oven, reserve a tablespoon of that fat to drizzle over the salad just before serving.

- Halve your grape tomatoes lengthwise—this exposes more surface area and allows them to release their flavorful juice into the dressing as the salad sits. Don't cut them the day before, though; tomatoes release too much water if left exposed for more than an hour, which will oversaturate your dressing. This is why I recommend composing this salad just a few hours before serving, not a full day ahead. Dice your English cucumber into ¼-inch pieces. The smaller size is intentional here—cucumber is 96% water, and smaller pieces mean more surface area to hydrate the other components evenly. If you're using regular cucumber instead of English, scoop out the seed core with a spoon, because those seeds are waterlogged and will make your salad soggy. Chop your fresh parsley just before assembly. Fresh herbs oxidize quickly and turn bitter when cut, so timing matters. You want bright, vibrant green color, not the dull olive-green that comes from sitting around after chopping.
- Use a large mixing bowl—large enough that you can toss the salad with room to move (I use a 6-quart bowl for this recipe). Add your room-temperature pasta first, then the diced chicken. The heat from the pasta is still present at this point, which means the chicken will warm slightly and become more tender. Add the cooled bacon and reserved bacon fat. Now sprinkle your dry seasonings directly onto the pasta mixture: sea salt, ground black pepper, onion powder, and garlic powder. Adding powdered seasonings to warm pasta means they dissolve and distribute more evenly than if you added them when cold. This is a professional technique that prevents pockets of too-salty or too-strong flavor.
- Add your halved grape tomatoes and diced cucumber to the bowl. Pour in your 1½ cups of ranch dressing, then add about three-quarters of your shredded cheddar cheese (reserve ¼ cup for topping). The cheese melts slightly into the warm pasta and creates additional creaminess, which is why we don't add all of it now—we want some unmelted cheese on top for textural contrast. Using a large spoon or rubber spatula, gently fold the mixture together with deliberate, controlled motions. Don't stir in quick circles—instead, use a folding motion where you bring the bottom ingredients up and over the top. This distributes the dressing evenly while preventing the pasta from breaking (which would release excess starch and make the salad gummy). Fold for about 20-30 seconds until everything is evenly coated and no dry patches of pasta remain.
- Add your 2 tablespoons of fresh lemon juice and about half of your chopped parsley. The acid brightens all the flavors and prevents the richness from feeling heavy. Taste a spoonful and adjust seasoning if needed—remember, the salad will absorb more dressing as it sits, so you're seasoning for its final state, not its current state. Transfer the salad to a serving bowl or storage container and top with the remaining cheese and parsley. Now comes the critical part that separates good salad from transcendent salad: refrigeration time. Cover and refrigerate for at least 2 hours, preferably 4-6 hours. During this time, the pasta continues to absorb dressing, the vegetables release their liquid and season the entire mixture, and the flavors marry together in ways they simply cannot if served immediately. Just before serving, give the salad a gentle stir and add a splash more dressing if needed—it will have absorbed quite a bit by now. Cold temperatures suppress flavor perception, so what tasted perfectly seasoned at room temperature might taste slightly underseasoned when cold. This is normal and why we adjust before serving.

Nutrition
Notes
Tried this recipe?
Let us know how it was!FAQs
Can I Make This Salad with Rotisserie Chicken?
Absolutely yes, and this is actually how I make it at home because it’s faster. Buy a high-quality rotisserie chicken (look for one without excessive oil or added sodium if possible), let it cool completely, then shred or dice the meat. Rotisserie chicken is pre-seasoned and already deeply flavored, which means you might need to reduce your salt and onion/garlic powder slightly—taste and adjust. The salad made with rotisserie chicken often has even more depth because the chicken meat has been more thoroughly penetrated by seasonings during cooking.
What If My Dressing is Too Thick or Too Thin?
Dressing thickness varies significantly by brand and type. If your bottled ranch is too thick and creating a clumpy salad, thin it by whisking in 1 tablespoon of buttermilk or fresh lemon juice at a time until you reach the consistency of heavy cream. If it’s too thin and the salad feels soupy, add more dressing gradually—about 2 tablespoons at a time. The goal is that creamy coating texture where everything moves together as one.
Should I Add the Dressing While the Pasta is Warm or Cold?
This is a critical moment. Add dressing when the pasta is warm (about room temperature, not piping hot). Warm pasta is more porous and absorbs dressing more efficiently, distributing it throughout the salad rather than having it sit on top. If you wait until everything is cold, the dressing sits on the surface and doesn’t integrate smoothly, leading to uneven coating.
Can I Substitute the Cheddar Cheese?
Completely. Sharp cheddar provides a specific flavor profile, but you can use American cheese (which melts more smoothly), Swiss (which adds nuttiness), Gruyère (which adds sophistication), or even a sharp provolone. The key is using cheese with enough flavor that you can taste it, not a mild cheese that disappears into the dressing. I’d avoid fresh mozzarella or feta, which have different flavor profiles that clash with ranch.
How Can I Make This Lighter or Less Rich?
Use a light or Greek yogurt-based ranch dressing instead of full-fat—these have the same flavor but about 30% fewer calories and less fat. Replace half the cheddar with a softer cheese like fresh mozzarella for texture contrast. Add more vegetables, particularly the cucumber and tomato, which are water-rich and contribute volume without richness. You can also use turkey bacon instead of pork bacon, or reduce the bacon to just 4 strips, which maintains the bacon flavor without as much rendered fat.
Seasonal Variations: How to Adapt This Recipe Year-Round
One of my favorite aspects of teaching this technique is showing how the same methodology adapts to seasonal ingredients. The framework stays constant, but the flavors shift with the seasons:
Spring Version: Replace grape tomatoes with 1 cup of snap peas (halved lengthwise), cucumber with fresh radishes (thinly sliced), and add 2 tablespoons of fresh dill instead of parsley. Add the zest of one lemon to brighten everything. Spring produce is lighter and more delicate, so this version feels fresher and less heavy.
Summer Version: This is the classic version I’ve provided, but you can amplify it by adding 1 cup of fresh corn kernels (raw or lightly blanched), sun-dried tomatoes for intensity, and a handful of fresh basil alongside the parsley. Summer produce is abundant and bold.
Fall Version: Replace some of the ranch with a cider vinaigrette mixed with apple cider (2 parts dressing to 1 part vinaigrette). Add 1 cup of diced apple (toss with lemon juice to prevent browning), replace cucumber with diced fennel, and use crispy sage instead of parsley. Add 1 cup of toasted pecans for crunch. This version becomes heartier and more autumnal.
Winter Version: Use this salad as a base and build up rather than simplify. Add 1 cup of roasted Brussels sprouts (halved and cooled), 1 cup of roasted beets (diced), and replace the fresh cucumber with shredded cabbage (which maintains crunch and doesn’t wilt). Use fresh thyme instead of parsley. This version is more substantial and warming despite being served cold.
Common Beginner Mistakes to Avoid
Mistake 1: Rinsing the Hot Pasta – I see this constantly. People rinse the pasta to cool it quickly, but this removes the starch coating that helps dressing adhere. The pasta ends up slippery and the dressing doesn’t stick. Solution: spread the drained pasta on a sheet pan instead of rinsing, and let it cool naturally while steam escapes.
Mistake 2: Adding Everything to the Salad Bowl Simultaneously – Beginners often dump all ingredients in at once, which means some things get coated in dressing and others don’t. Solution: build the salad in layers as I’ve described, adding the dressing with components already in the bowl so it distributes evenly as you fold.
Mistake 3: Not Tasting Before Serving – Cold temperatures suppress flavor perception by up to 30%. A salad that tastes slightly underseasoned at room temperature tastes significantly underseasoned when cold. Solution: always taste right before serving and adjust seasoning with both salt and fresh lemon juice, which brightens everything.
More Recipes Using This Technique
- this cozy soup – while this is technically a hot dish, it uses the same emulsification and protein integration principles we’ve mastered here
- Baked Ranch Chicken Without Breadcrumbs Recipe – teaches you the same ranch flavor principles applied to a different cooking method
- My Weeknight Chicken Recipe – Worth adding to your recipe collection.
- This Flavorful Chicken Dish – Worth adding to your recipe collection.
You